BizPortals Quality Incident Suite
The module BizPortals Quality Incident Suite enables you to do the following –
A comprehensive solution for streamlined and efficient incident reporting, approval, and resolution within an organization. This module empowers users to easily report unwanted events, facilitating a collaborative workflow with designated stakeholders for prompt approval and resolution. Comprehensive activity logs track every action and field change, ensuring transparency and accountability. Automated notifications, electronic signatures, and a centralized admin console for streamlined configuration complete this robust incident management system.
Functionality:
- Incident Reporting:
- Intuitive interface for users to easily report incidents with detailed descriptions, attachments, and other fields.
- Capture specific incident-related information relevant to the organization.
- Workflow & Approvals:
- Define and configure customizable workflows with multiple approval stages involving relevant stakeholders.
- Automated notifications to stakeholders at each stage of the approval process.
- Electronic signature capabilities for seamless approvals and record-keeping.
- Incident Resolution:
- Track progress, add updates, and attach relevant documentation throughout the resolution process.
- Generate reports (Power BI) on incident trends, root causes, and resolution times.
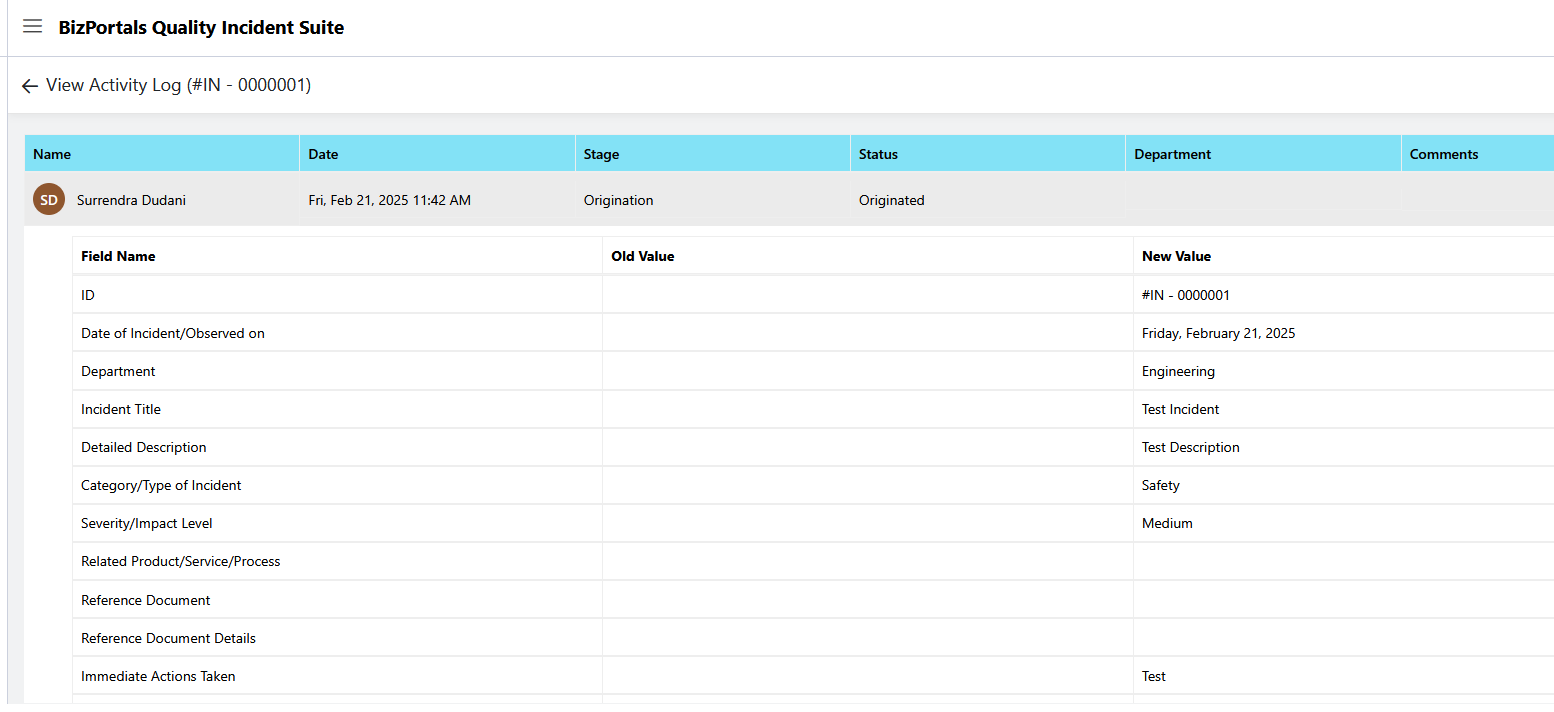
- Activity Log:
- Detailed audit trail capturing all activities performed on each incident, including field-level changes, user actions, and timestamps.
- Notifications & Alerts:
- Configurable email and in-app notifications to alert stakeholders about new incidents, approvals, and resolution updates.
- Admin Console:
- Centralized platform for administrators to manage system configurations, user roles and permissions, and email templates.
Notes:
- Only Site Collection Administrators can add a BizPortals Quality Incident Suite.
- Users should be a part of site members group and have enough permissions from the admin dashboard > assign roles to add a new entry.
- Users with site admin roles should be able to see the admin dashboard and manage the configurations in it.
2. Module Addition and Functionality
2.1 BizPortals Quality Incident Suite – Addition as a webpart
Simply navigate to your site or site page, edit it and add the BizPortals Quality Incident Suite.
Follow the details installation guide.
Note: It’s recommended to use the BizPortals Quality Incident suite single on a page in one column or full width section.
Web Part Data Properties
- Fill out the details as mentioned in property pane, Signature Application Client ID, QMS Page URL and Your Domain.

- Application client id can be captured as per below screenshot.

- QMS page URL is <Your Site Collection URL/Page URL>, where you have added this web part.
- Your Domain is <Specify your domain name>.
- Click on “Apply” and publish the page.
2.2 BizPortals Quality Incident Suite Functionality
Upon successful addition BizPortals Quality Incident Suite, you should be able to use its full features.
Note: User should be a part of SharePoint site member group to use the below functionality.
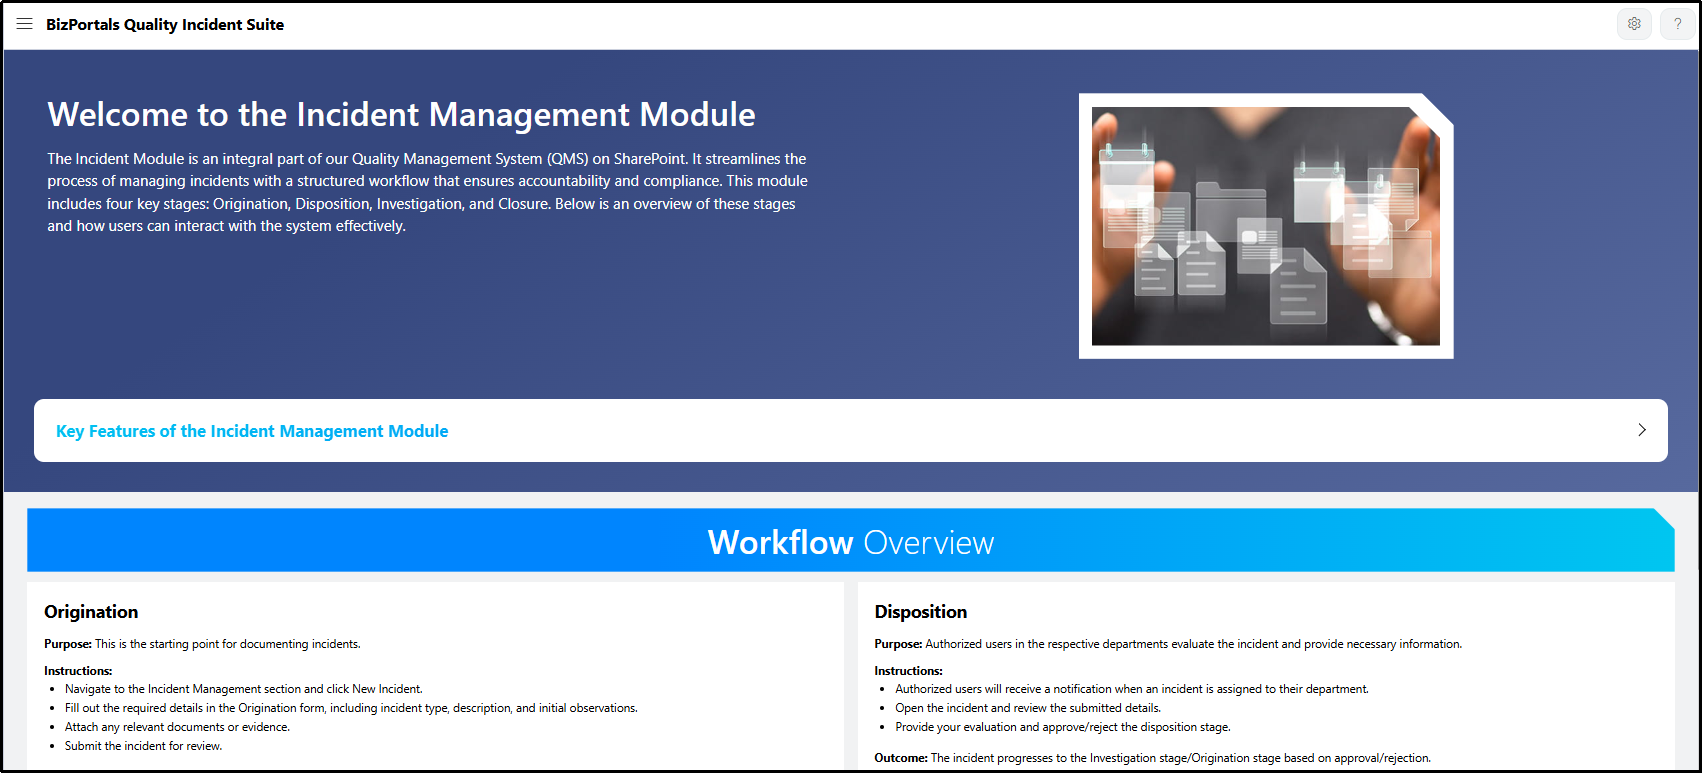
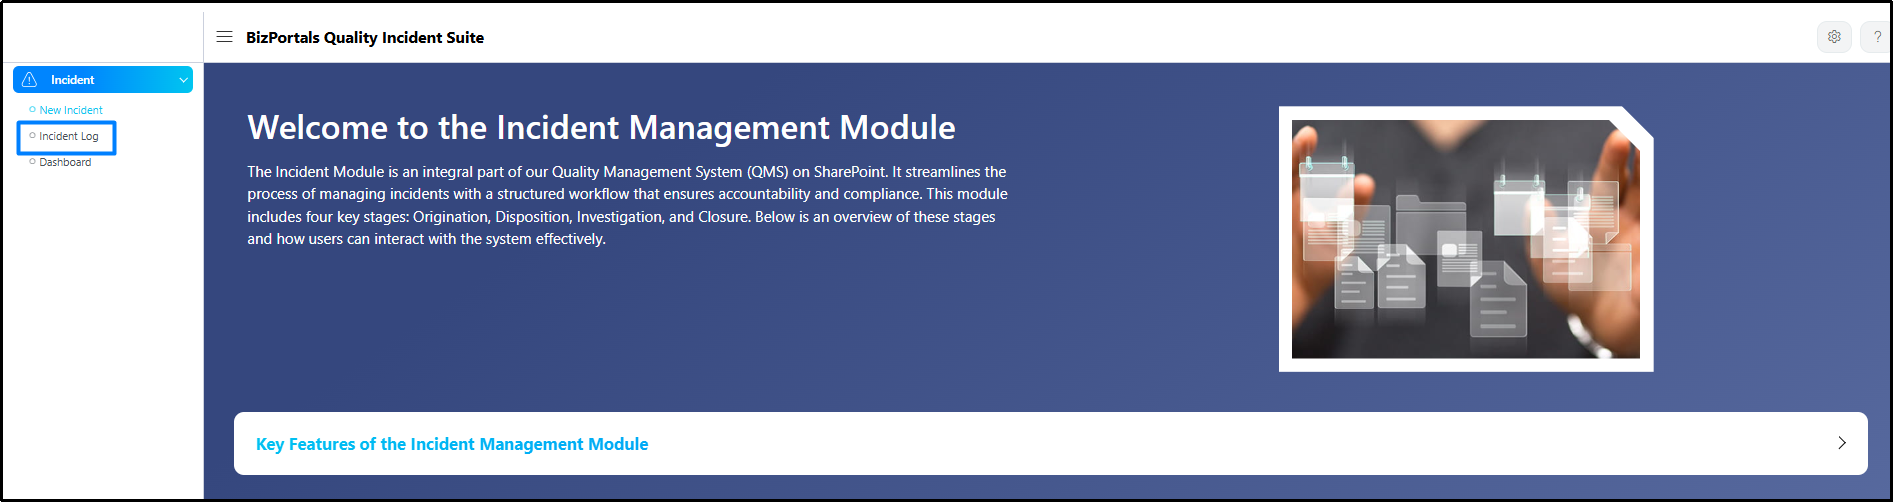
Refer below screenshots with Key Features and Workflow Overview as a landing page.
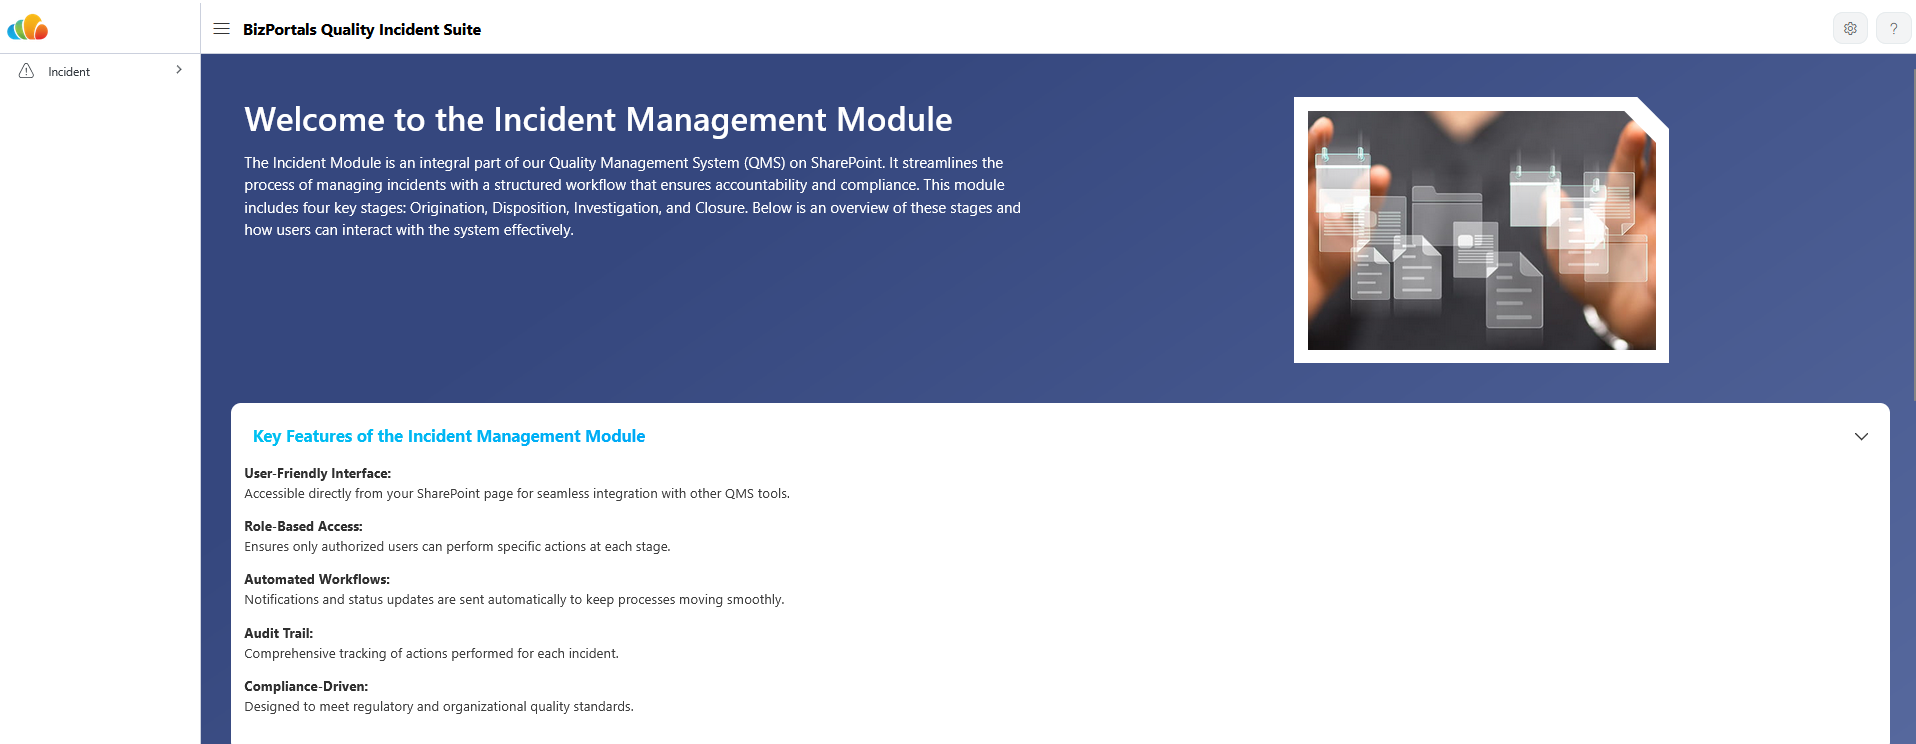

- Navigate to left navigation as highlighted in below screenshot to report new incident, visit incident log.

2.2.1 New Incident
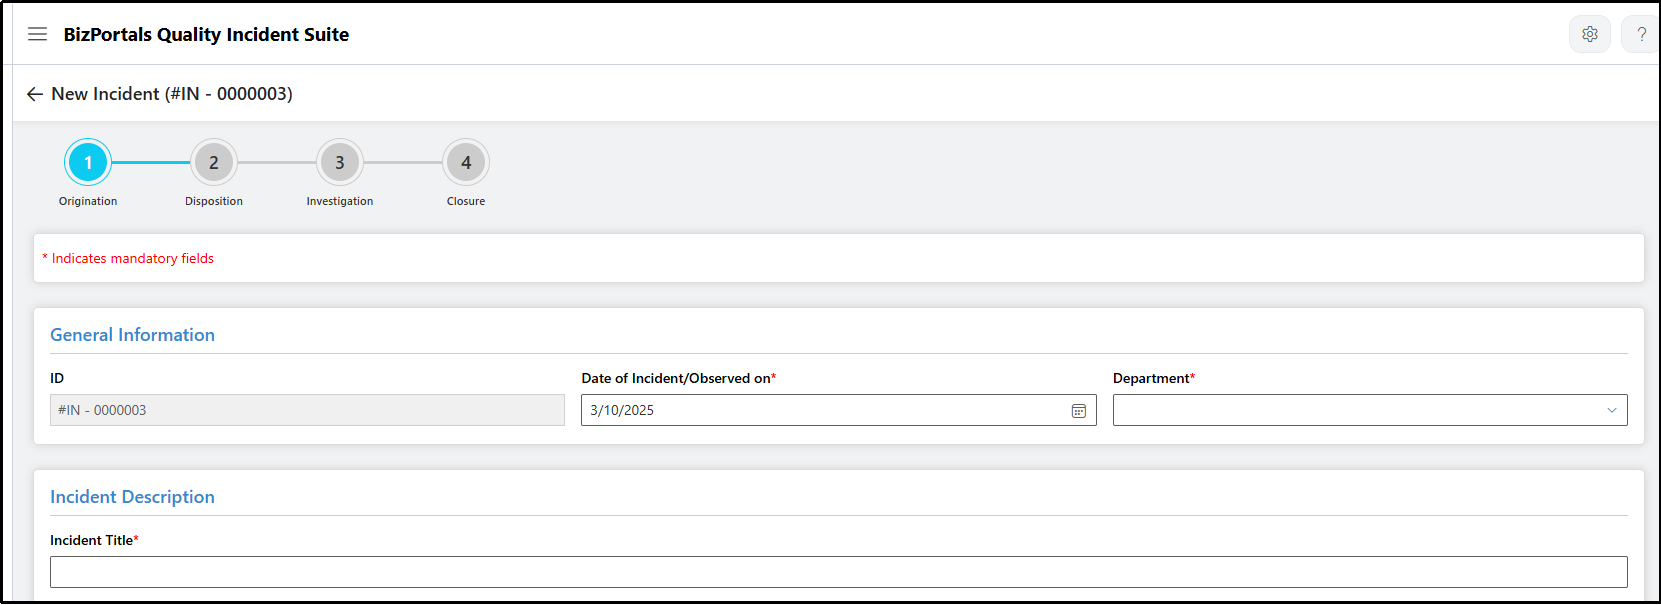
- Click on “New Incident” option as mentioned in above screenshot. It will open the New Incident form.
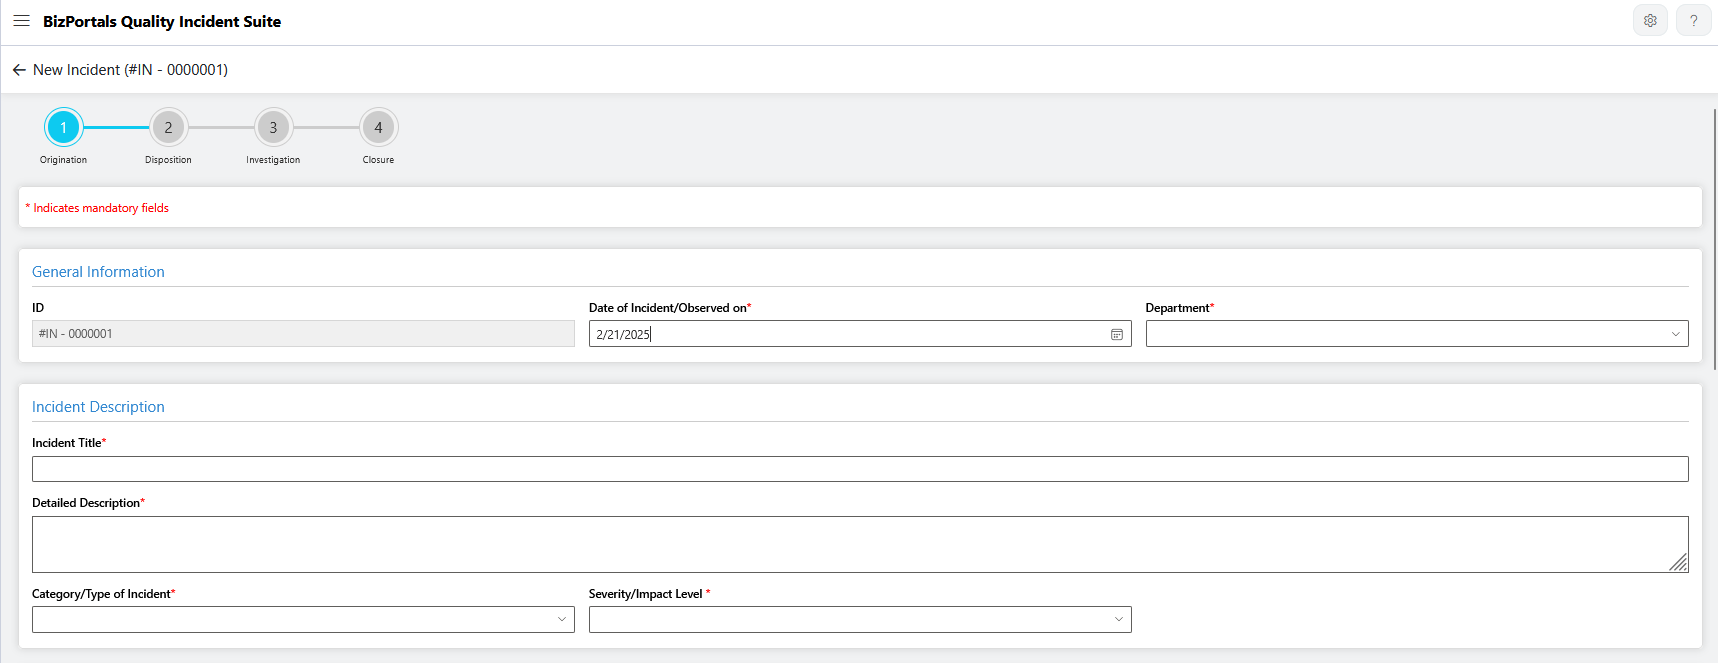
- There are 4 stages in it – Origination, Disposition, Investigation and Closure.
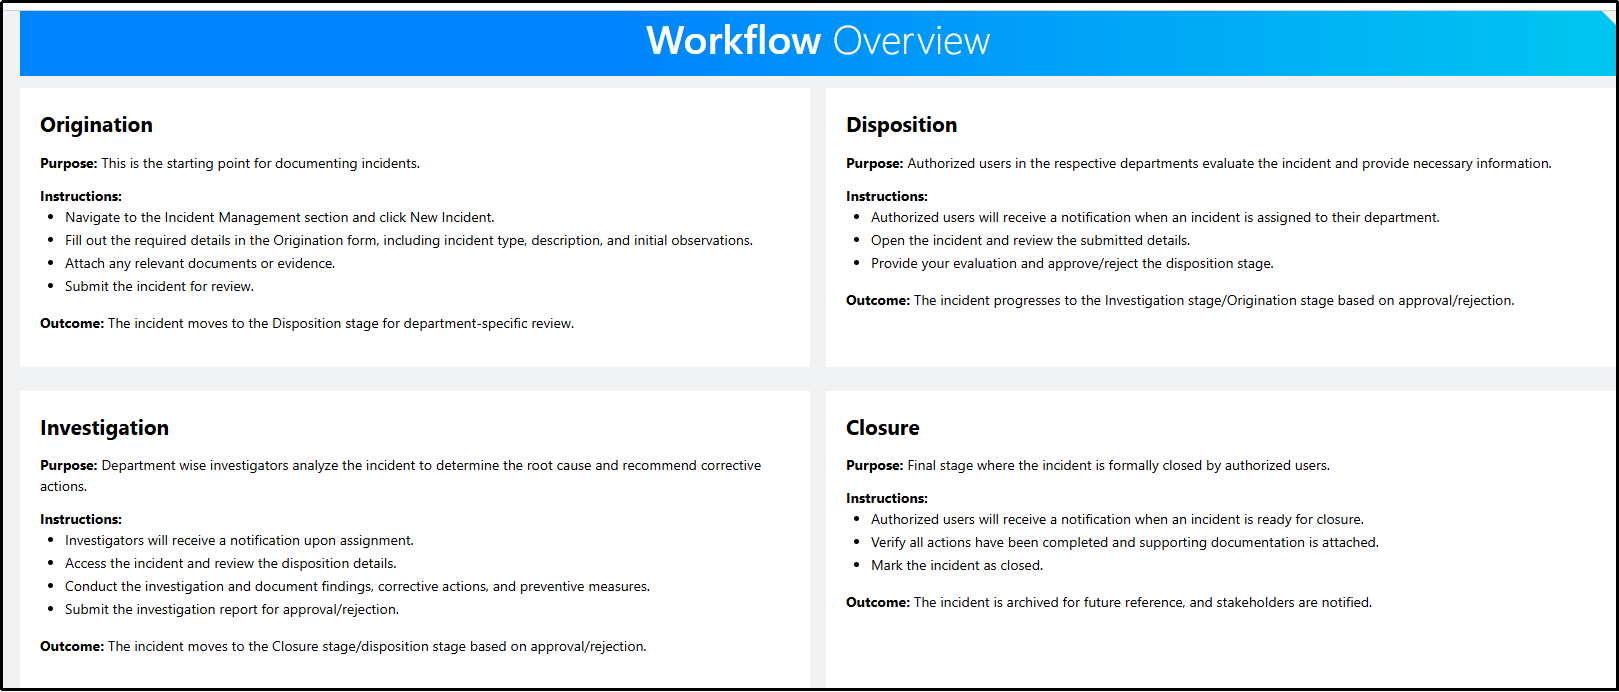
- Fill out the required details in the Origination form, including incident type, description, and initial observations. Attach any relevant documents or evidence. Submit the incident for review. The incident moves to the Disposition stage for department-specific review.
- Authorized users will receive a notification when an incident is assigned to their department.
They will open the incident and review the submitted details. Finally, they will provide their evaluation and approve/reject the disposition stage. The incident progresses to the Investigation stage or Origination stage based on approval/rejection. - Investigators will receive a notification upon assignment. They can access the incident and review the disposition details. They will Conduct the investigation and document findings, corrective actions, and preventive measures. Finally Submit the investigation report for approval/rejection.
- Authorized users will receive a notification when an incident is ready for closure. They can verify all actions that have been completed and supporting documentation is attached and finally mark the incident as closed. The incident is archived for future reference, and stakeholders are notified.
2.2.2 Incident Log
- Click on the Incident Log to view all reported incidents.
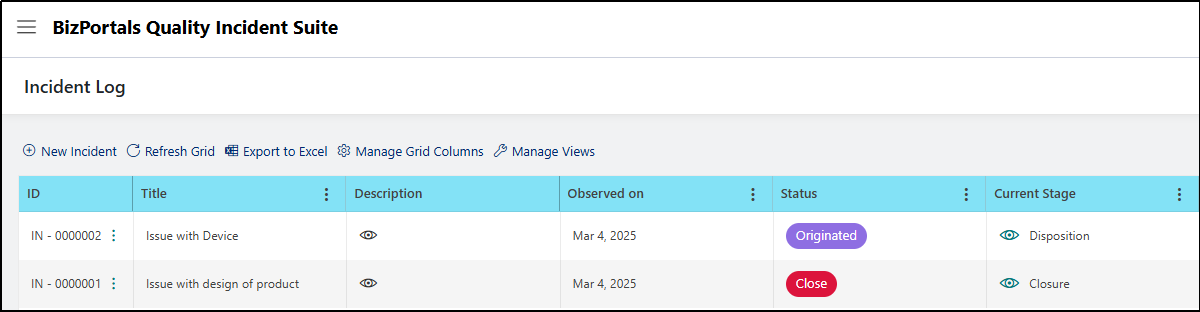
- Click on below option to edit the incident.
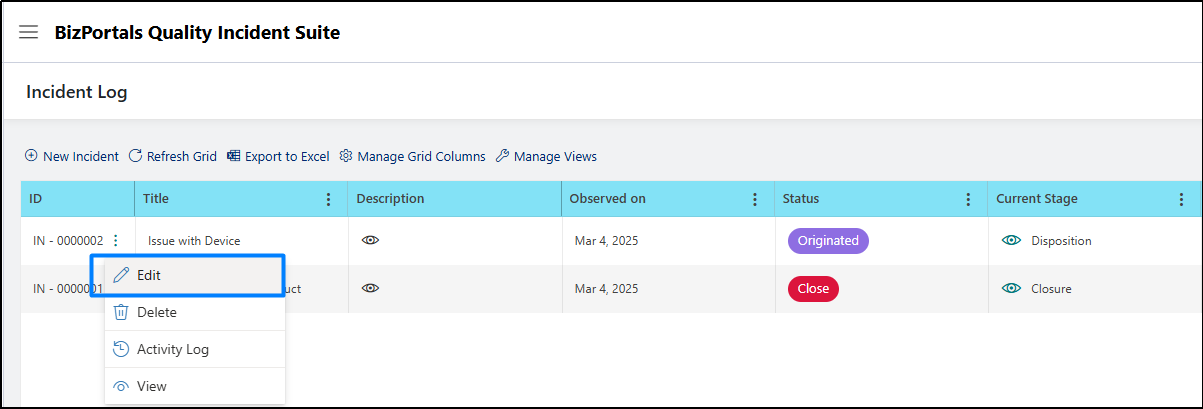
- Click on View option to see the details.
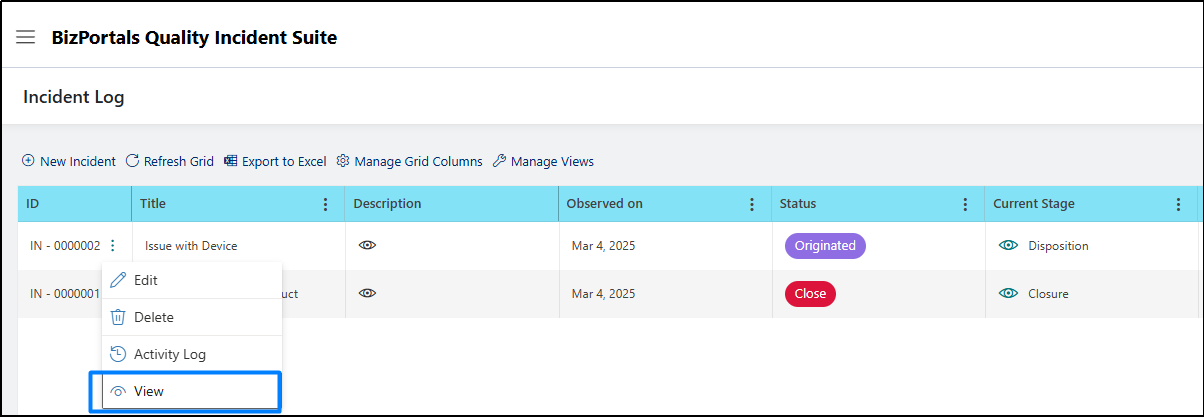
- Click on Activity Log option to see the details.

2.3 Admin Console
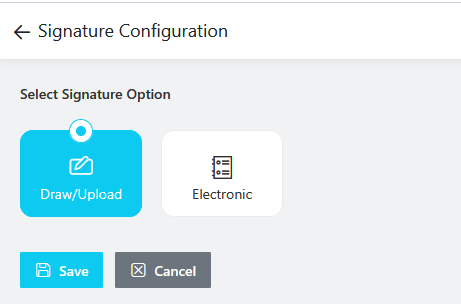
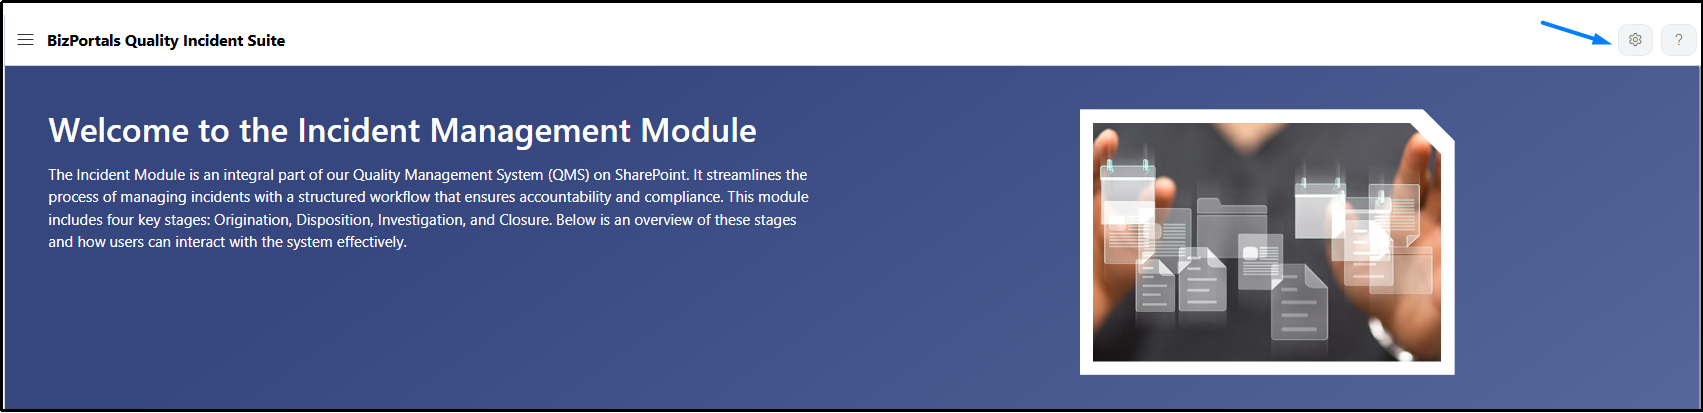
- Click on highlighted icon to view the Admin Dashboard.

- Select the default signature configuration from below highlighted options.
- Use User Roles and Permissions for permission management for Incident module.
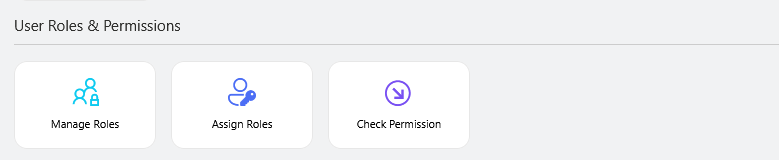
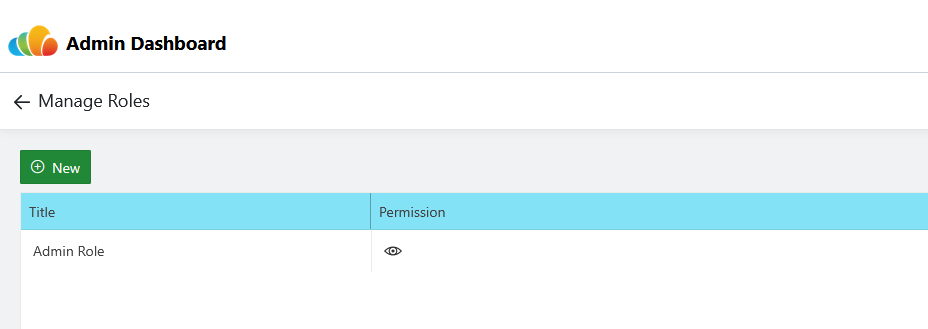
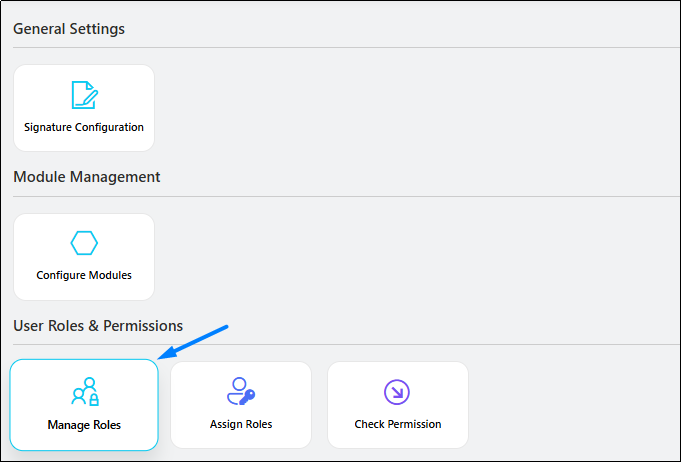
- Click on Manage Roles> Click on “New” button to add a new role.
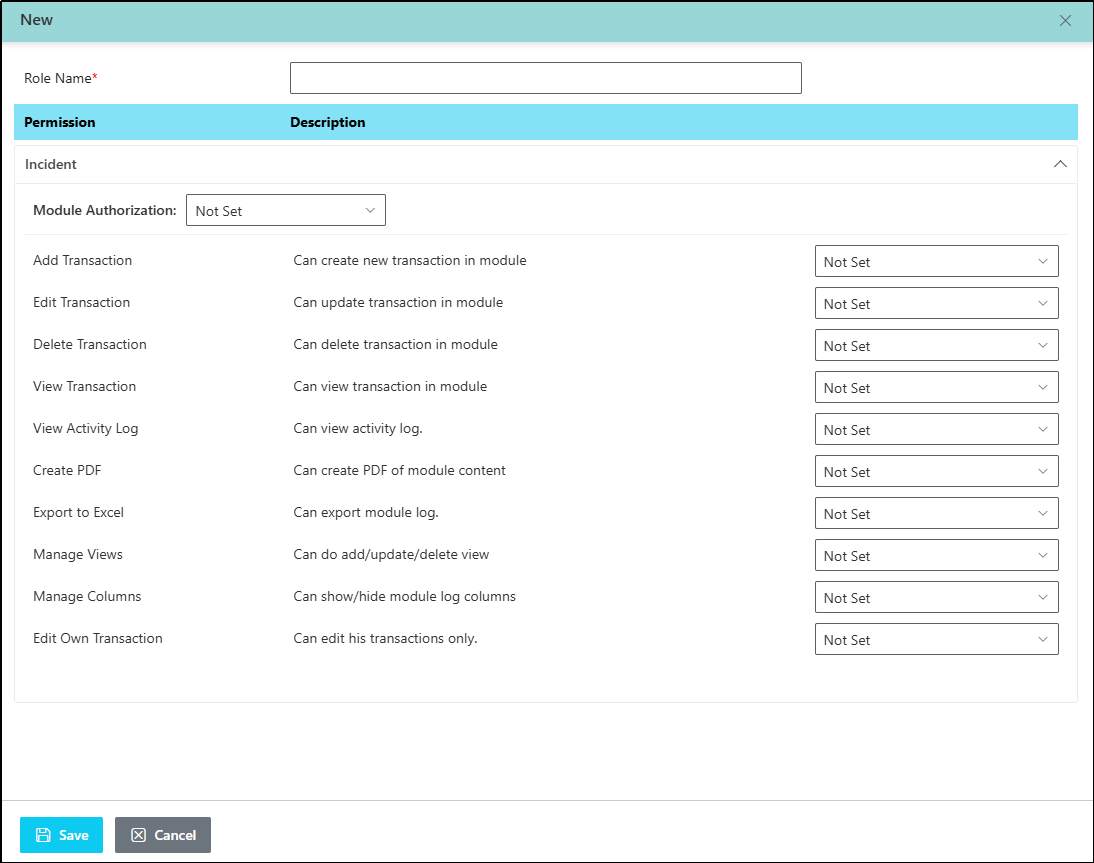
- Give a Role name, select transactions and save.
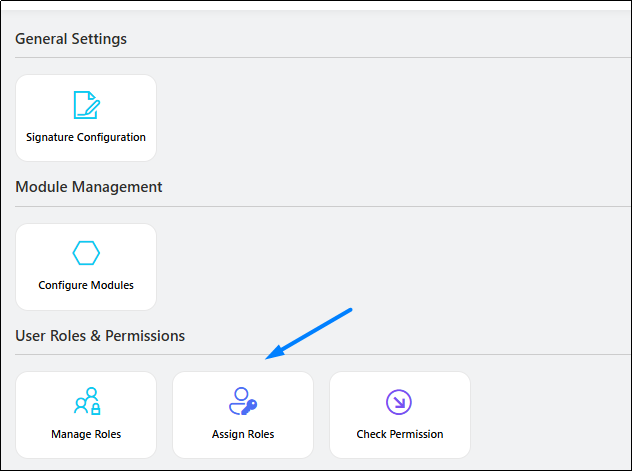
- Click on “Assign Role” and then New button.
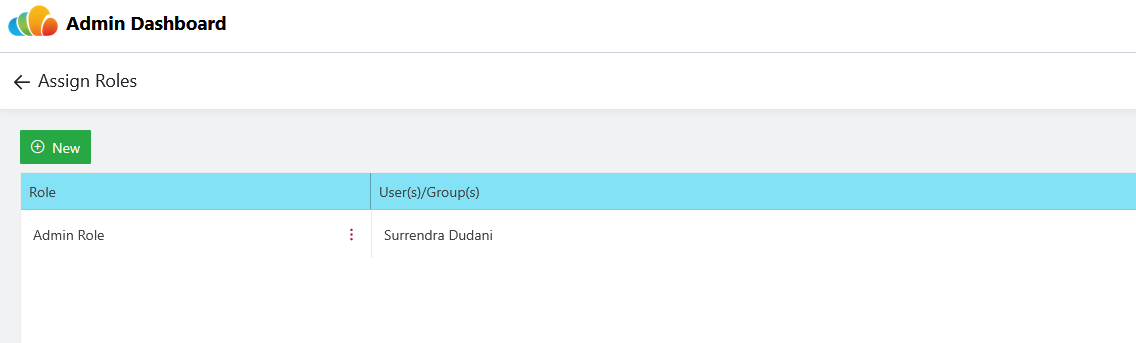
- Select Role from drop-down and add user/group and save.

2.4 BizPortals Incident Suite – Flow Functionality and Configurations
Step by step guide:
- Post successful installation, you will see the below page with BizPortals Quality Incident Suite.
- To ensure smooth flow of incidents, set stakeholder responsibilities for each stage within the department list.
- Click on below mentioned gear icon to locate the admin dashboard.
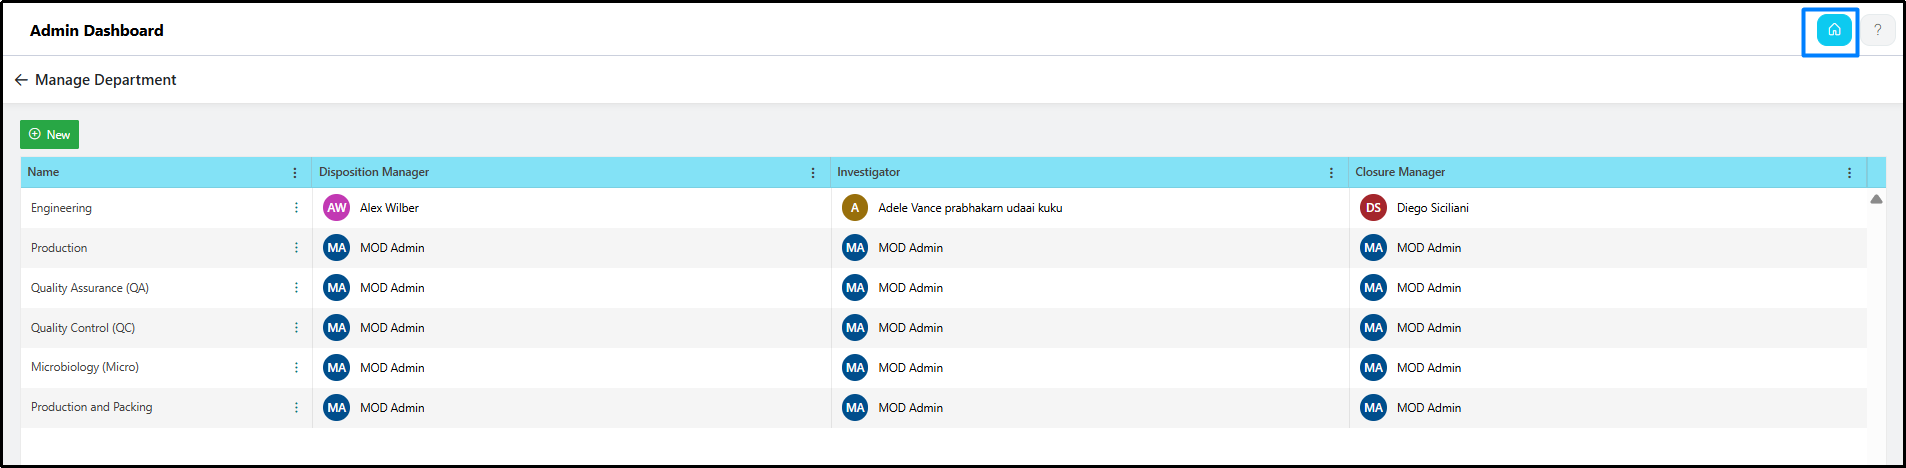
- Click on “Departments” – under “Manage Departments” section.

- You will be redirected to Departments list – Manage Department section
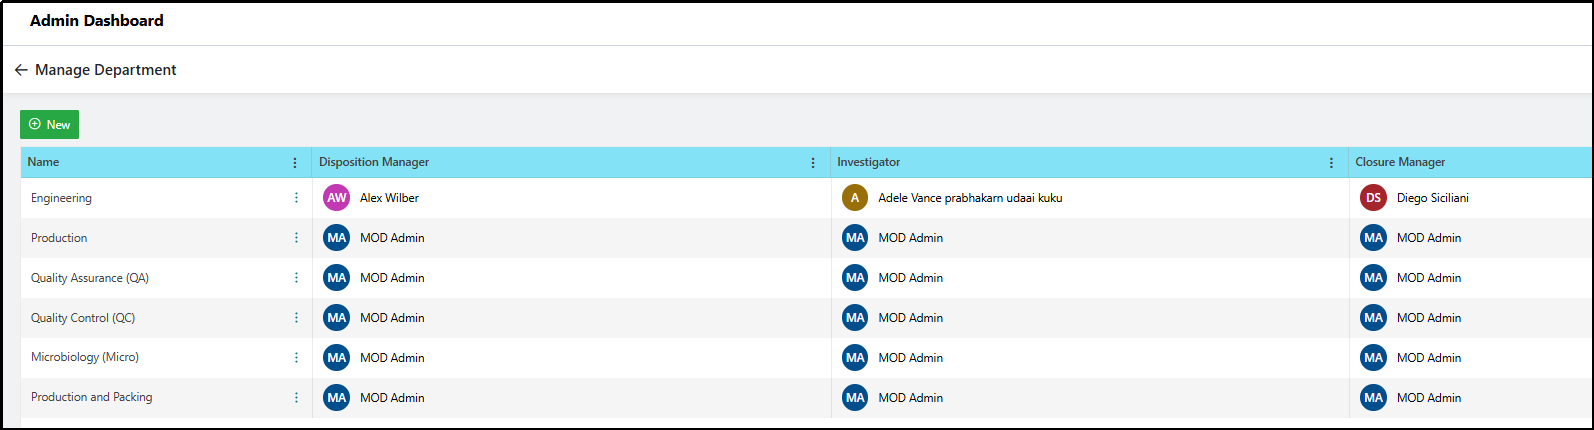
- Click on highlighted option and edit to modify existing department stakeholders

- Once you will click on Edit – it will open a pane to update value of different stakeholders. “Disposition Manager”, “Investigator”, “Closure Manager”.
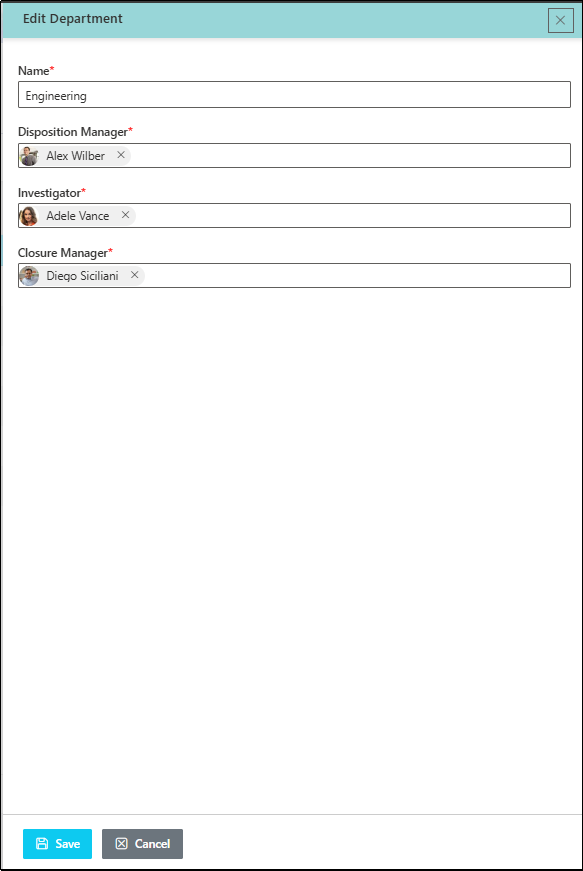
- Click on “Save” option to modify your settings.
- Click on “New” option to add new department.

- Once you will click on “New”, it will open a pane, specify your department name and other details and save.

- Navigate back to incident log by clicking on home icon and incident log available in left navigation.
- Initiate a new incident by clicking on new option, provide relevant details and submit it from stage “Origination”.

- Once the Origination stage is submitted, it will send an email to Disposition user as specified in above department list.
- The user who is specified in department list as Disposition manager, they will review the details from stage 2 and can approve this to further review to Investigator specified in department list.
- Follow the workflow overview details specified on the BizPortals Quality suite landing page to proceed incident towards closure.
Note:
Important: Users assigned as Disposition Manager, Investigator, or Closure Manager in the department list must have:
- Member access to the SharePoint site.
- Should be added in employee profile (see instructions below section 2.5).
- Access to the BizPortals Quality Suite role (refer to sections 2.6 and 2.7).
2.5 User Profile on Manage Employee Profile on – BizPortals Quality Incident Suite
- Click on Manage Employee Profile under admin dashboard as mentioned below

- It will open a Manage Employee Profiles list as shown in the screenshot below.

- Click on “New” to add new user profile.

- Once clicking on “New”, you will see above “New Employee Information” screen, fill out employee name and mark employee “Is Active “as true by enabling this button and save.
2.6 User Role Assignment on – BizPortals Quality Incident Suite
- The user who adds the BizPortals Quality Suite on SharePoint site, automatically gets access to admin role. The assigned role details can be checked as per below highlighted screens.
- Navigate to admin dashboard.

- Click on “Assign Role”.
- Click on highlighted icon.

- Click on “New” to assign Admin Role to other users.
- Select available role from drop-down and assign to other users.

- Navigate to admin dashboard.
2.7 User Role Creation on – BizPortals Quality Incident Suite
- Click on “Manage Role”
- Click on “New” to create new role.

- Give a new role name, Select Module Authorization as Set and select other permissions as required for this role as “Set” and save.

2.8 How to use solution – scenario
An employee, Sarah, discovers a safety hazard in the warehouse – a leaking container of cleaning chemicals.
***** Stage 1 *****Incident Filing – Origination Stage:
Sarah accesses the company’s incident reporting system by navigating to module.
- Date and time of the incident
- Department of the incident
- Description of the hazard (leaking chemicals)
- Attaches photos of the leaking container and the surrounding area as evidence. (if applicable) etc.
Then finally she submits the incident report.
***** Stage 2 *****Review – Disposition Stage:
The incident report is automatically routed to Sarah’s department Disposition manager as specified in Department list; Let’s say John.
John reviews the report and assesses the severity of the incident by filling out the mentioned field on the form.
Incident may move to Investigation stage/Origination stage based on approval/rejection from John.
***** Stage 3 *****Investigation Stage:
Departmental investigators are responsible for analyzing incidents, determining root causes, and recommending corrective actions. Based on their approval or rejection of these recommendations, the incident is moved to closure or disposition.
***** Stage 4 *****Closure Stage:
The incident is officially closed in this final stage by a designated closure manager, specific to each department. These managers will review the incident and either close it directly or reassign it for further investigation or disposition.