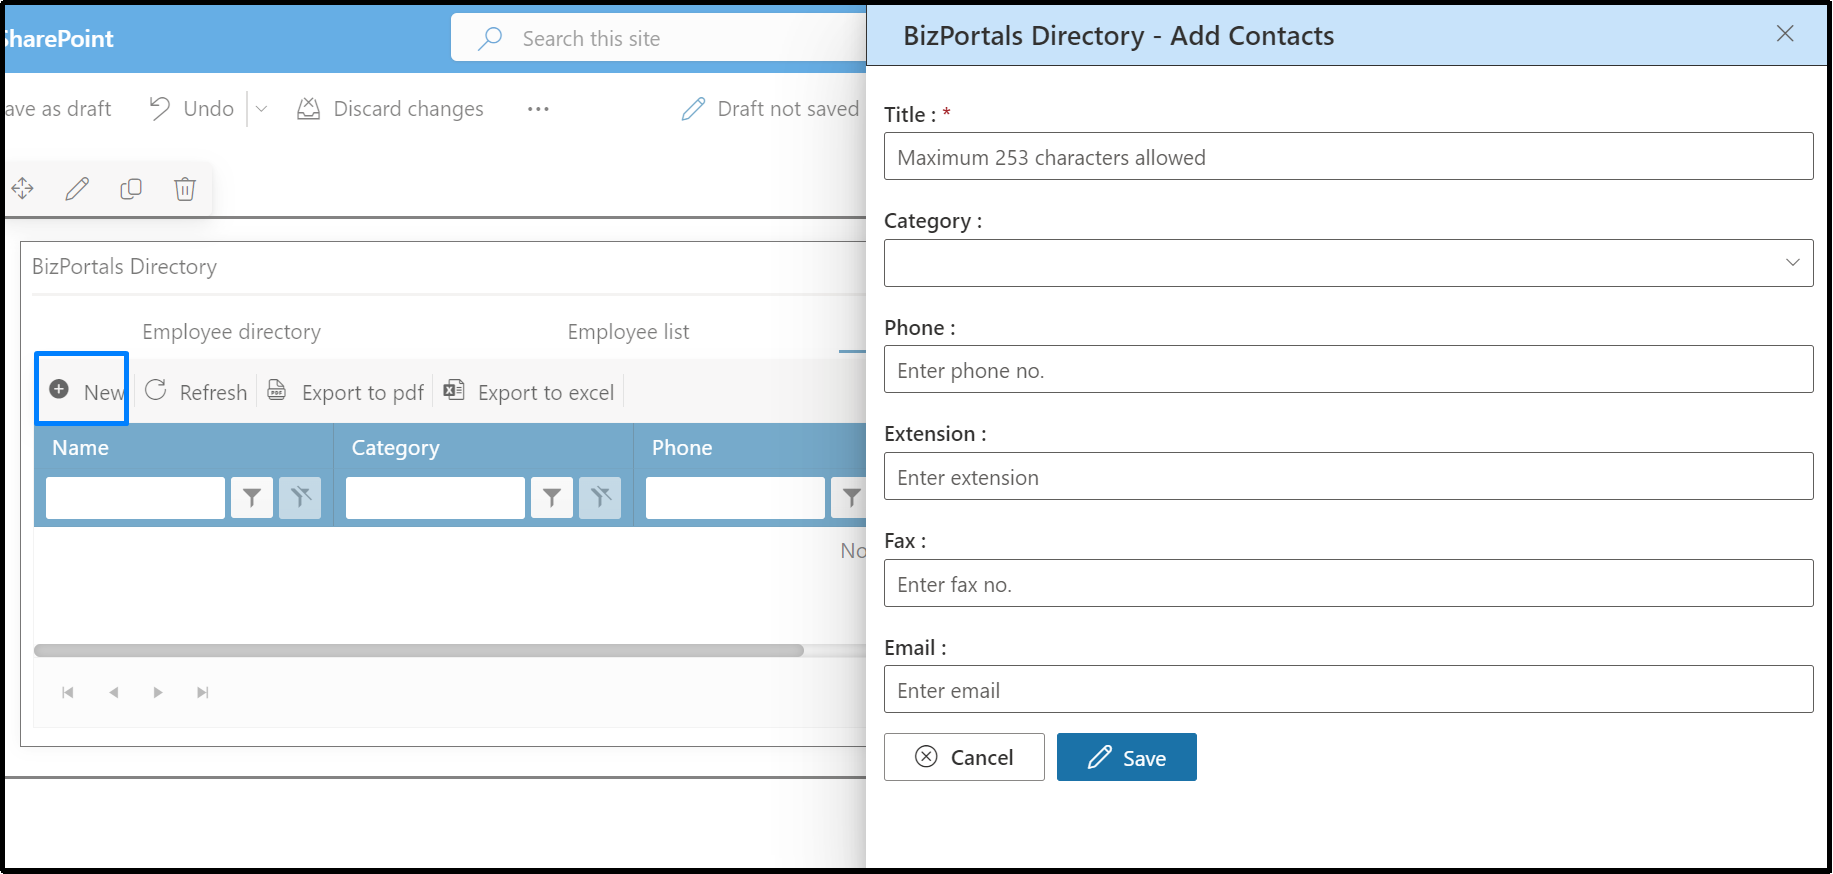
BizPortals Directory
BizPortals Directory web part enables you to do following –
- It brings the contact details of your organisation’s employees to your fingertips.
- You can also reach out to people directly through the extensions (using email, phone, Teams, or other extensions)
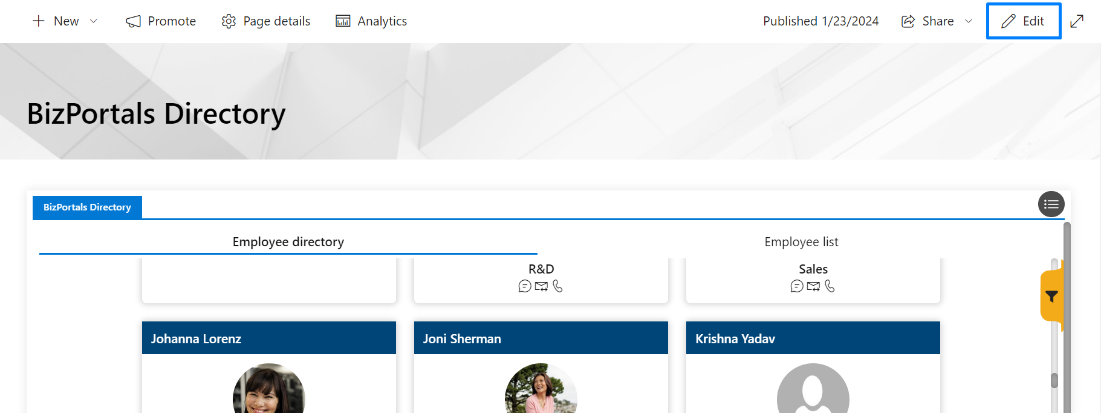
- View employees in list view and card view.
- You can filter the name of the employees based on the filter operations you add in a list view of this web part. The list can further be exported in the form of excel or pdf.
Notes:
- Only users with site owner or higher privileges can add new BizPortals Directory web part.
- Site owners can choose to display header style/image by selecting the header layout in the webpart layout settings configuration.
- Users can visit another user’s Delve profile simply by clicking on their name. To enable this feature, make sure the “Redirect to Delve” option is turned on in the property pane.
- The web part shows profiles for all the users present in the AD. External users will have “Guest” displayed next to their name.
2.Web part Configuration
2.1 Overview
You can change the title of this web part, add a description of the web part, change the header layout, set the web part height, apply custom theme, show/hide the web part title, and other configurations.
Note – You must have at least the site owner’s permission to configure this web part.
Follow the steps mentioned below,
- Navigate to the top right corner of the page and click the edit button.
- Then click on the edit web part icon as shown in the below image.
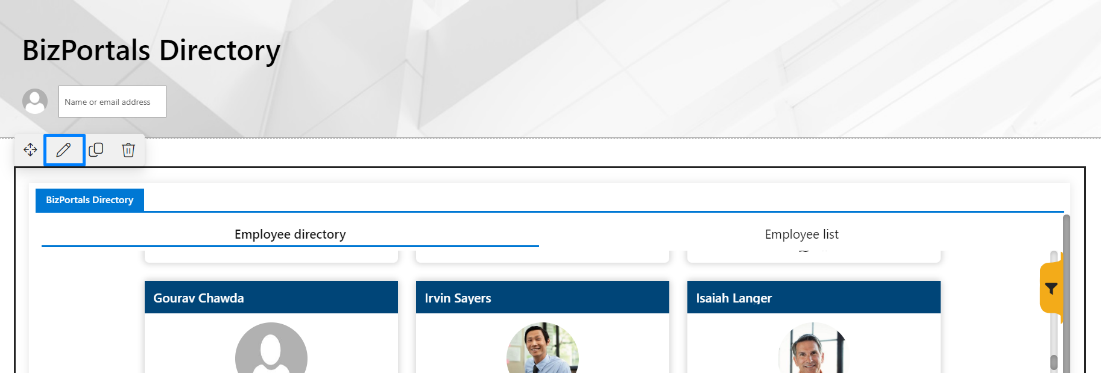
- After clicking on the edit web part icon, the property panel will be shown for this web part on the right side.
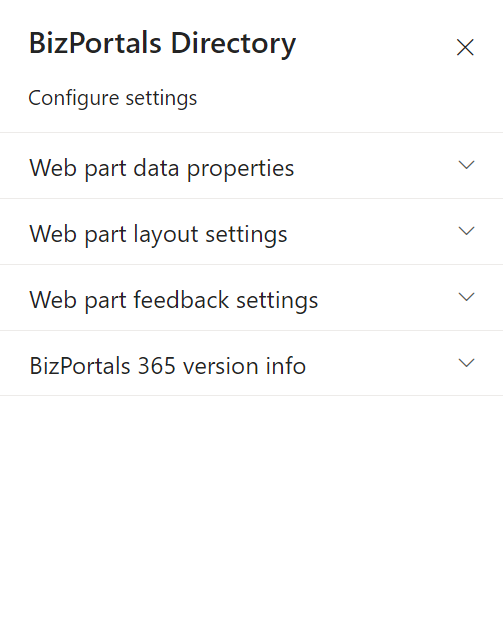
2.2 Web Part Data Properties
2.2.1 Web Part Title
It is the name that shows in the header of the web part that summarizes the web part’s function.
2.2.2 Web Part Description
This is the brief information related to the web part which can highlight what is the functionality of the web part.
2.2.3 Allow redirect to Delve
If this option is enabled, users can click on a name to be redirected to that user’s Delve profile. If the option is disabled, the names of users will not be clickable, and users won’t be able to navigate to other users’ Delve profiles from there.
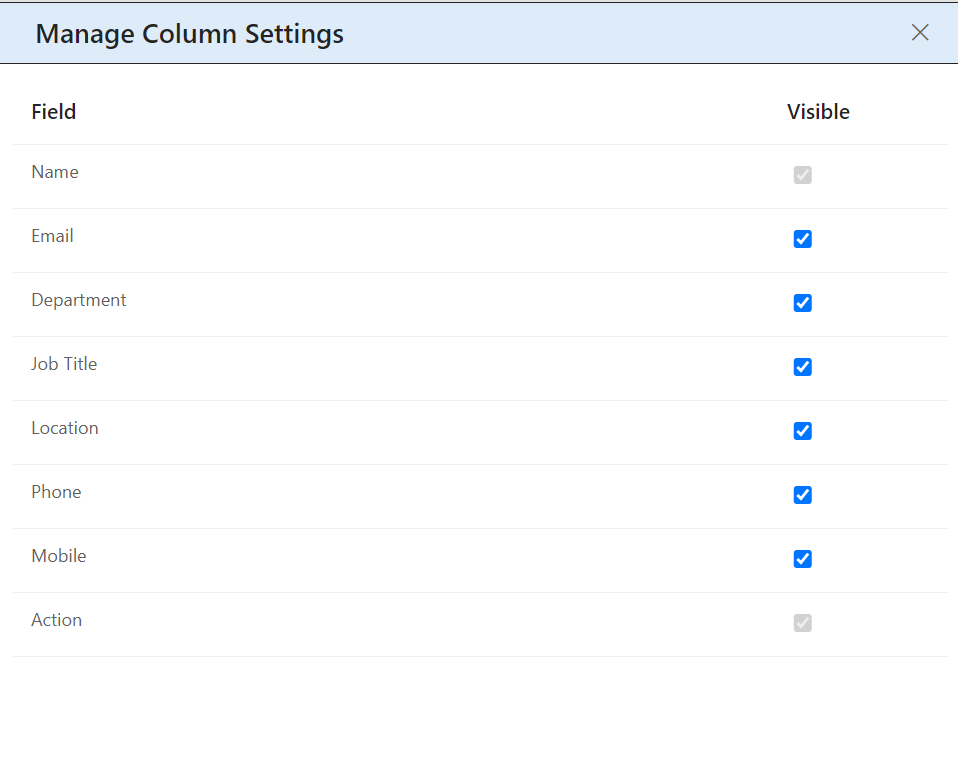
2.2.4 Configure/Manage Column Settings
The columns you choose in the “Manage Column Settings” will appear in the employee list tab of this web part.
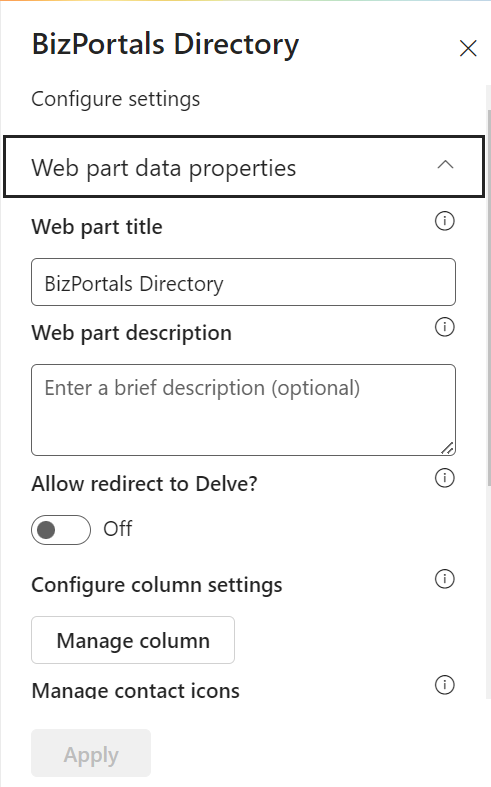
2.2.5 Manage Contact Icons
- Choose which contact options you want to appear on the web part by checking the checkbox next to each option. If it’s unchecked, that contact option won’t show up on the web part.
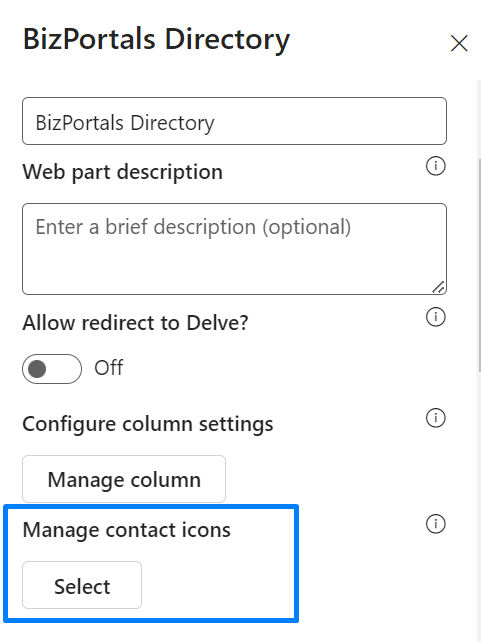
- Once you’ve decided on the contact options, you can then pick what type of connection each option will have. For example, if you choose “Message” as a contact option, you can decide it will be integrated with “Teams.” So, when someone clicks on the message icon on the web part, they’ll be taken to MS Teams to connect with that user.
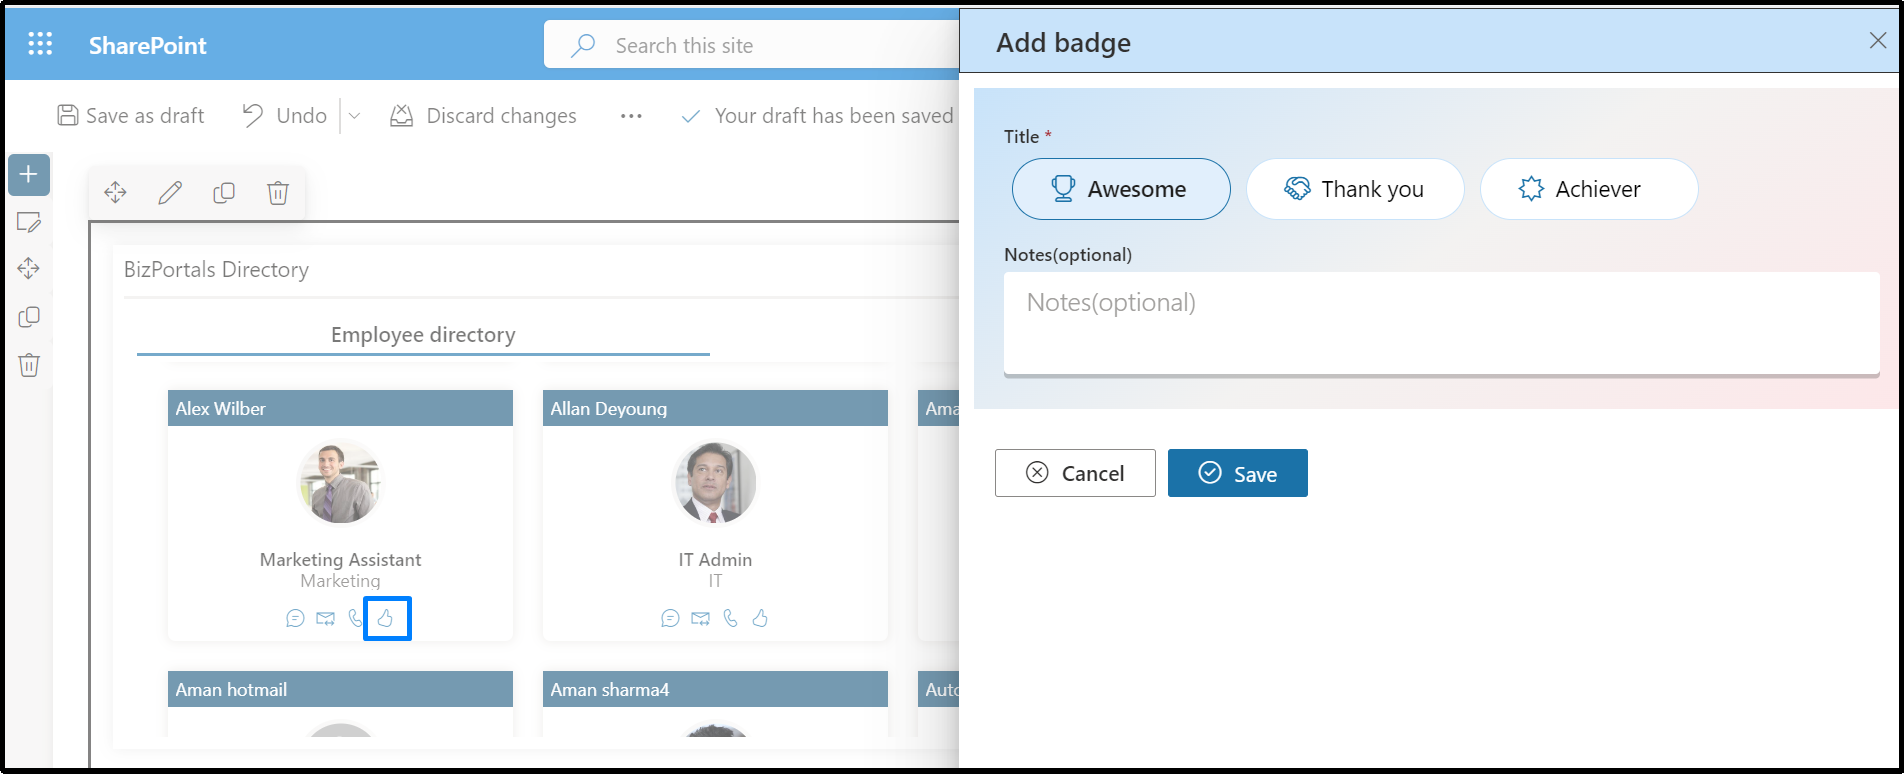
2.2.6 Praise Feature
User can click on the check box to enable the praise feature for the web part. By enabling the badges checkbox users will be able to see an icon on the employee card using
When you enable this feature, you’ll need to create or select a list to store badges using the “configure badge list” option as shown in below image
![]()
Please note that this option will only appear when the badge feature is enabled via the “manage contact” settings.
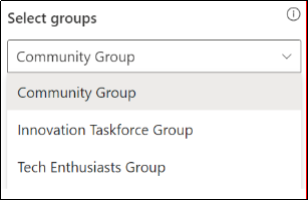
2.2.7 Enable group selection
In this feature we will show an option in the property pane to select the Azure AD groups once enabled, a dropdown menu will appear, displaying all available AD groups
2.2.8 Show border
To display a border around the web part, users should activate the toggle button in the property pane. Once enabled, a 1pt border will be applied to the web part shown in the image below

2.2.9 Size
In this feature user should be able to change the size of the user profile tile size in Employee directory section

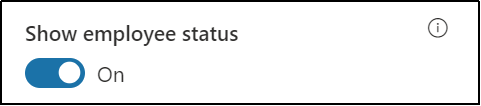
2.2.10 Show employee status
In this feature user can see the employee (Microsoft Teams) status on the web part display as shown in image below.

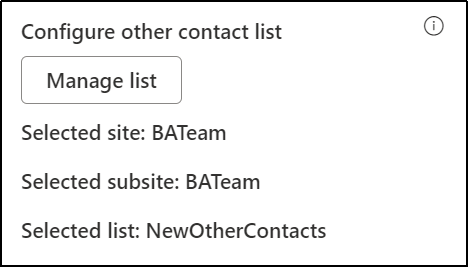
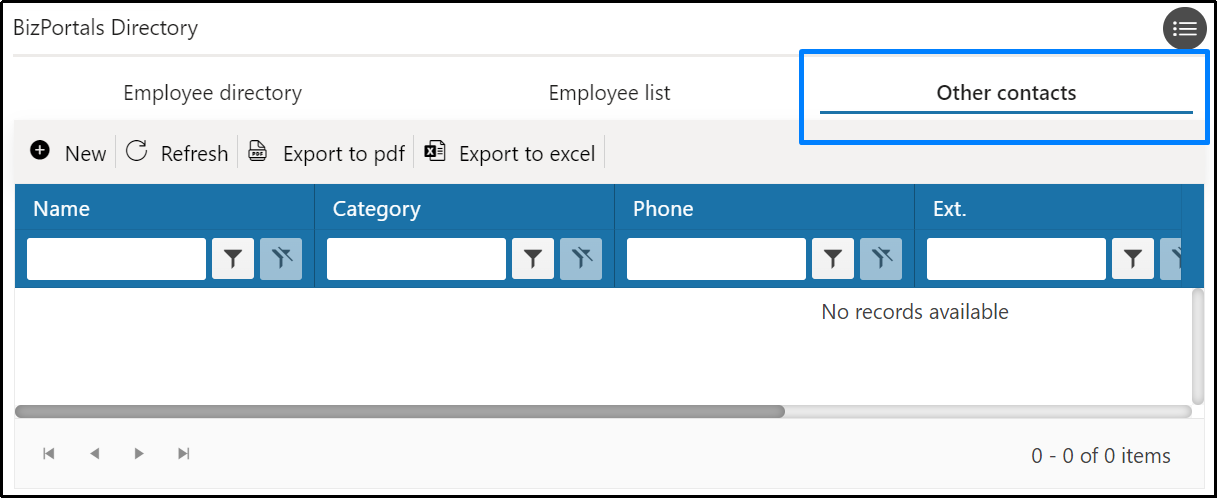
2.2.11 Other Contacts
This is a list of contacts compiled by the Portal Administrator. It may include vendors, consultants, potential customers, and other users, regardless of whether they have portal access, to use this feature user needs to enable the option from property pane as shown in below image

Once this feature is enabled, you’ll need to set up a list to store contacts, as demonstrated in the image below.
Once the list is set up, a tab labeled “Other Contacts” will appear in the web part display.
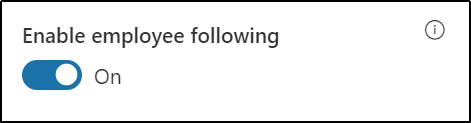
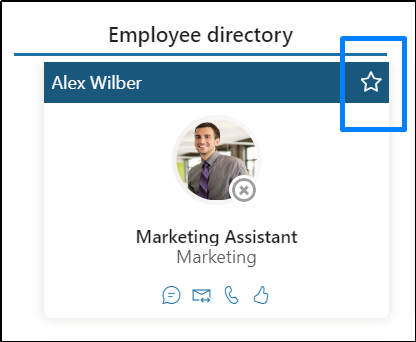
2.2.12 Enable employee following
When this option is enabled, users will see a “follow” option on the employee card. A star icon will appear, and by clicking on it, user can follow any employee
2.3 Web Part Layout Settings
2.3.1 Select header layout
Users can change the web part header layout. There are six options to choose from. The sixth option allows you to set an image in the web part title. When you select the sixth option in the panel layout, a URL field will automatically appear next to the panel layout option. Users can enter an image URL to display on the panel. If you leave the field blank and click ‘Apply,’ it will use a default image.
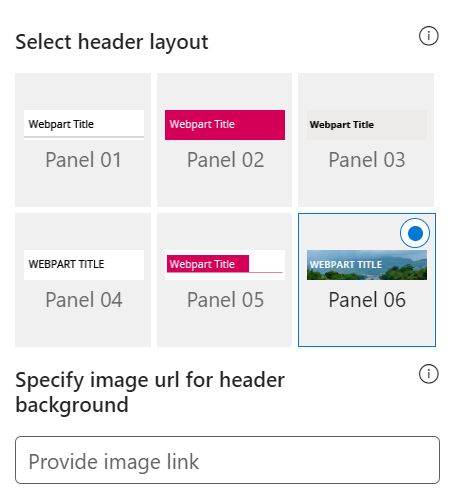
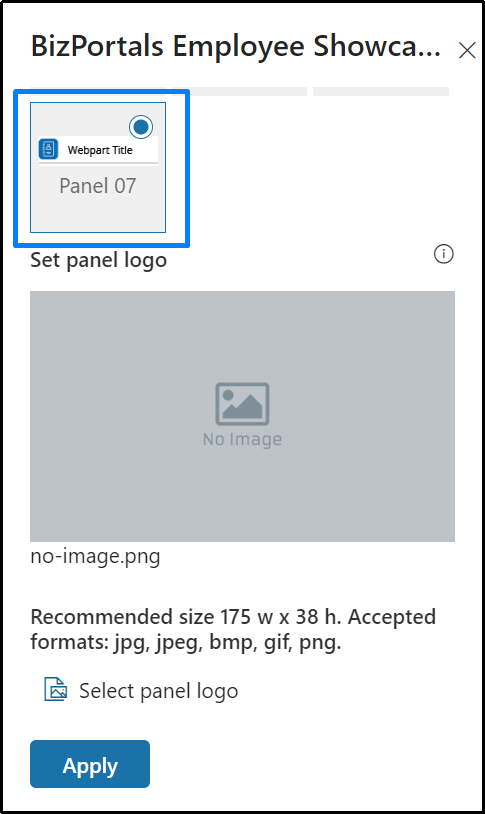
When you select panel layout 7 user should be able to configure logo for web part header, the size for that image will be (175*38)
2.3.2 Web Part Height (px)
Users can set the web part height by sliding the range bar according to the requirement.
2.3.3 Display Web Part Title
Enable this toggle button if you want to display the title in the header of the web part. Keep this toggle button in disabled state if you want to hide the title in the header of the web part.
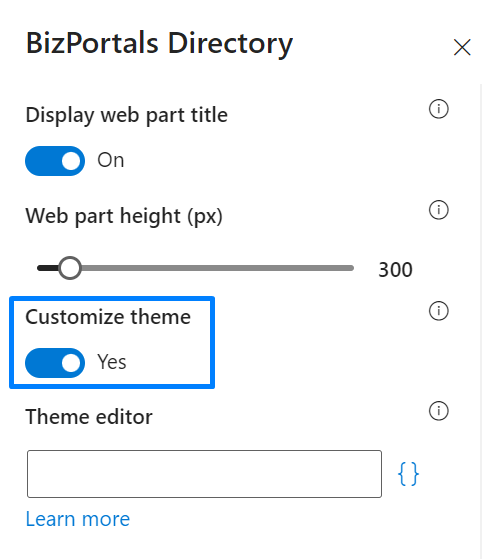
2.3.4 Customize Theme
Users can enable this option to personalize the web part’s visual appearance by applying a custom background theme. This is achieved by entering a JSON (JavaScript Object Notation) code into the theme editor as shown in below image. The JSON configuration includes parameters such as text color, background color, and other styling options to tailor the look and feel of the web part according to individual preferences.
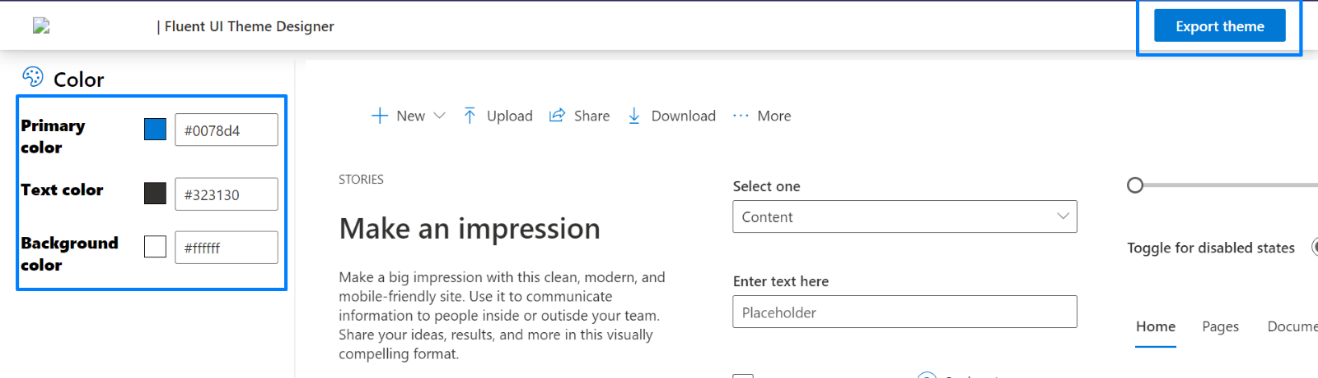
- Click” Learn more” to visit the Fluent UI Theme Designerwebsite.
- Customize your theme by selecting your preferred primary, text, and background colors. Once satisfied, click Export theme.
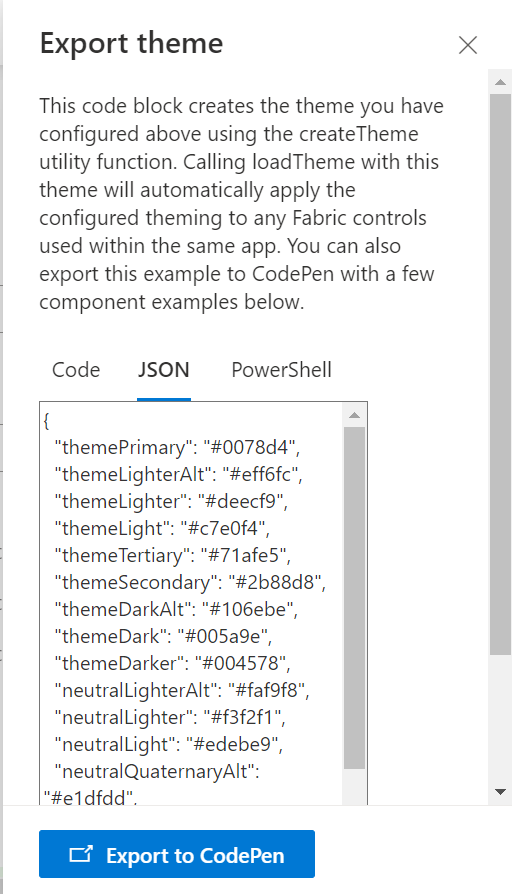
- To apply the theme settings, copy the JSON code and paste it into the designated area of the Theme Editor (Customize theme field). Click Save.
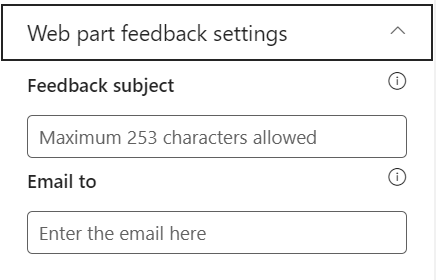
2.4 Web Part Feedback Settings
Feedback subject: This determines the subject line of the email sent when users submit any feedback related to the web part.
Email To: This field designates the recipient’s email address to whom feedback-related emails will be sent. When a user submits feedback through the web part, an email notification is generated and directed to the email address specified in this field.
Note: Feedback recipient must have access to this site collection.
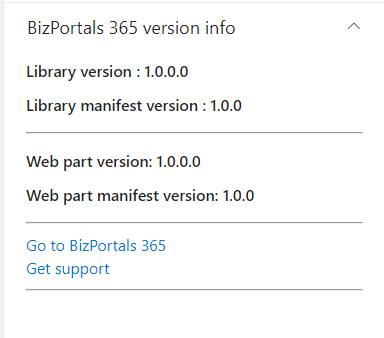
2.5 BizPortals 365 Version Info
Here user can see the version information.
3. Web part Functionality
3.1 Refresh and Reload
Refresh Data
If you make changes in the web part settings, click the refresh button to see the latest updates.
Reload Data
When you make changes in the Active Directory (AD) and want to see the updated information in the BizPortals Directory web part, click the Reload button.
Note: The user’s image is taken from Delve.
3.2 Employee Directory Views
- Card View
On the employee card, all the relevant field value information is fetched from the Azure Active Directory.
Showing status on employee card – In this feature user can see the employee (Microsoft Teams) status on the web part display
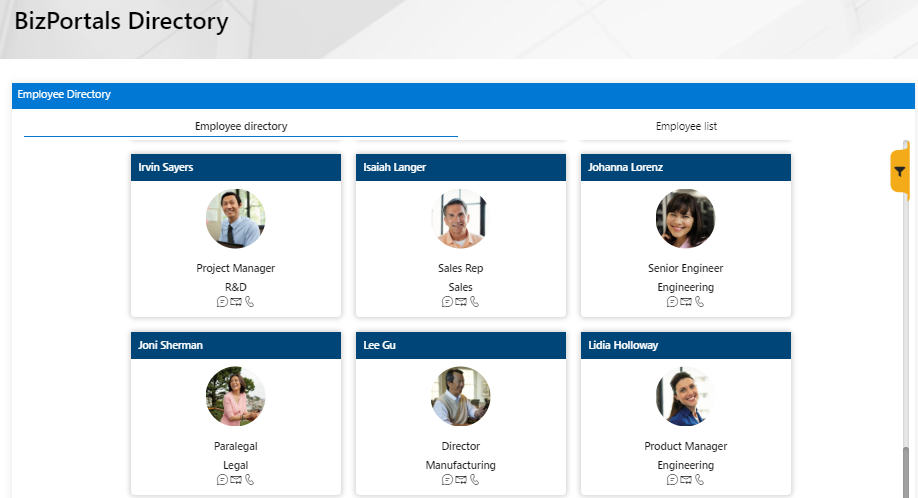
Note: You can also search employee in card view.
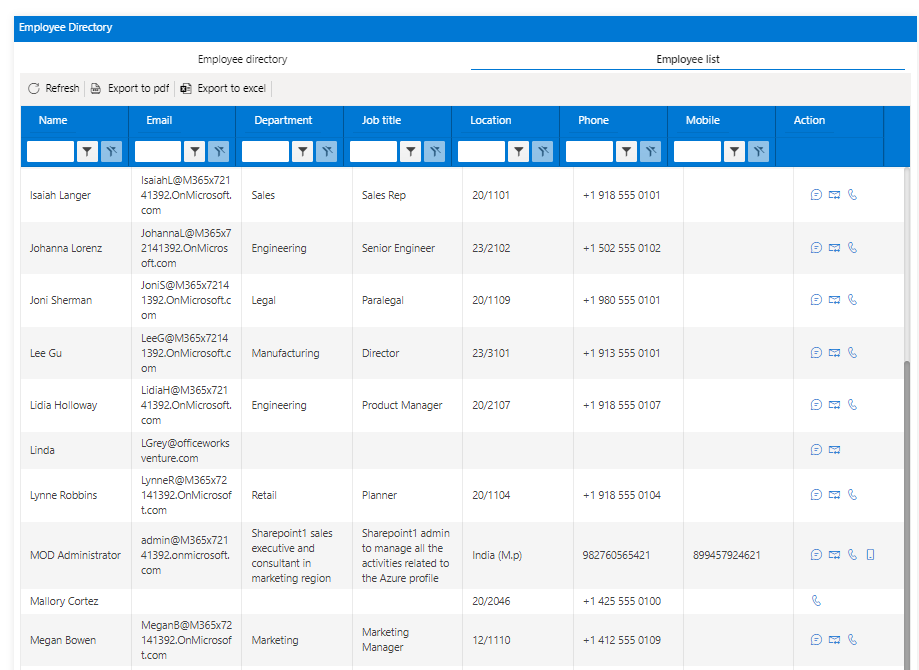
- List View
On the employee list view, users can see additional details in the tabular format.
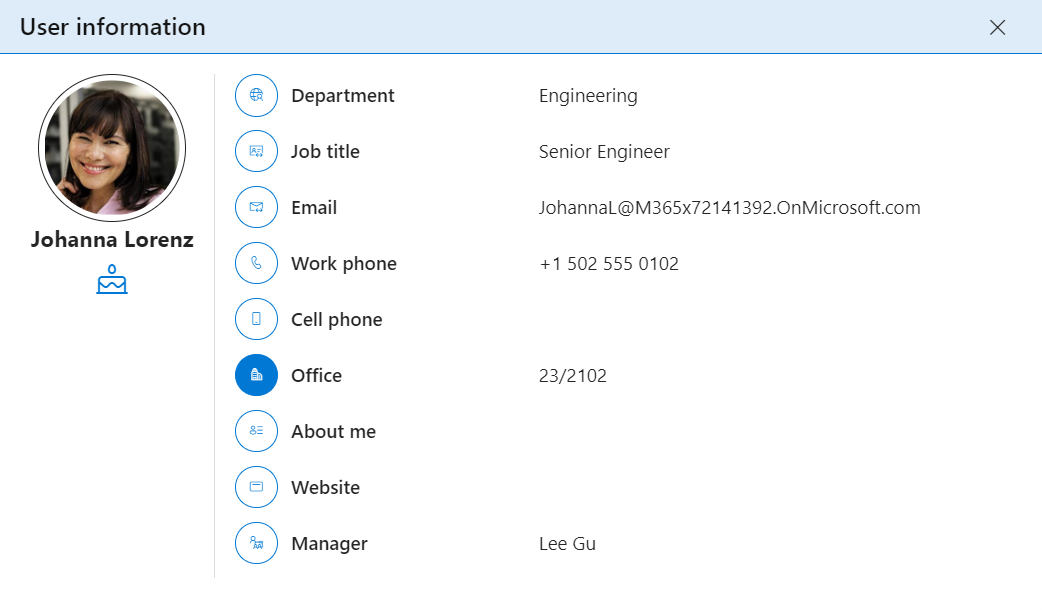
3.3 View Employee Profile
- Click the name of a person to view their Delve profile.
- Click on the photograph to view their brief profile information.
Note:
- All the user’s details come from Microsoft AD, except for the birthday, which is taken from Delve.
- The web part shows profiles for all the users present in the AD. External users will have “Guest” displayed next to their name.
- The extension for connecting with external users will not be displayed under their name.
3.4 Send message or make calls
- Once you find the user you were searching for, you can get in touch with them in one of the following ways:
- To send a message, click the message icon. This launches the Teams app.
- To send an email, click the email icon. This launches the email application installed on your computer.
- To make a call, click the call icon. This launches the calling application installed on your computer.
Notes:
- If the user does not have a registered account for any of these applications or does not have them installed on their computer, the respective icons will not be shown under their name.
- These apps can be enabled, disabled by the site owners from the web part property pane.
- Once a user clicks on the employee profile image, then it displays a user information page with the values.