
How BizPortals Quality Suite Works
1 Introduction
1.1 Purpose of the Document
This document is your comprehensive guide to the organization’s SharePoint-based Quality Management System (QMS). Whether you’re an end user, administrator, or part of the quality assurance team, this resource will help you understand the system’s capabilities, navigate its modules (such as Incident Management, CAPA, and Change Control etc.), and effectively utilize its features. Inside, you’ll find details on the system’s structure, how the modules connect, and essential components like activity logging, task management, approval processes, and reporting tools. This guide is designed to support consistent use, simplify training, and ensure we meet our quality and compliance standards.
1.2 Target Audience
The primary audience includes end users managing quality processes and administrators overseeing system operations. It also supports stakeholders involved in audits, compliance, and continuous improvement initiatives.
- End Users
- Quality Managers, Approvers
- Administrators
- IT/Support Staf
1.3 Scope
This document covers the full scope of the SharePoint-based Quality Management System (QMS), which is designed to streamline and standardize quality processes across the organization. The system provides configurable, role-based modules tailored to manage key quality functions such as Incident Management, Corrective and Preventive Actions (CAPA), Change Control, and more.
1.4 Overview of QMS Modules and Features
The modular BizPortals QMS provides fully configurable and interconnected modules for complete process visibility. It features automated activity logs, task management, approvals, notifications, and reporting. User-friendly data views and a centralized admin dashboard streamline operations, ensuring compliance, collaboration, and ongoing quality improvement.
1.5 System Requirements
To ensure optimal performance and access to all functionalities of the SharePoint-based Quality Management System (QMS), the following system requirements must be met.
- MS 365 Licenses: Each user accessing the QMS must have a valid Microsoft 365 license that includes access to SharePoint Online (e.g., Microsoft 365 Business Standard, E3, or E5 plans).
- SharePoint Online: The QMS is built on SharePoint Online, leveraging its document management, workflow automation, and permission management capabilities. Organizations must have an active SharePoint Online environment configured and maintained under their Microsoft 365 tenant
- BizPortals QMS Licenses: A valid BizPortals QMS license is required to activate and use the quality management modules, features, and configurations. Licensing is typically based on the number of users and the selected modules
2 System Overview
2.1 What is the Quality Management System?
The Quality Management System (QMS) is a centralized, SharePoint-based platform designed to manage and streamline an organization’s quality processes. It helps ensure compliance with internal standards and external regulations by providing structured modules for managing incidents, CAPAs, change controls, and more. The QMS promotes accountability, traceability, and continuous improvement through automation, standardized workflows, and real-time reporting.
2.2 Purpose and goals
The purpose of the Quality Management System is to provide a structured, consistent, and automated approach to managing quality-related activities across the organization. Its goals include improving process efficiency, ensuring regulatory compliance, reducing risks, and fostering a culture of continuous improvement. By centralizing quality data and standardizing workflows, the QMS supports better decision-making and enhances overall operational excellence.
2.3 SharePoint as the underlying platform
The Quality Management System is built on Microsoft SharePoint Online, leveraging its robust features for document management, workflow automation, user access control, and collaboration. SharePoint provides a secure, scalable, and cloud-based environment. This foundation ensures that the QMS is both user-friendly and adaptable to evolving organizational needs.
2.4 Key Modules
- Incident Management : The Incident Management module provides a structured process for logging, tracking, and resolving quality incidents, safety issues, and non conformances. Users can easily submit incidents via intuitive forms, initiate investigations, and assign corrective actions. Automated workflows ensure timely escalation and resolution, while comprehensive dashboards and reporting tools provide real-time visibility into trends and root causes.
- CAPA (Corrective and Preventive Action): The CAPA module facilitates the systematic investigation and resolution of quality issues to prevent recurrence. It supports the entire CAPA lifecycle—from identification and evaluation to implementation and effectiveness verification—ensuring a closed-loop approach to quality improvement.
- Change Control: This module manages controlled changes to processes, products, documents, or systems, ensuring that all modifications are assessed, approved, and implemented in a compliant manner. Change requests are routed through predefined workflows with stakeholder input, risk assessment, and impact analysis
- Document Control: Document Control ensures all quality-related documents—such as SOPs, policies, work instructions, and forms—are created, reviewed, approved, distributed, and archived in a secure and compliant manner. Version control and access restrictions ensure that users always work with the latest approved documents
- [Add more as applicable] – For custom module – contact us at support@bizportals.com
3 Core Features & Functionality
3.1 Module Interlinking
Seamlessly connect related modules such as Incident Management, CAPA, and Change Control to ensure data continuity and traceability. This integrated approach enhances efficiency and promotes a closed-loop quality process.
- Relationships between modules (e.g., CAPA linked to Incidents)
- Benefits of linked records (traceability, accountability)
3.2 Activity Log
Maintain a comprehensive, time-stamped record of all user actions and system events. This audit trail ensures accountability, transparency, and compliance with regulatory requirements.
- Auto-logging of actions and changes
- Audit trail and compliance tracking
- Export options (Excel, PDF)
3.3 Email Notifications
Automated email alerts keep users informed of task assignments, approvals, escalations, and due dates
- Trigger points (e.g., status change, task assignment)
- Template customization
- Notification frequency and configuration
3.4 Approval Mechanism
Multi-level configurable approval workflows ensure that submissions are properly reviewed and authorized. Approvers receive instant notifications and can act directly.
- Multi-level approval workflows
- Parallel/sequential routing via advanced customized Power Automate flows
3.5 Task Management (Integration with MS Planner)
Tasks can be created whenever needed and are linked with Microsoft Planner. This integration provides a familiar and collaborative environment for managing action items, while real-time progress tracking ensures greater accountability.
- Task creation and assignment
- Due dates and reminders
- Status tracking and reporting
3.6 Roles and Permissions
Granular role-based access control ensures users only see and act on information relevant to their responsibilities. This enhances data security and streamlines user experience.
- Role-based access control
- Module-level and item-level permissions
- Custom roles and their privileges
3.7 Interactive Admin Panel
A user-friendly admin dashboard allows system administrators to manage users, configure master data, notifications and customize modules—all from a centralized interface.
- User management
- Master data configuration
- Workflow and notification management
3.8 Reporting & Analytics
Built-in dashboards and reporting tools offer real-time insights into key metrics, trends, and performance indicators.
- Built-in dashboards – Kendo UI
- Custom dashboards – Power BI
- Export in excel options
3.9 Grid View Features
Modules are equipped with advanced grid views for filtering, and sorting editing. Users can easily navigate, customize, and manipulate data for faster decision-making.
- Create and save
- Advanced filters and sorting
- Export options (Excel, PDF)
- Create custom views
3.10 ERP Integration
The solution can be integrated with existing ERP systems to sync master data and relevant transactions. This ensures data consistency and reduces duplication across platforms.
- Acumatica
- Other ERP like SAP Hana etc.
4 User Guide & Installation
4.1 Getting Started
4.1.1 Installation
- Refer to detailed instruction for BizPortals Quality Suite Installation –
BizPortals Quality Suite Installation
4.1.2 Logging in & Navigating to QMS Site
- Go to your SharePoint QMS portal, the one with BizPortals Quality Suite.
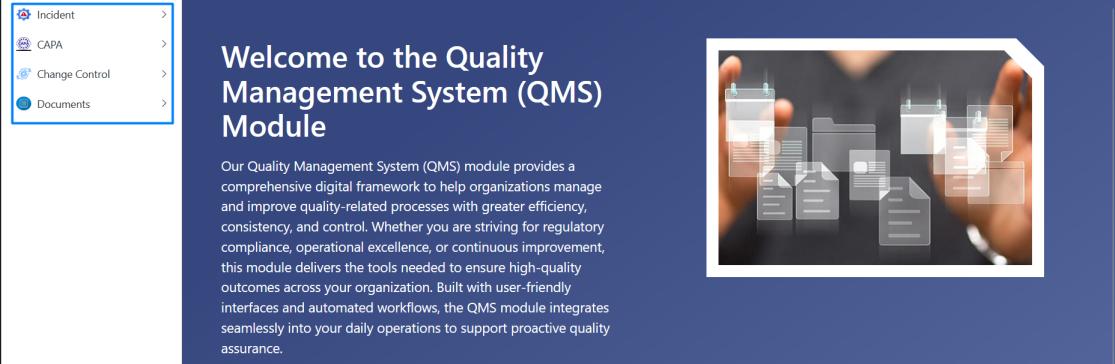
- The landing page displays a dashboard along with a welcome message.
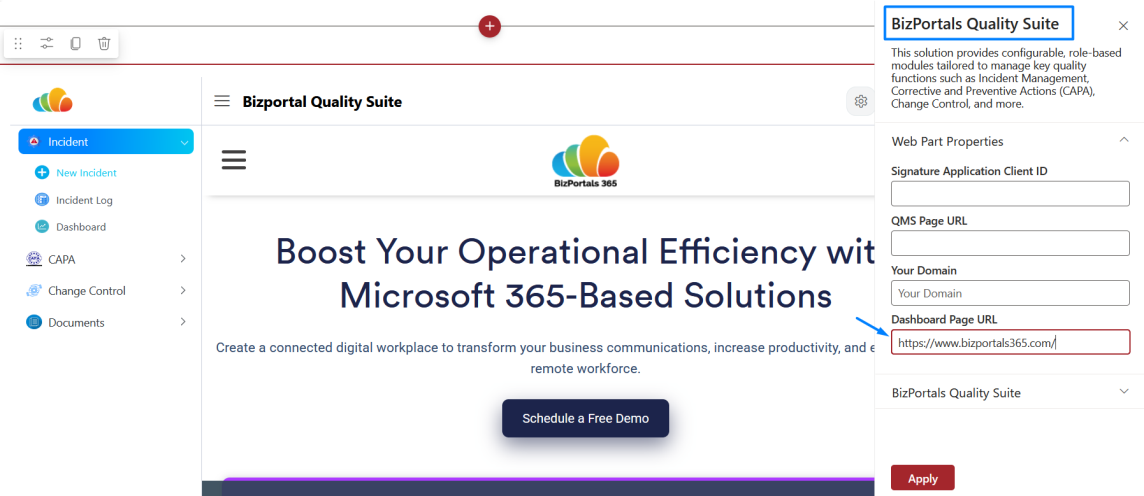
- You have the option to set a custom landing page through the property pane. Use the instructions below to apply your changes.
- Click on edit page layout

- Click on the BizPortals Quality Suite web part, then select ‘Edit Properties’ as highlighted in the image below.

-
A property pane will appear on the right side—paste the appropriate URL of your custom page, click ‘Apply,’ and then republish the page to make it accessible to all users.
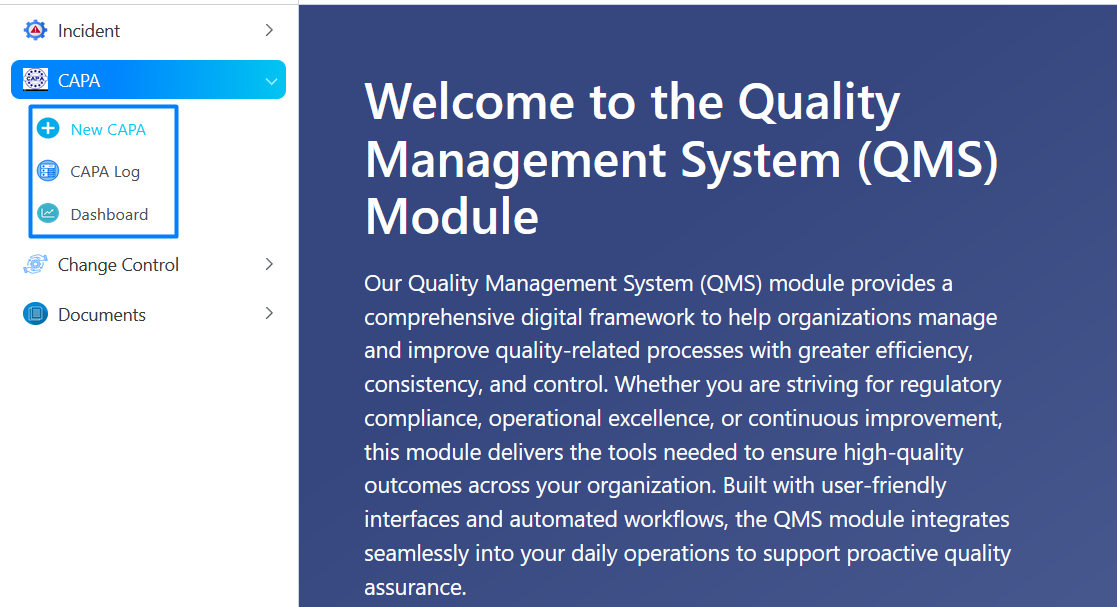
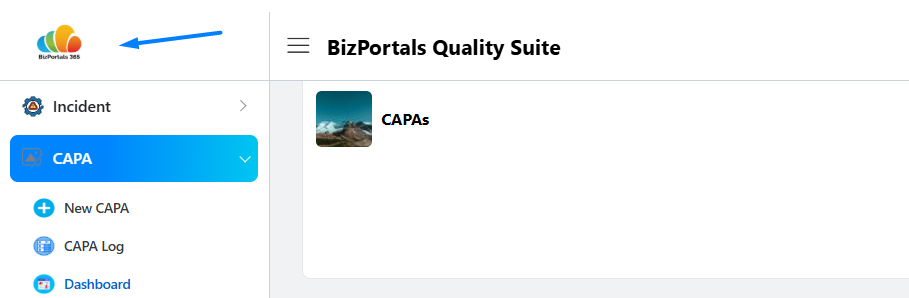
- The core modules—Incident, CAPA, Change Control, and Document Control— will be available for access.
- Navigate through each module to view logs, dashboards, and add new items through the corresponding links.
- Navigate to the Admin Dashboard using the steps below.
- To open the Admin Dashboard, click on the icon shown below
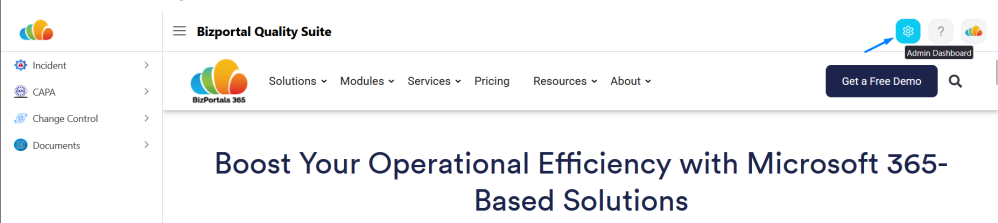
- It will redirect you on to the admin dashboard.
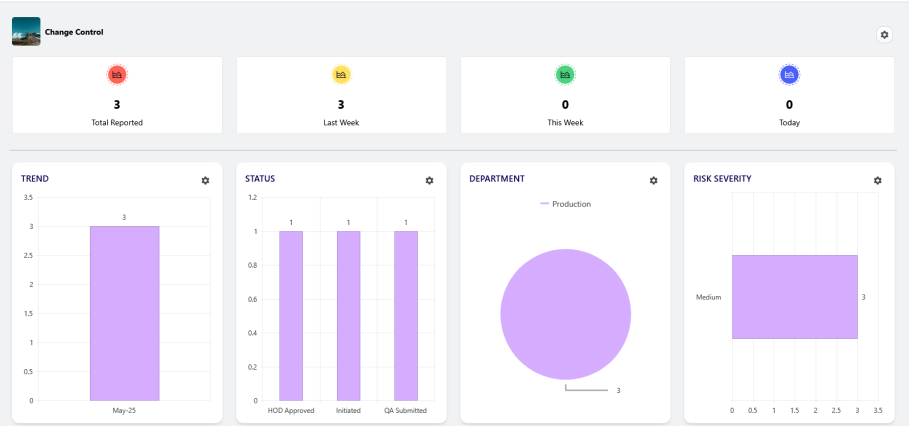
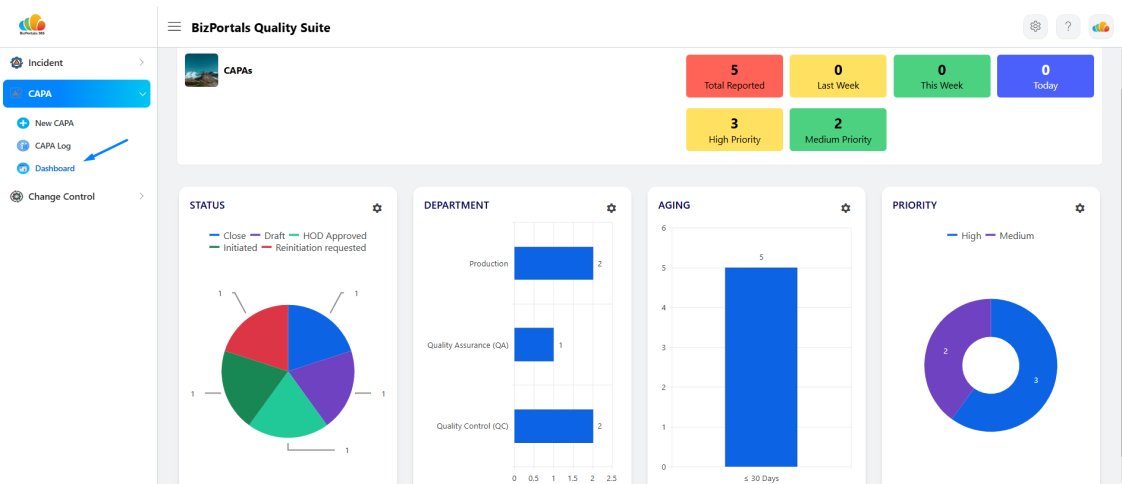
4.1.3 Dashboard Overview
- Each core QMS module includes a default dashboard. Sample screenshots for Incident, CAPA, and Change Control are provided for reference.

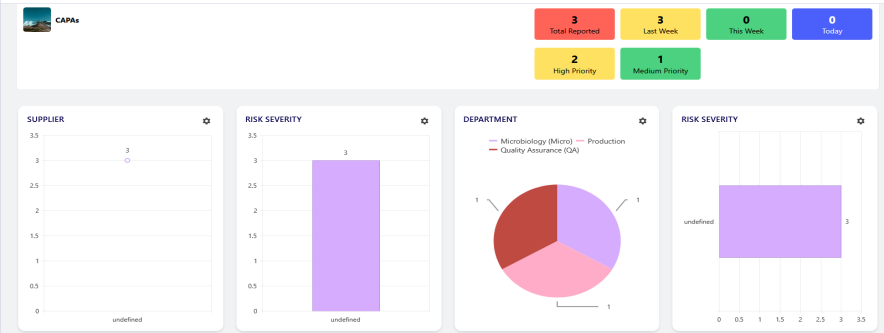
- Navigate to each module – Report Dashboard using the steps below.
- Go to the left navigation, then select CAPA, and finally Dashboard to reach the CAPA Dashboard.
- Likewise, the Incident and Change Control Dashboard is accessible via the left navigation panel.
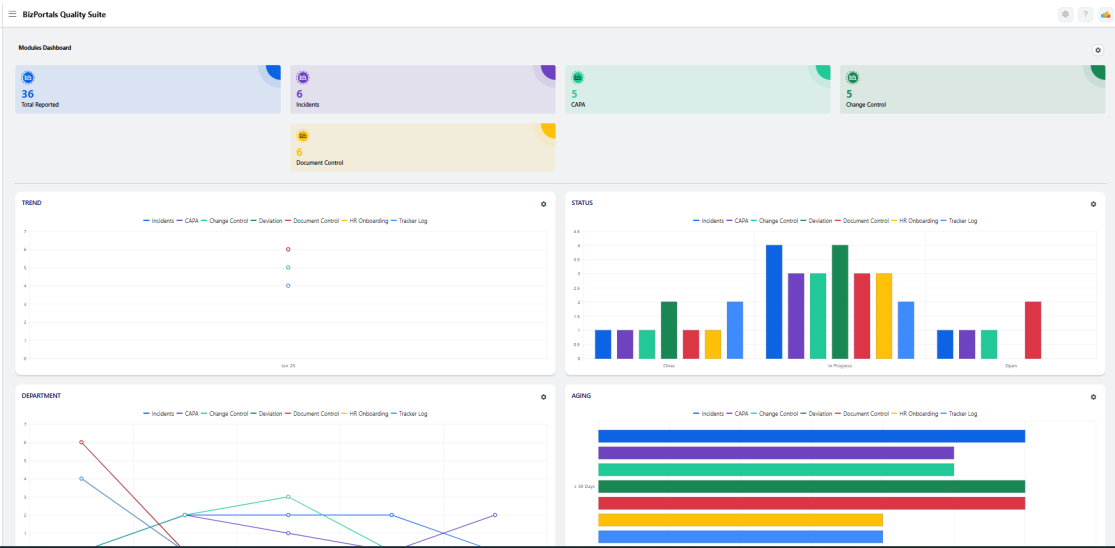
- To access the comprehensive QMS Dashboard for all modules, click the icon in the top left corner.
Note: You can modify the layout, theme, and graph type of default charts through the settings provided for each chart.
Need custom Power BI visuals? BizPortals Quality Suite supports them—contact us at support@bizportals.com to learn more.
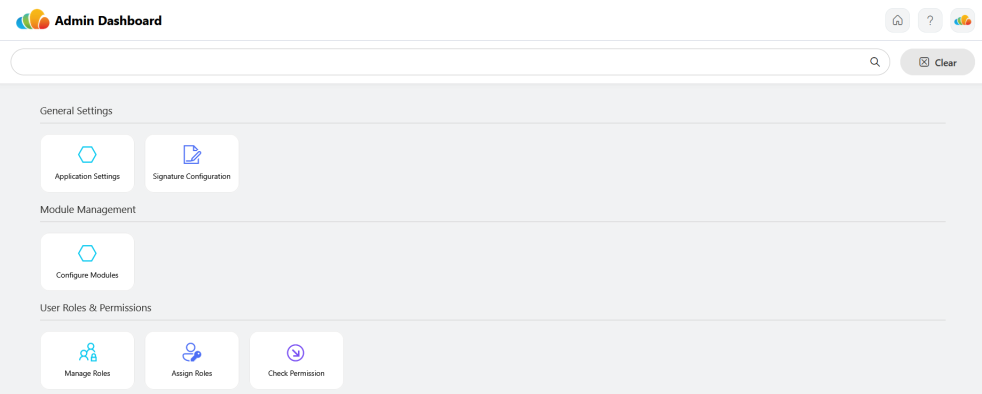
4.2 Administrative Guide
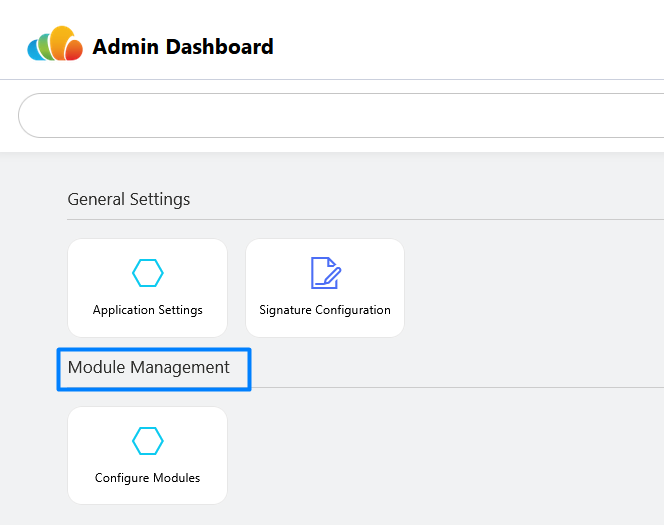
4.2.1 General Settings
The General Settings section provides administrators with key configuration options to tailor the system behavior and ensure compliance.
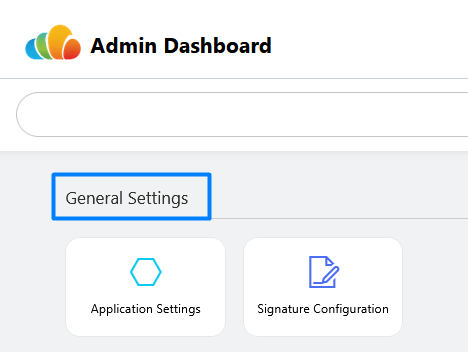
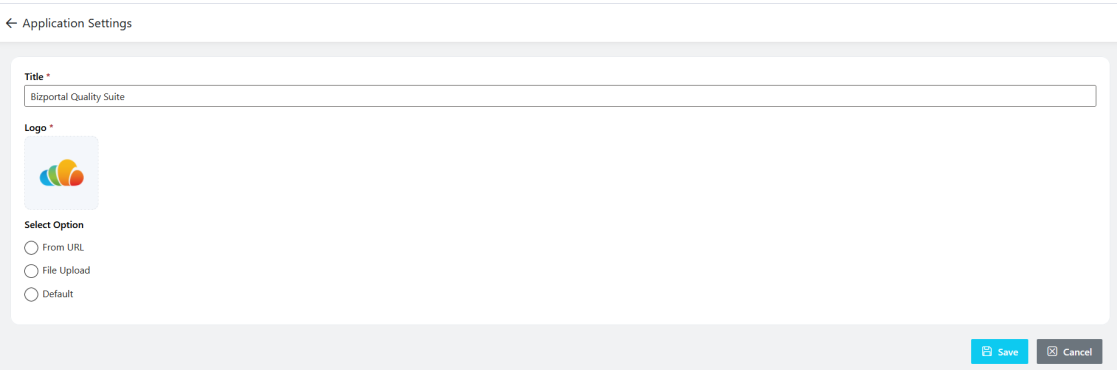
Application Settings:
- Customize global configurations such as title and logo for your QMS Site.
Signature Configuration:
- Set up and manage digital signature requirements used across the system for secure record validation, ensuring alignment with compliance standards.
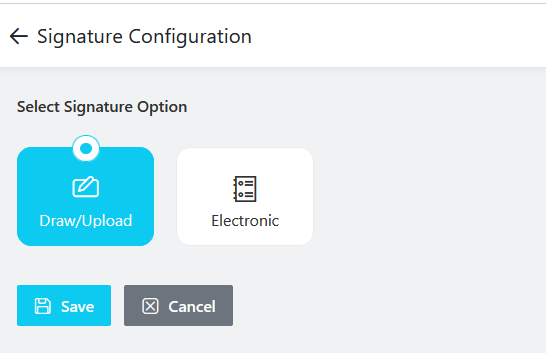
Note: Secure your actions with one of two signature types: a manually drawn/uploaded signature or an electronically verified signature through AD Authentication.
Refer to detailed guidelines for signature configuration on your portal.
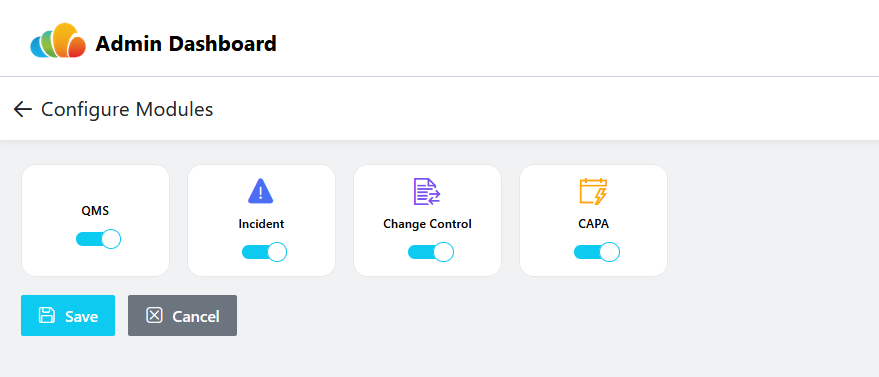
4.2.2 Module Management
The Module Management section allows administrators to control which QMS modules are active.
Configure Modules:
- Enable, disable, or customize available QMS modules such as Incident Management, CAPA, Change Control, and more. This section ensures that only relevant modules are visible and properly configured according to organizational needs.
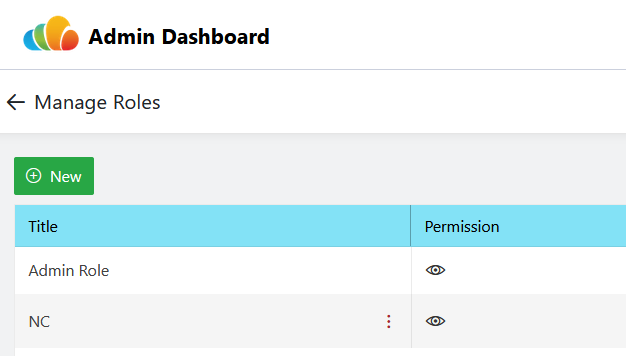
4.2.3 User and Role Management
The User Roles & Permissions section enables administrators to define, assign, and manage user access across the QMS platform.
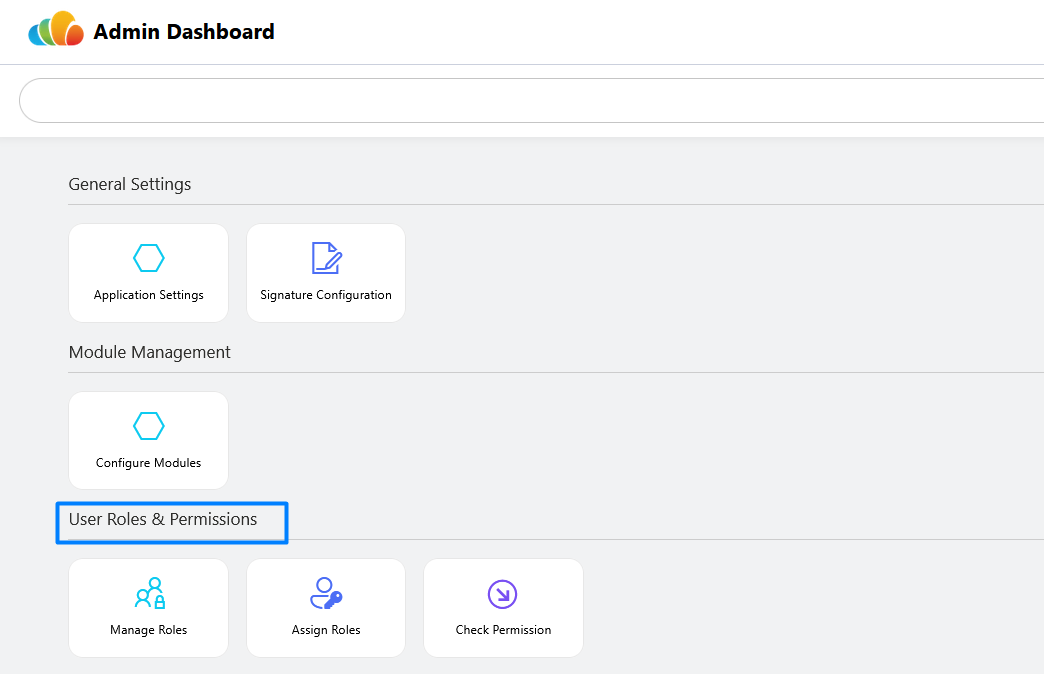
Manage Roles:
- Create and configure role types with specific access levels tailored to organizational policies.
- Click on New and Give role name and select module and select permission as per requirements. Below are screenshots for your reference.
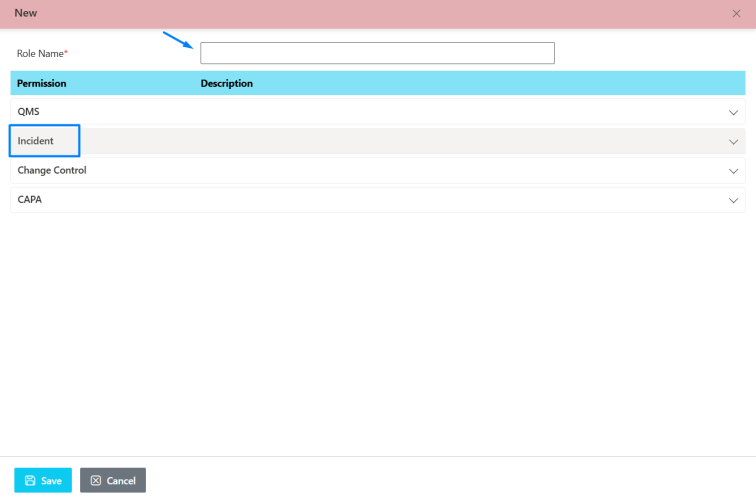
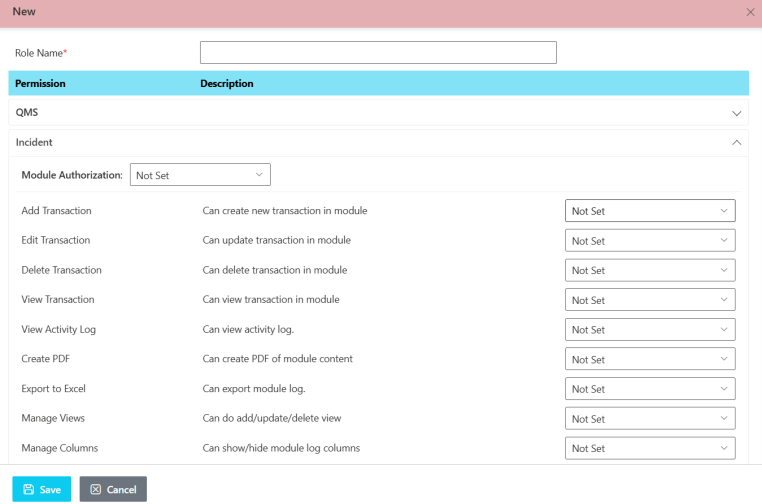
Note: For each permission type, there are three options: Not Set, Set, and Deny. Deny is always the highest preference.
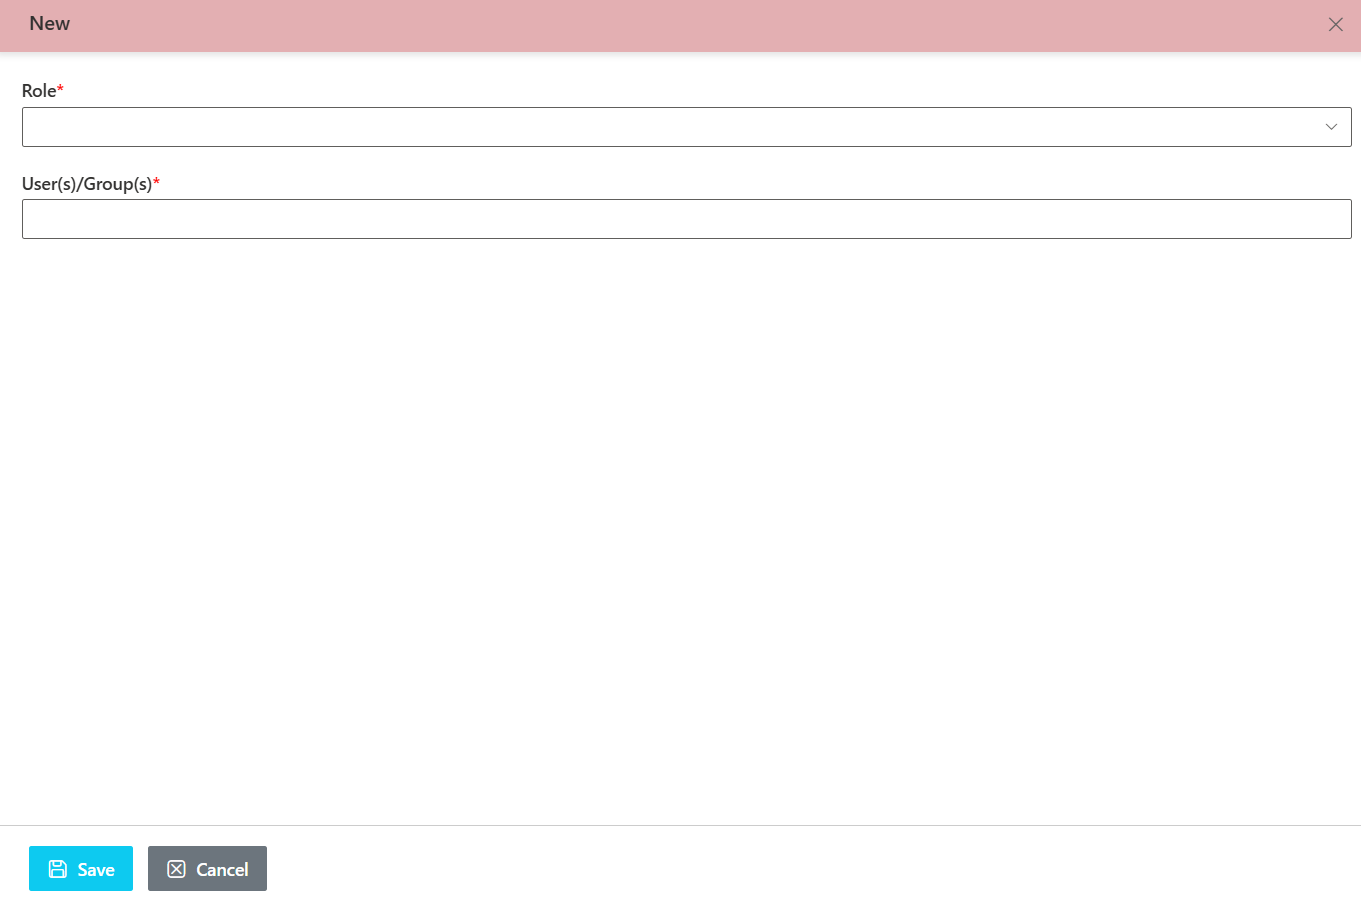
Assign Roles:
- Allocate predefined roles to users, ensuring the right individuals have appropriate access to relevant modules and functions.
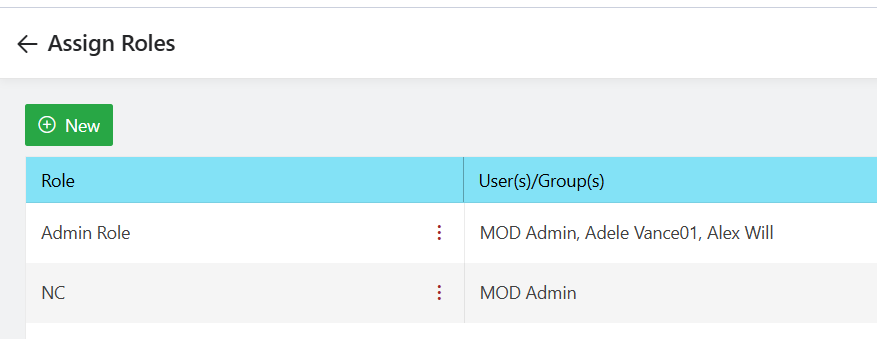
- To create a new role assignment, click “New,” choose the role, assign the user in the relevant fields, and hit “Save.”
Check Permission:
- Verify and review the permissions assigned to specific users or roles to maintain transparency and security.
- Click on Check Permission under User Roles & Permissions.
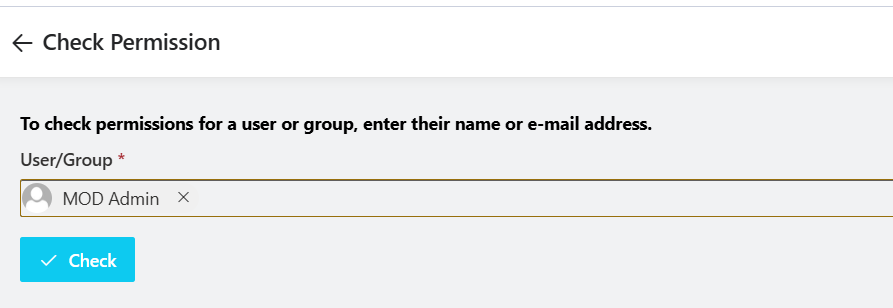
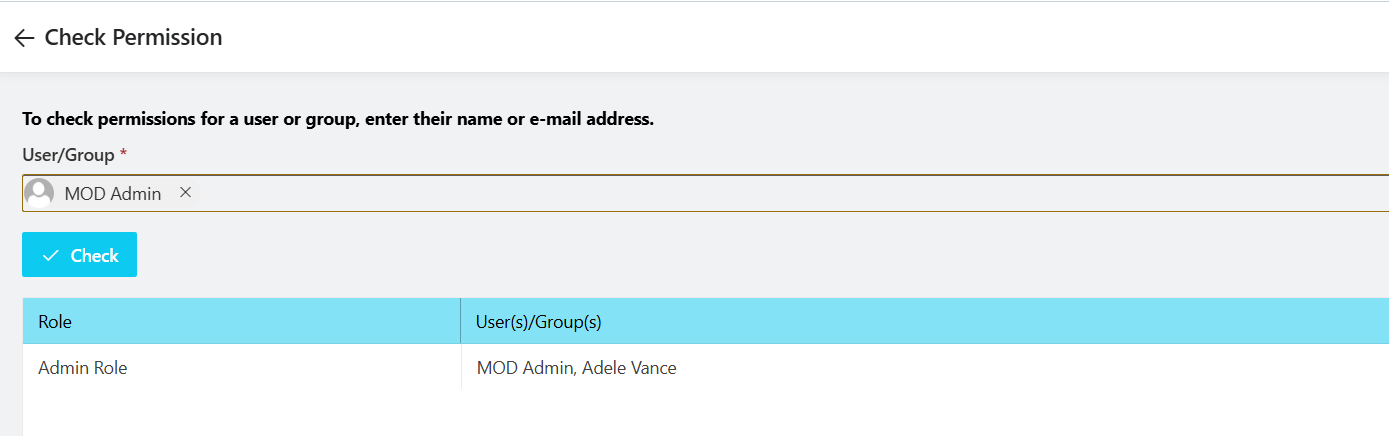
- To check user permissions, type in the username, add it, and click on “Check.”
- It will display the user’s role across the sites, refer below screenshot.
4.2.4 Manage Lists
The Manage Lists section allows administrators to add, edit, view, and delete the master data that’s used across various modules.
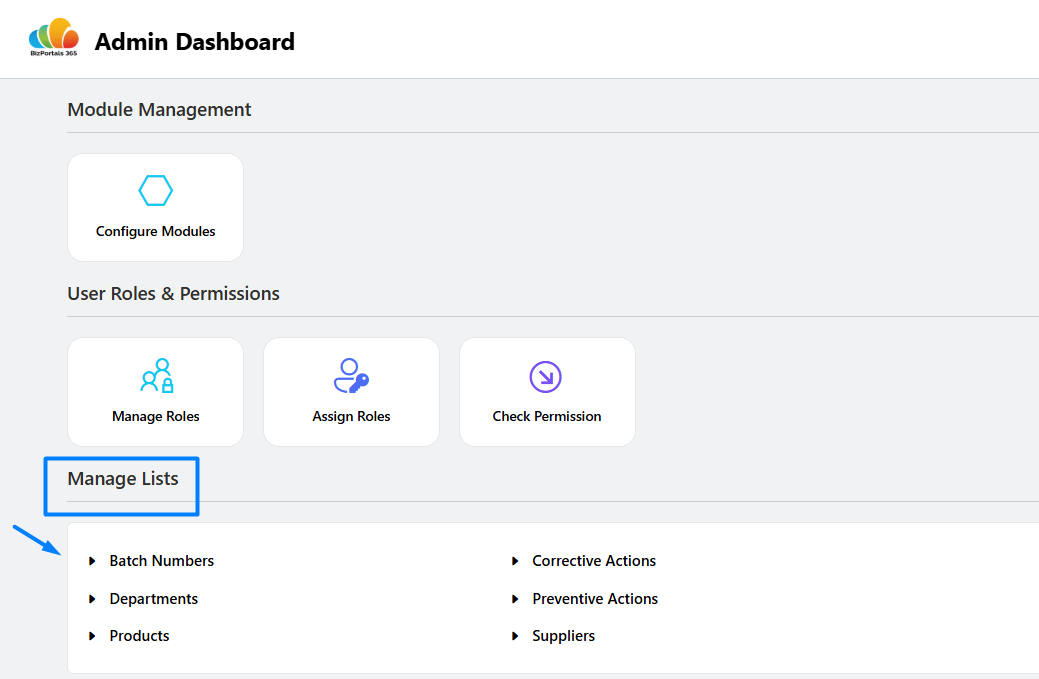
- To view the details of a list, simply click on it.
- This section displays the records within the list. Administrators can add new items by clicking “New” and then saving.
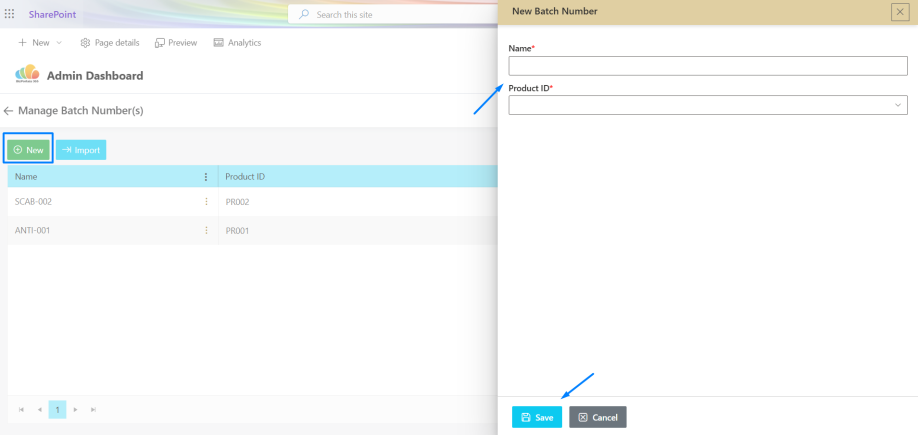
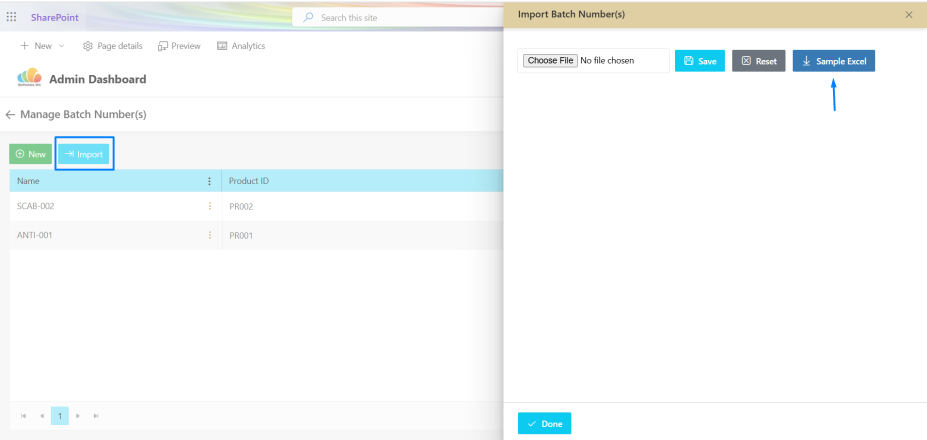
- Administrators can also bulk import data using the provided template. (See screenshots below.)
- You’ll see the data for the selected list displayed here. For instance, the screenshot below shows Batch Number(s).
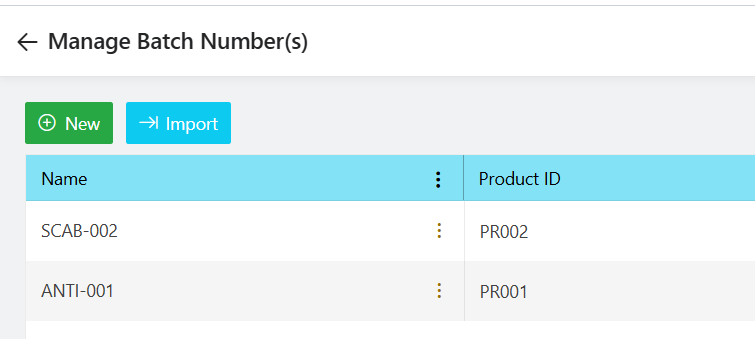
- You can add new data and import bulk data for the other lists shown in the screenshot above using the same method.
4.2.5 Notifications and Alerts
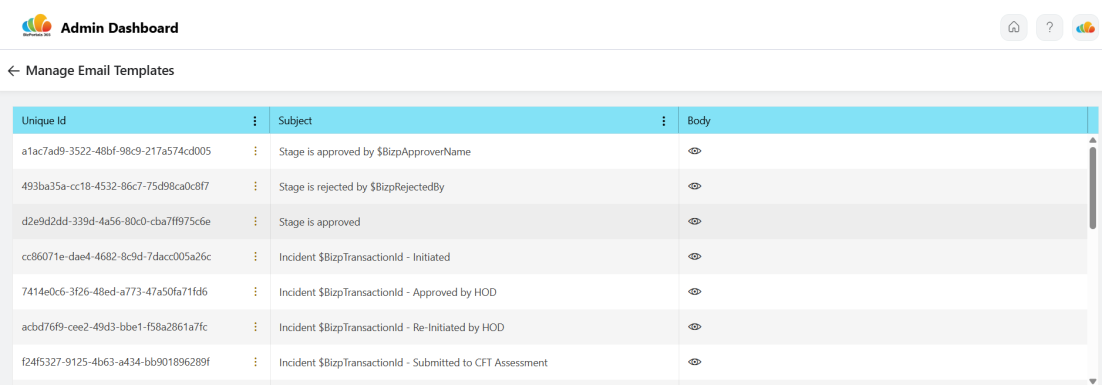
The Notifications and Alerts section lets administrators update the existing email notification templates for specific modules.
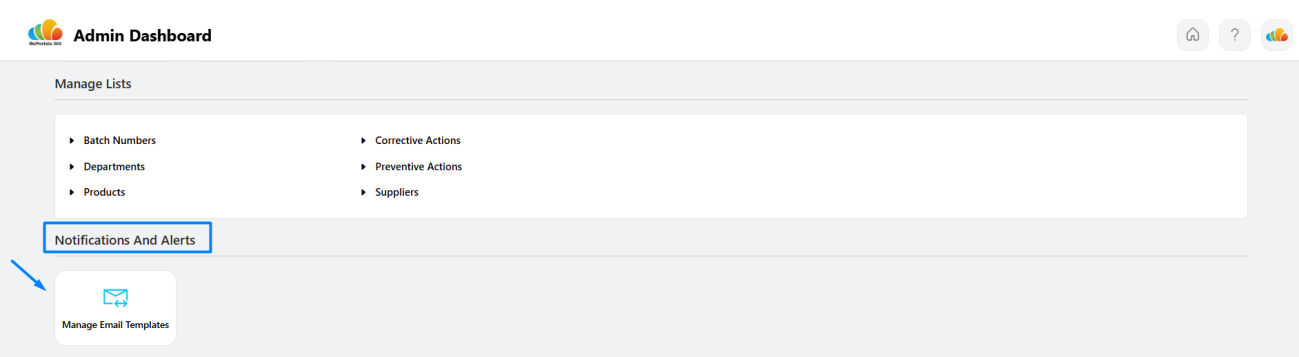
- Administrators can simply click “Manage Email Templates” to view the existing templates.
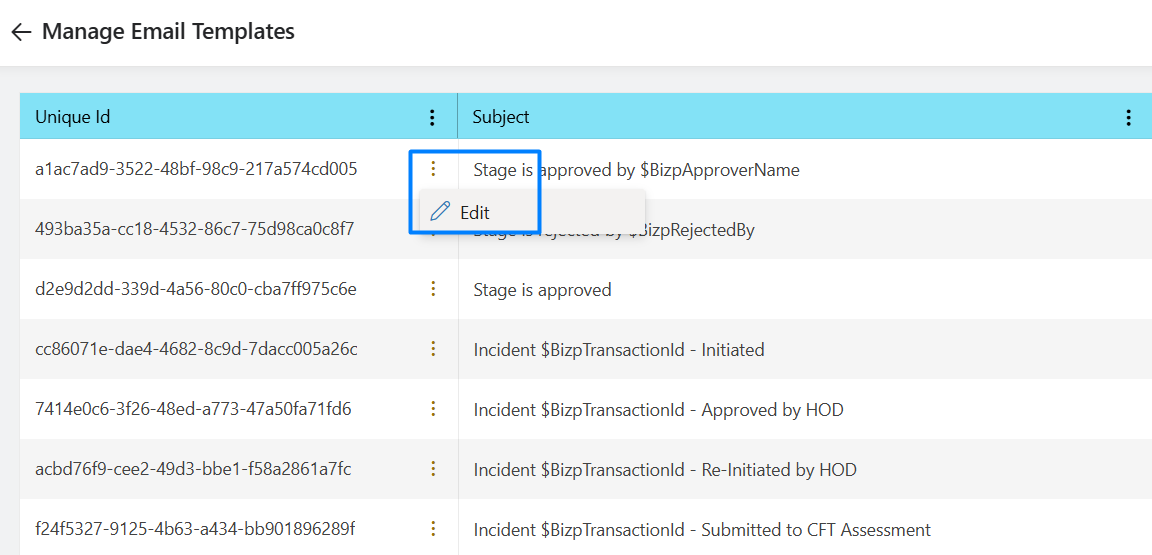
- To edit an existing template, click the ” ⋮” icon and then select “Edit.” It’s recommended not to modify any parameters.
- To add a new template contact us at support@bizportals.com for further template configuration and details.
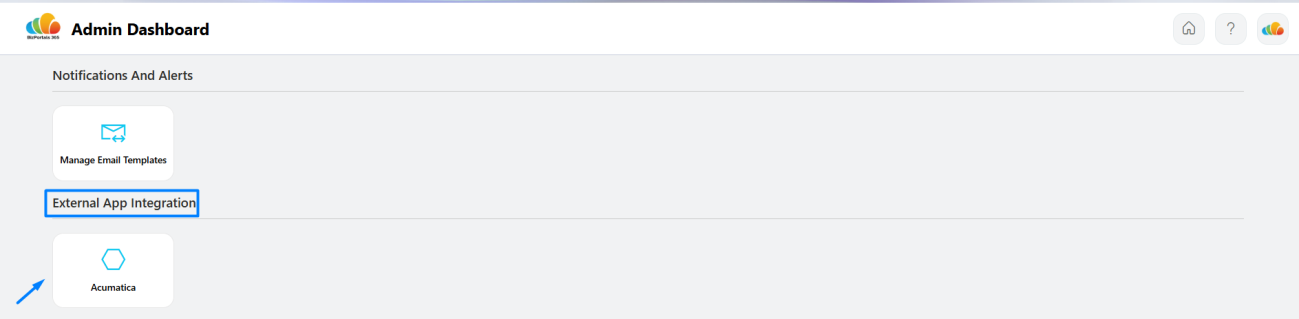
4.2.6 External App Integration
The External App Integration section allows administrators to configure settings for various ERP systems. BizPortals QMS supports integration with Acumatica, SAP, and other ERP solutions.
- Contact us at support@bizportals.com for further ERP Integration details.
4.2.7 Manage Employee Profile
Administrators use the Manage Employee Profile section to manage all organizational users needing BizPortals QMS. For a user to access the system, they must be added to this list and have at least member permissions on the SharePoint site collection hosting BizPortals QMS.

- Click on Manage Employee Profile as shown in above screenshot.
- This will open the Employee Profile list, displaying all employee names.
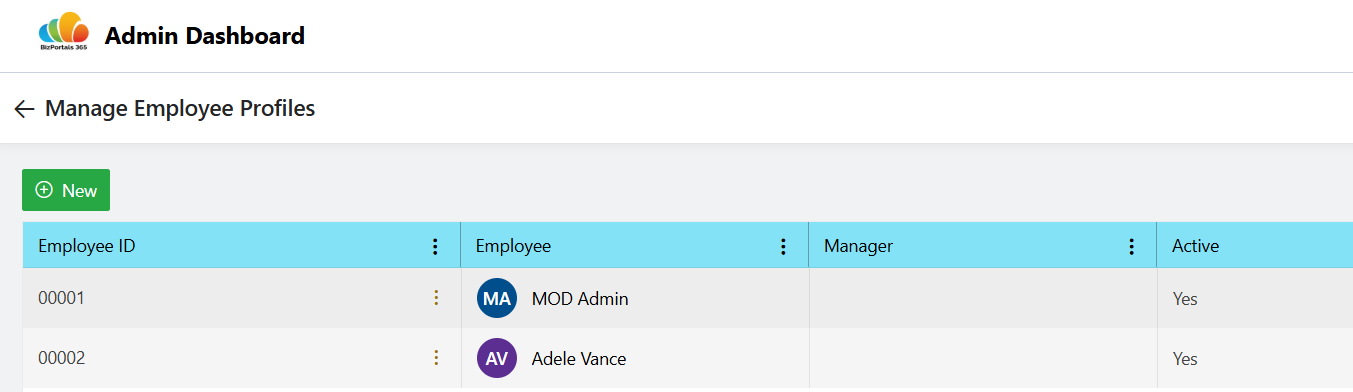
- To add a new user to this list, select the “New” option.
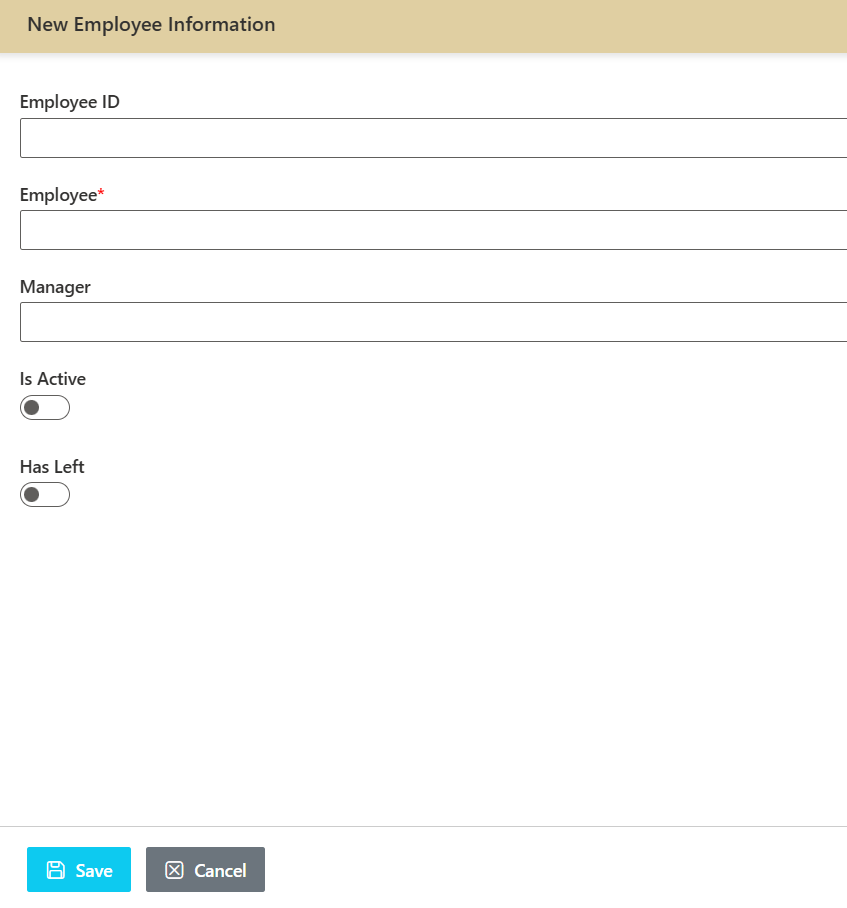
- Fill in the user details and save as shown in the screenshot above and be sure to enable “IsActive” so the user can access the QMS Portal.
- Please note, the user’s activation in this list depends on your subscription and available licenses.
4.2.8 List Provisioning
The List Provisioning section is applicable for BizPortals QMS core module – Incident, CAPA and Change Control. It’s not recommended to make any changes here. This is for our development use. Please contact at support@bizportals.com for further details related to this feature.
4.3 Creating and Managing Records
4.3.1 Adding new records within modules
- To add a new Incident, CAPA, or Change Control in the QMS module, users can navigate to the respective section via the left navigation menu and select the “New” option to open the corresponding form page.
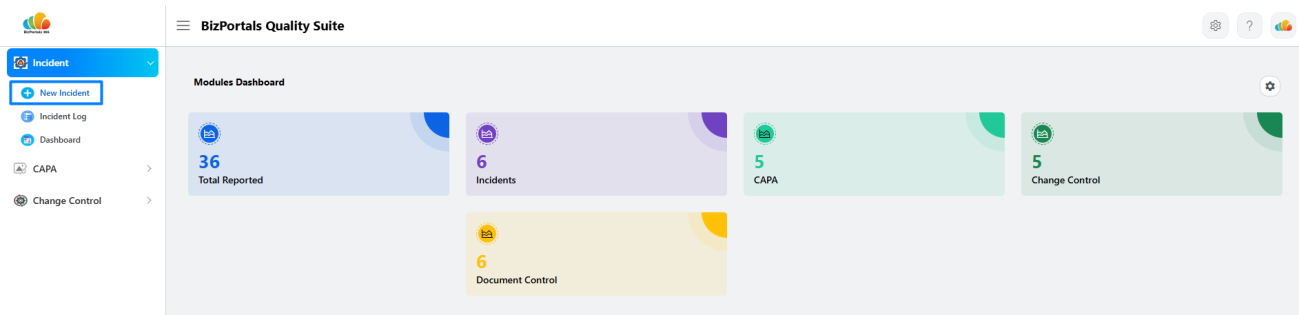
- It will open a new form page for the corresponding module. Refer to the sample screenshot of the New Incident page—enter the required details, submit the form, and continue with your process flow.

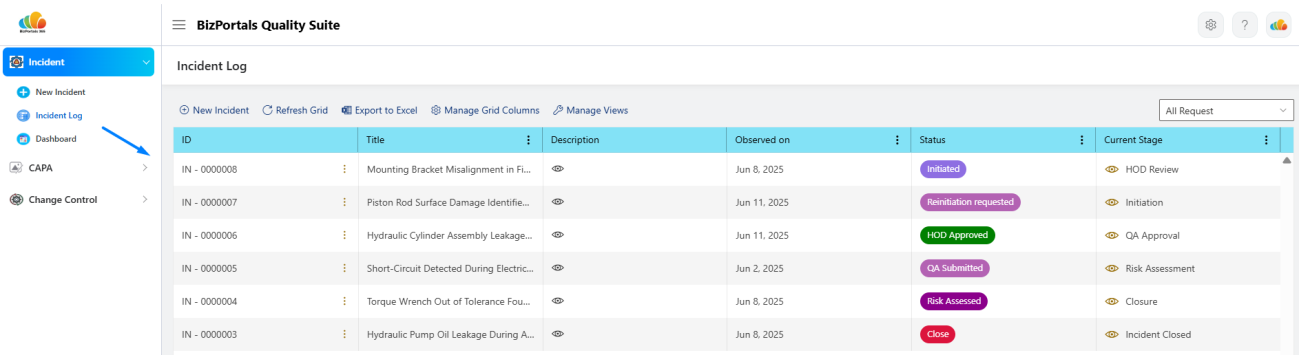
4.3.2 View existing records within modules
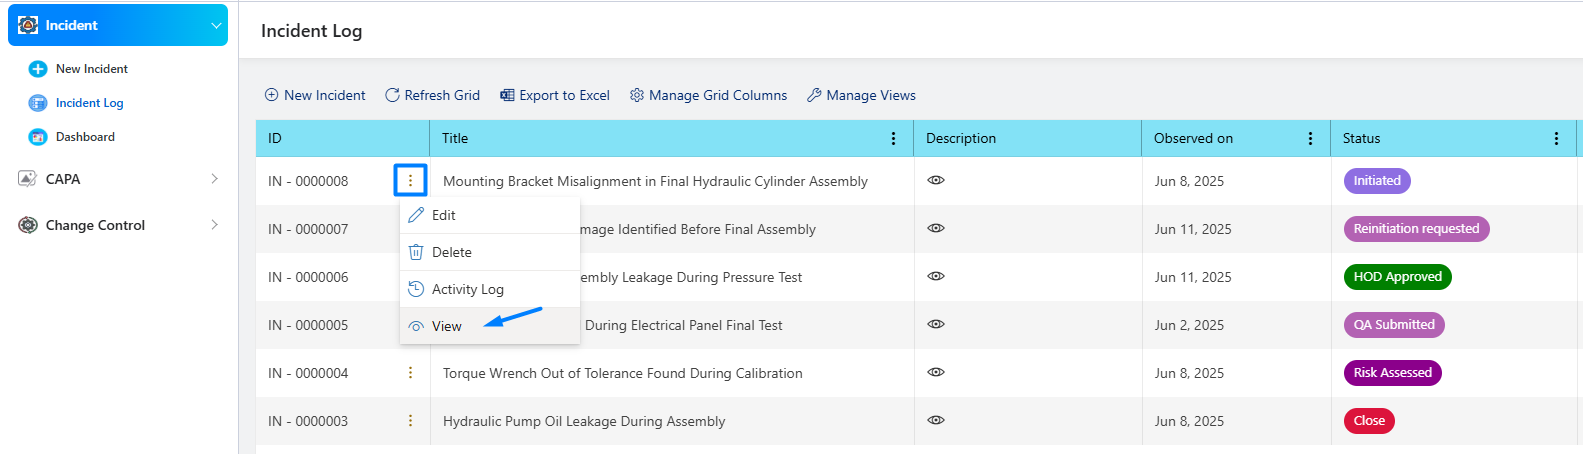
- To view an existing Incident, CAPA, or Change Control in the QMS module, users can navigate to the respective section and access the log page from the left navigation menu.
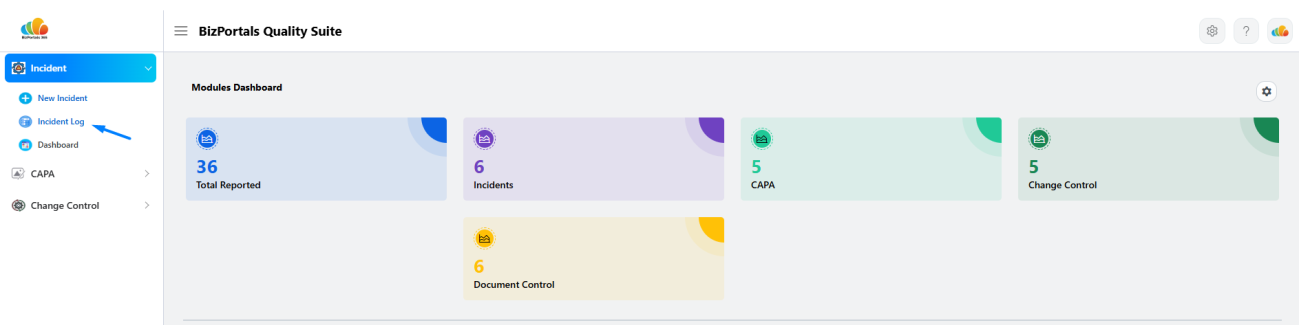
- Clicking the Incident, CAPA, or Change Control log link will open the corresponding module’s log page, displaying all previously created records.
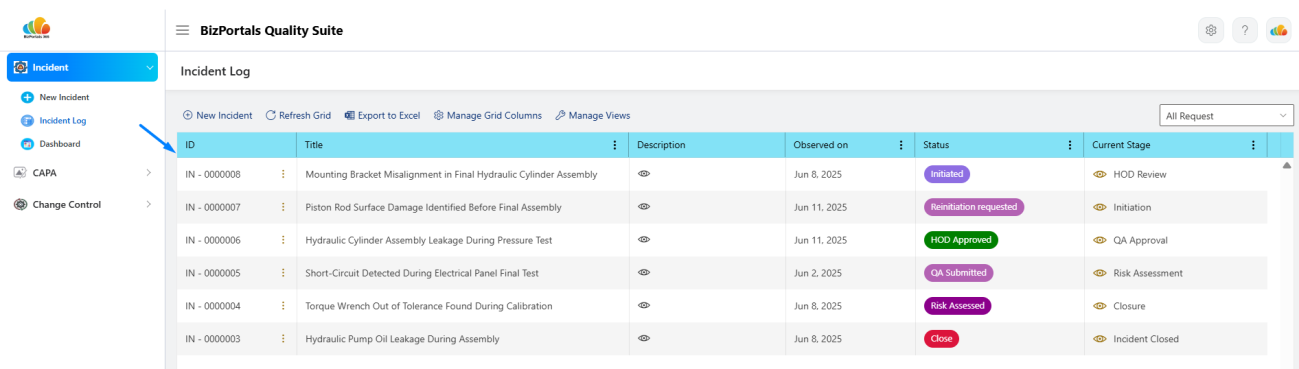
- Users will be able to view records based on the permissions assigned to them. If they have the necessary access, they can hover over the “⋮” icon next to a specific item in the log and click on the “View” option to see its details.
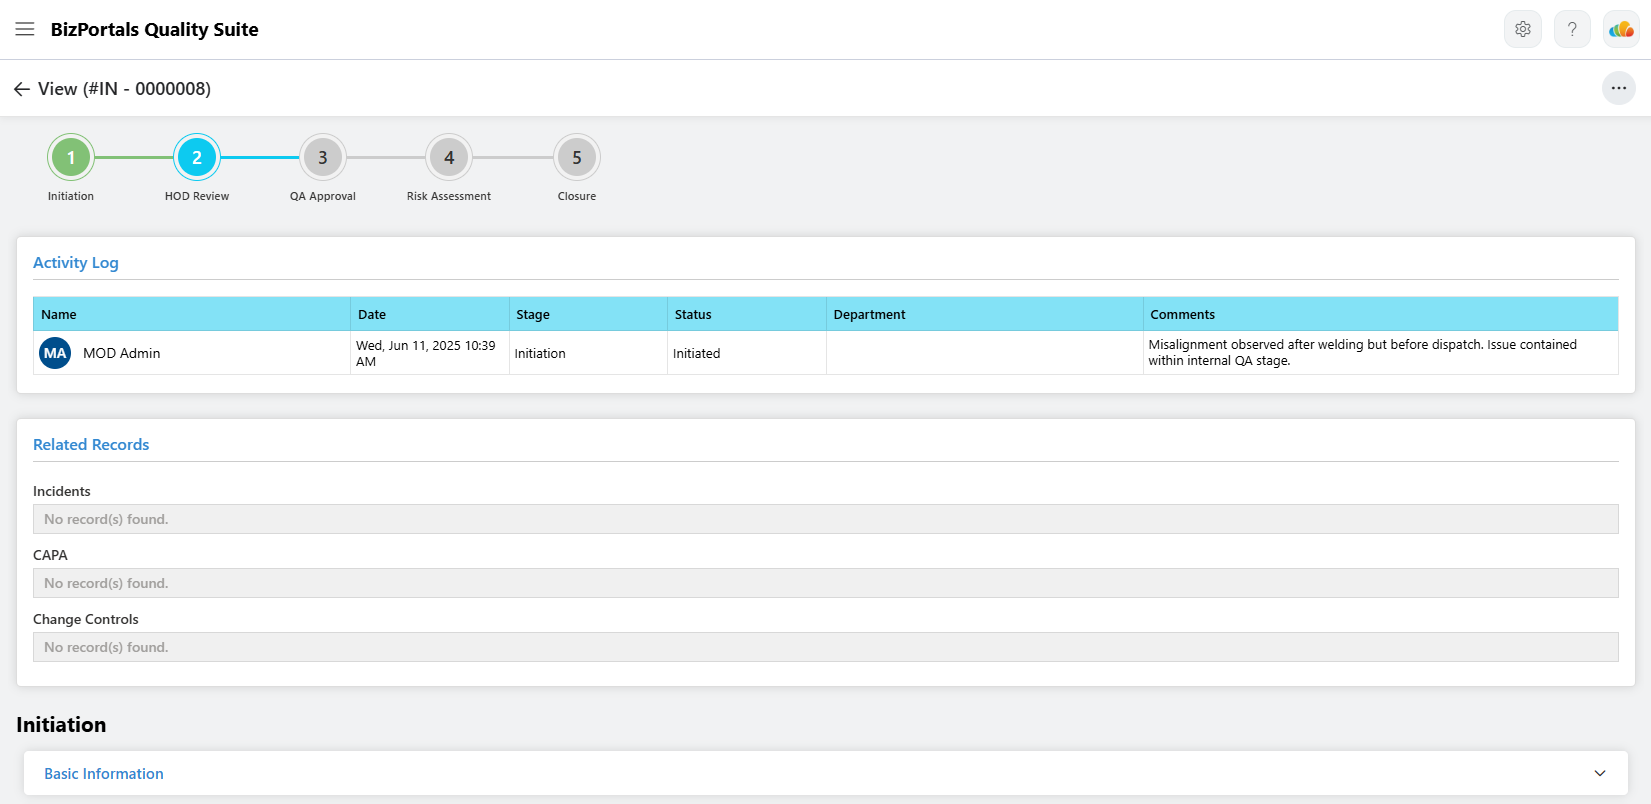
- The corresponding item’s view page will open upon clicking, allowing users to scroll down and view the complete details.
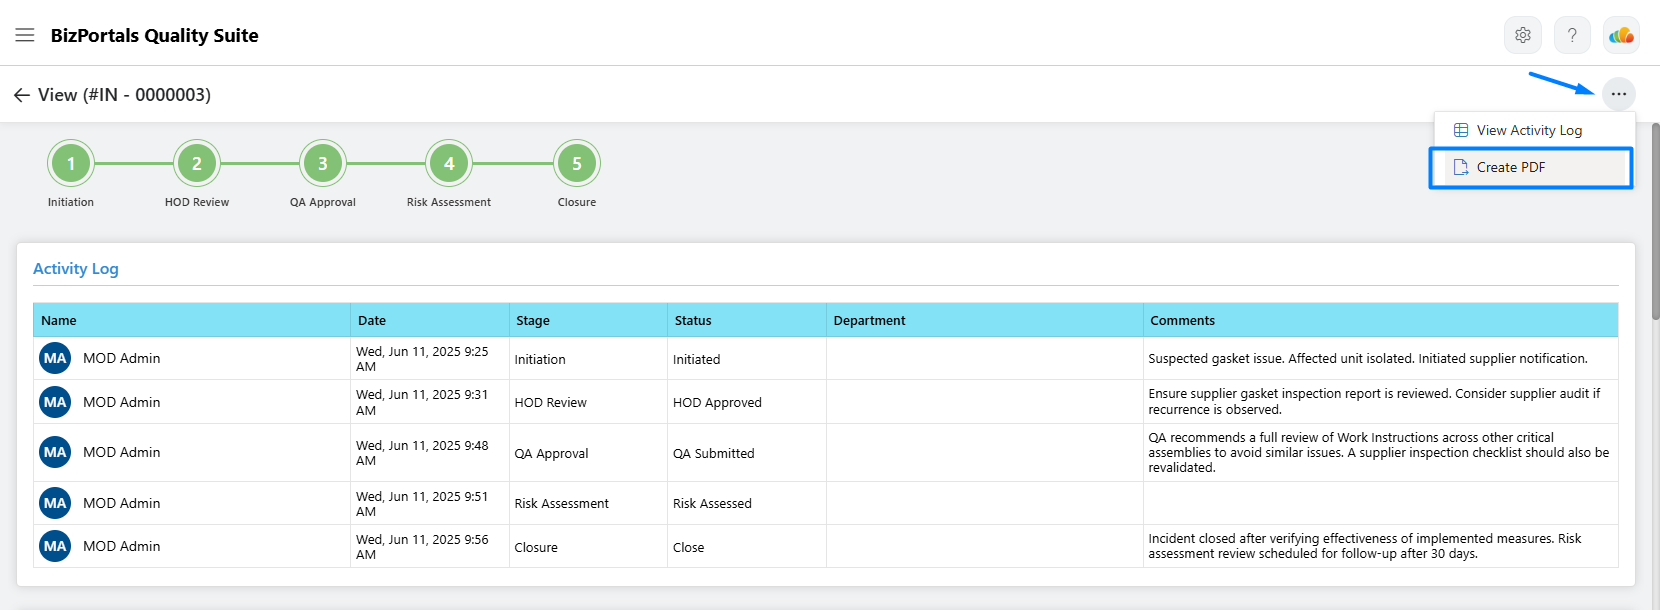
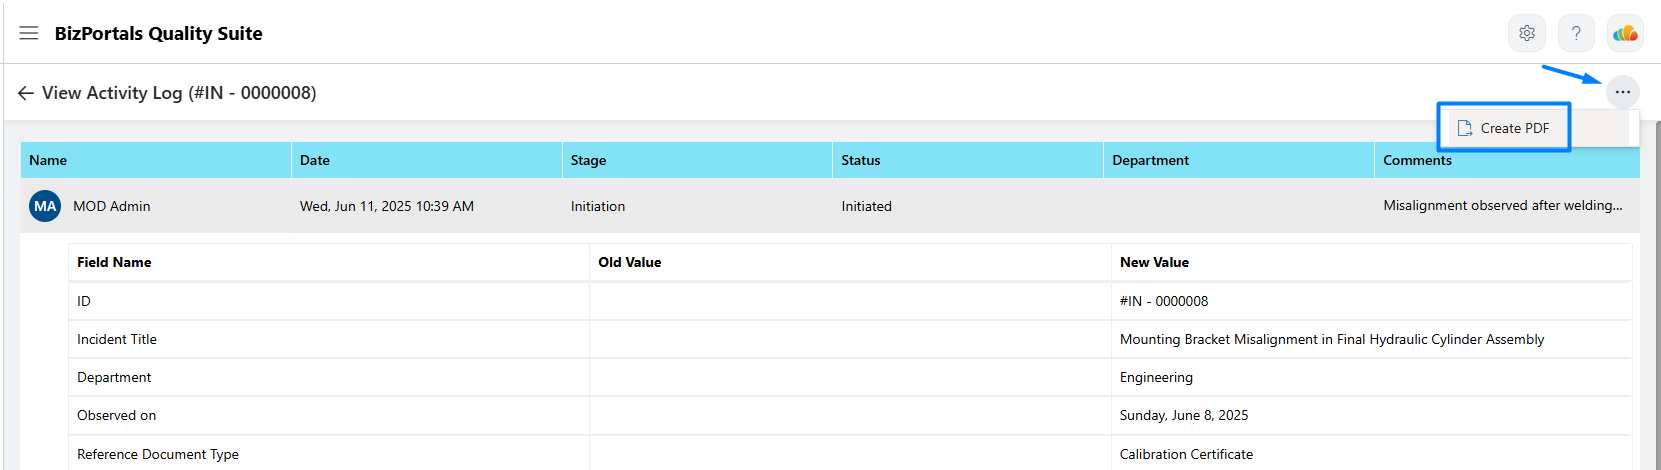
- Users can create a PDF of the complete transaction by clicking the icon highlighted in the screenshot below.
4.3.3 Edit existing records within modules
Users will be able to edit records based on the permissions assigned to them. If they have the necessary access, they can hover over the “⋮” icon next to a specific item in the log and click on the “Edit” option to see its details.
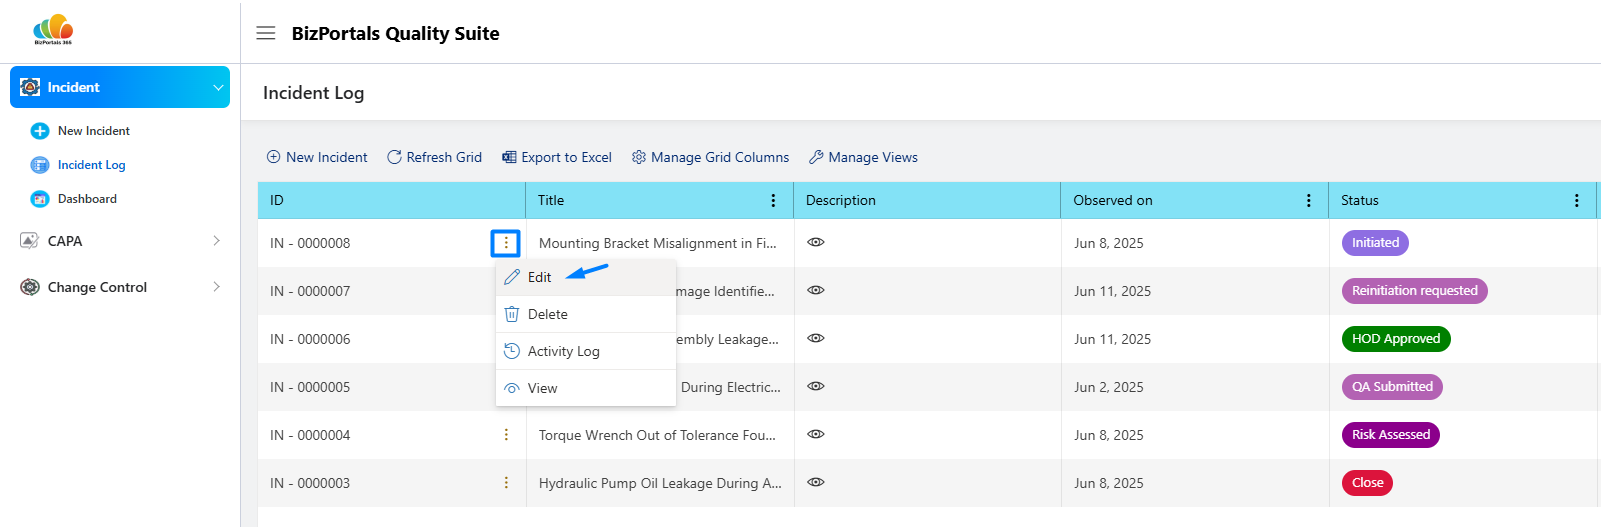
- The corresponding item’s edit page will open upon clicking, allowing users to scroll down and edit the complete details.
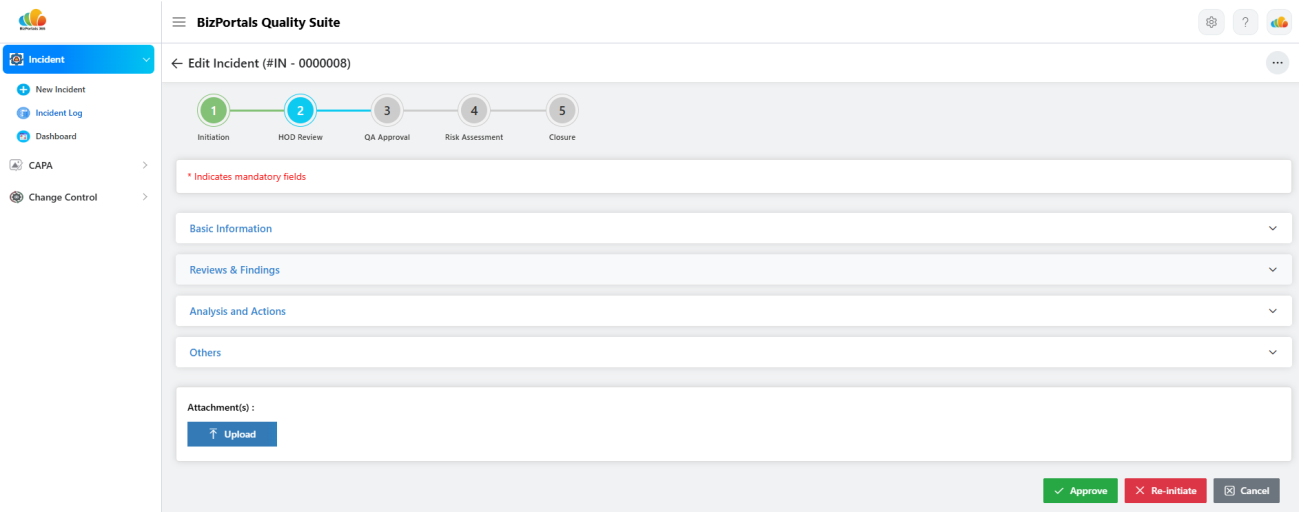
Note: Users can also upload supporting attachments for this record, which will be securely stored in the associated SharePoint document library.
4.3.4 Delete existing records within modules
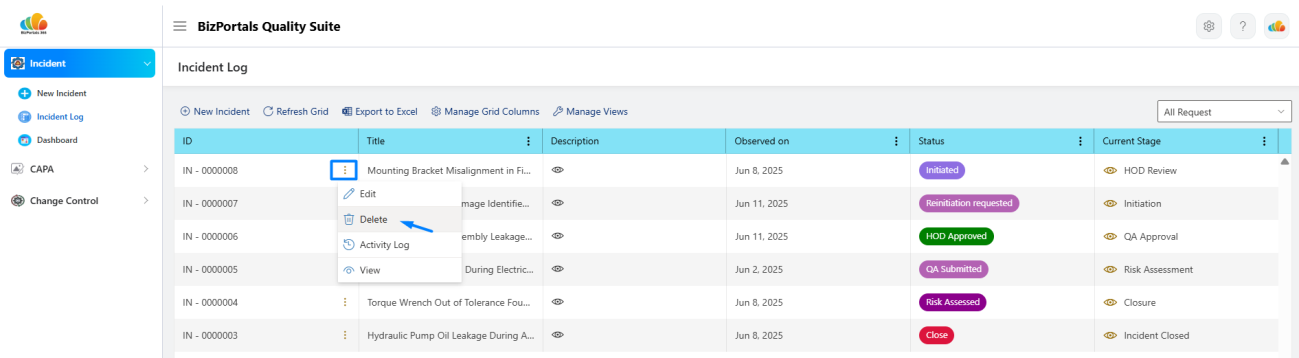
- Users with the appropriate permissions will have access to delete options and can remove records as needed. To do so, they can hover over the “⋮” icon next to a specific item in the log and select the “Delete” option.
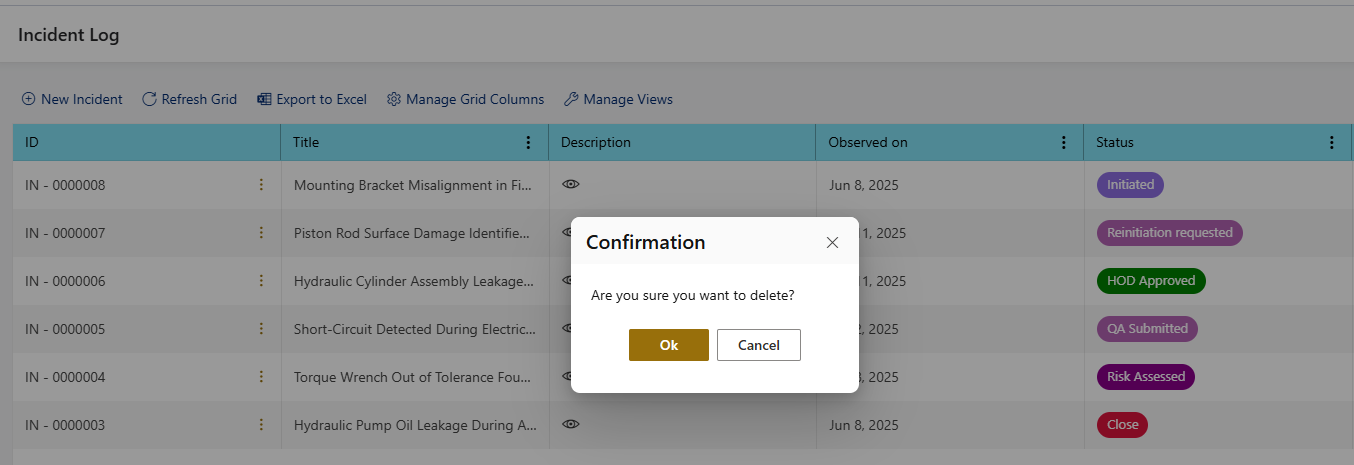
- A confirmation pop-up will appear for the selected item, and clicking “OK” will permanently delete the respective record.
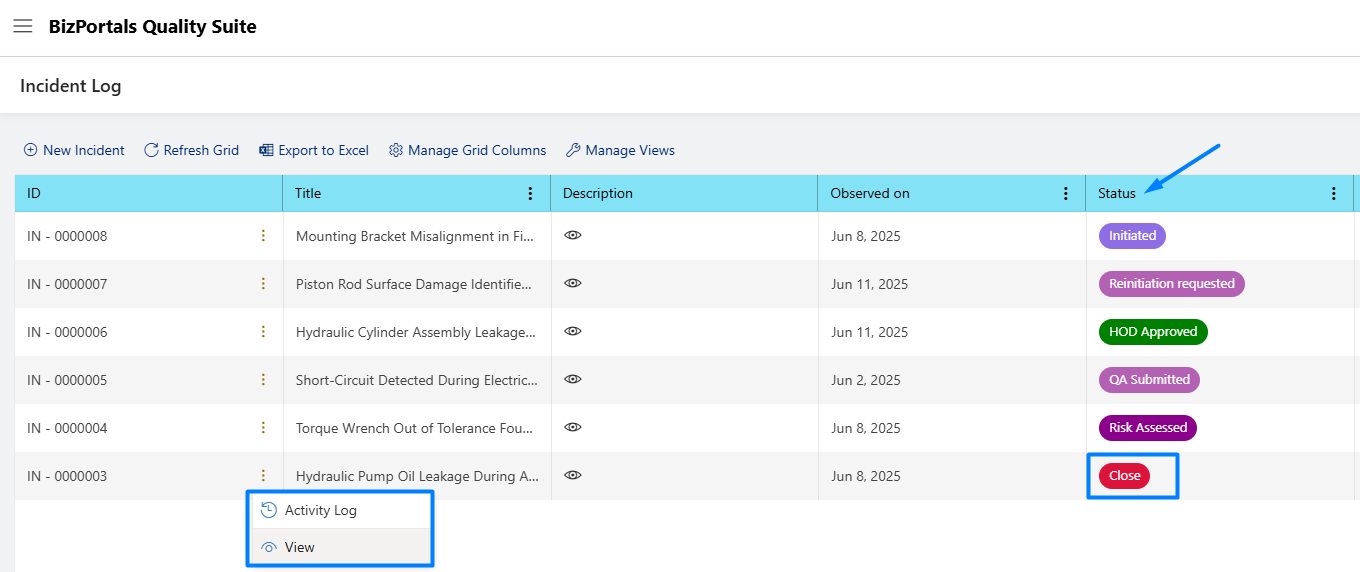
- Users will not see the delete option for items with a status of “Close.”
4.4 Managing Grid Operations
- Clicking the Incident, CAPA, or Change Control log link will open the respective module’s log page along with its grid view.
- Users can perform various actions at the grid level depending on their assigned permissions.
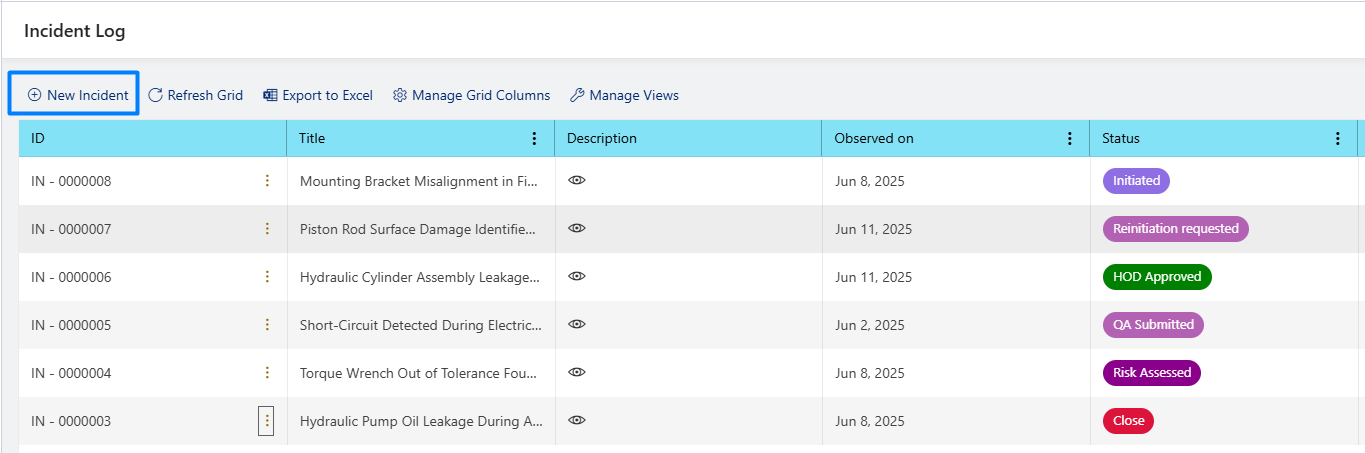
4.4.1 Creation of new item
- Users with the necessary permissions will see the “New Item” option on the respective module’s grid. Refer to the screenshot below for the New Incident option in the Incident Module.
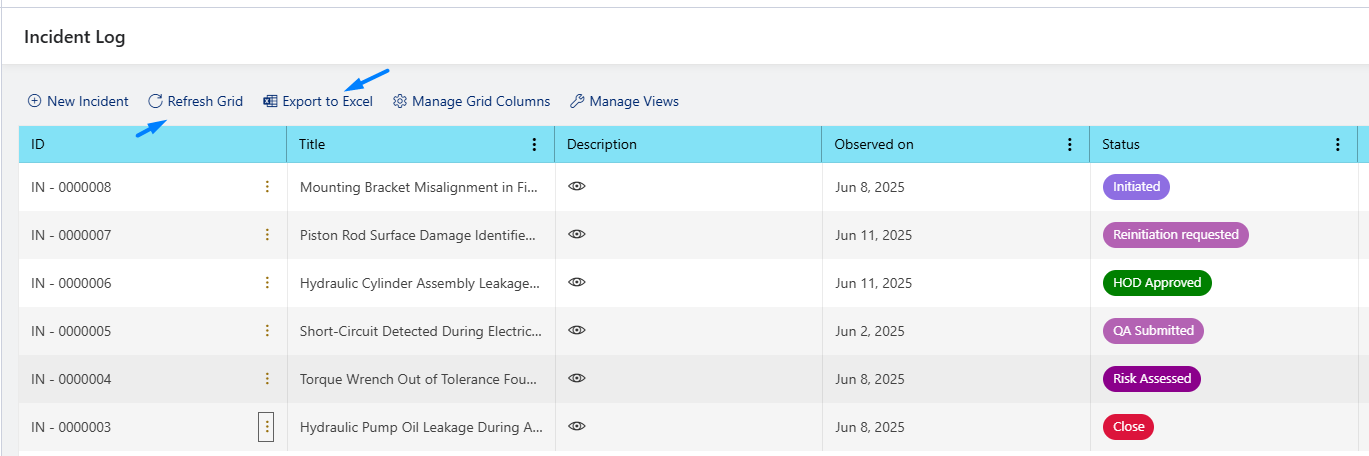
4.4.2 Grid Management
- Users can refresh the grid and export the displayed records to Excel.
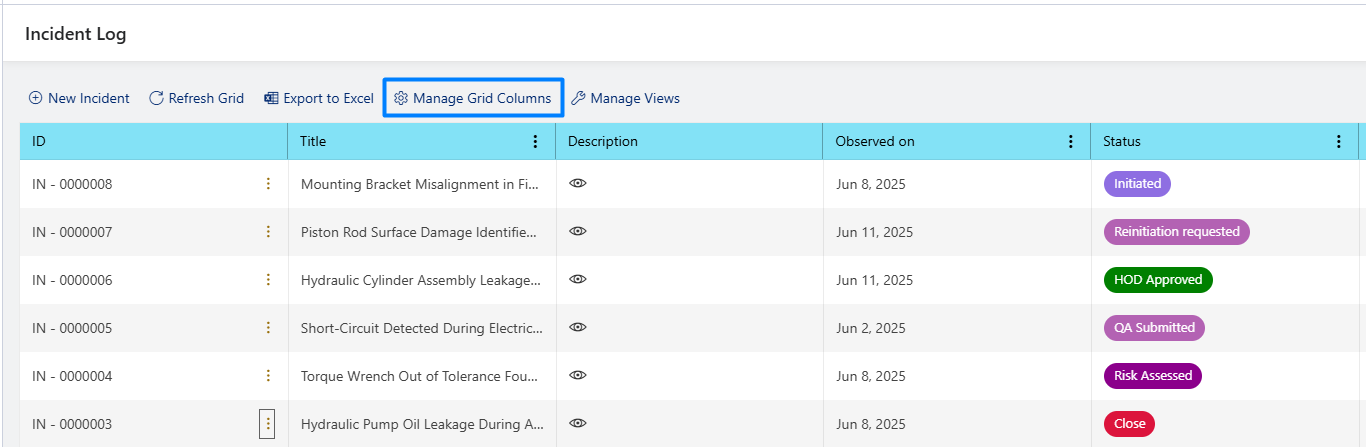
- Users can customize the grid display by selecting which columns to show using the “Manage Grid Columns” feature, as illustrated in the screenshot below.
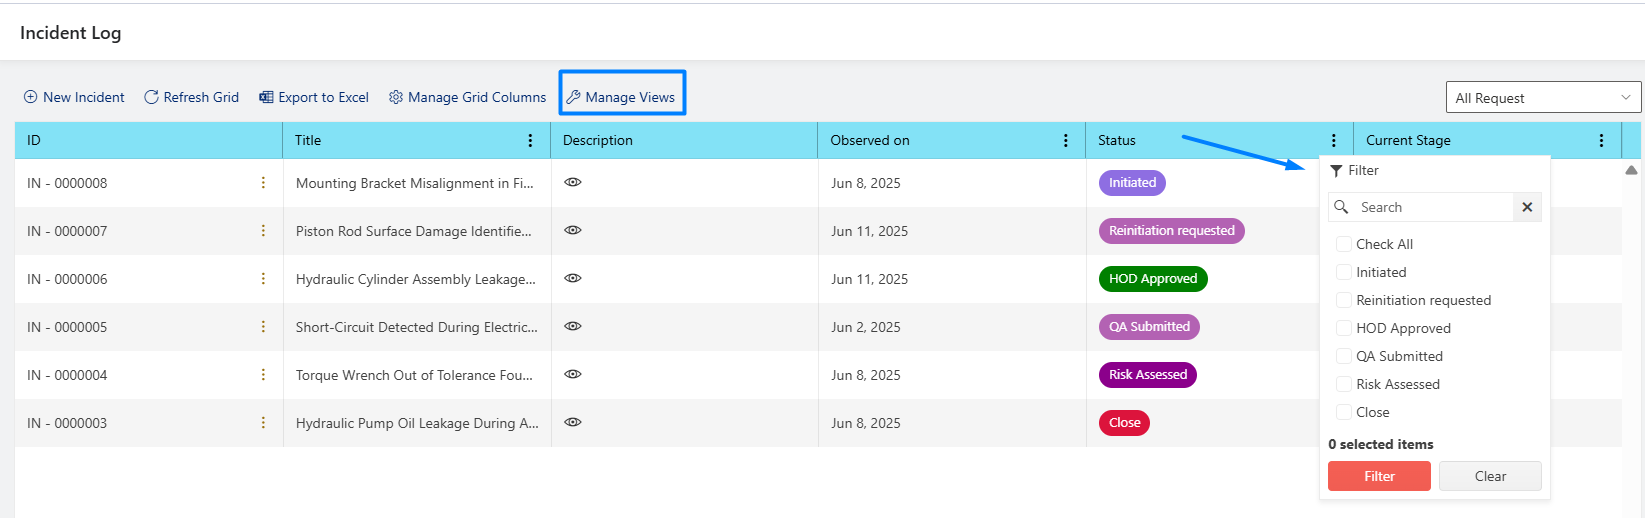
- Users can apply filters to the grid and save them as a new custom view using the “Manage Views” feature.
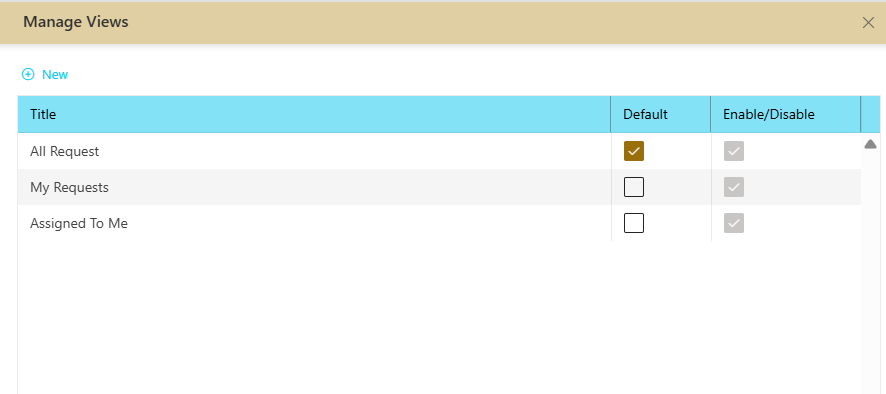
- Users need to click the “New” option to create and save a custom view.
- The newly created view will be available from the drop-down menu, as shown below.
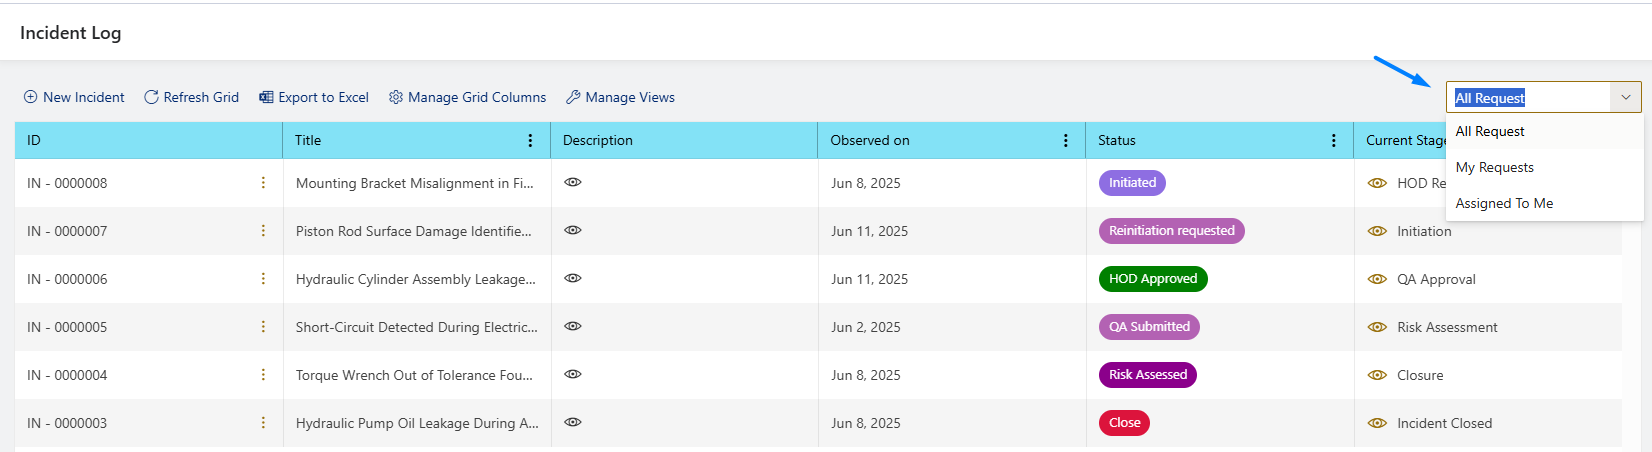
Note: The default view mentioned above cannot be renamed, modified, disabled, or deleted.
4.4.3 Accessing Activity Log
- Users with the appropriate permissions can access the Activity Log for a specific item by hovering over the “⋮” icon next to it in the log and selecting the “Activity Log” option.
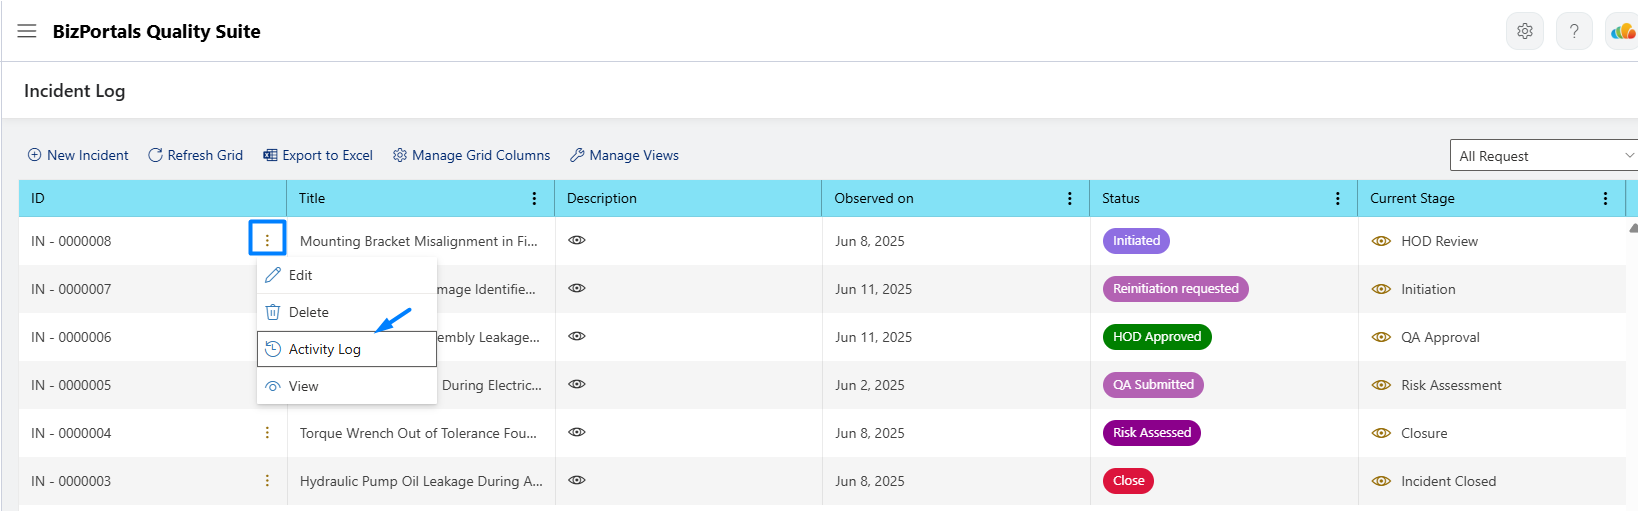
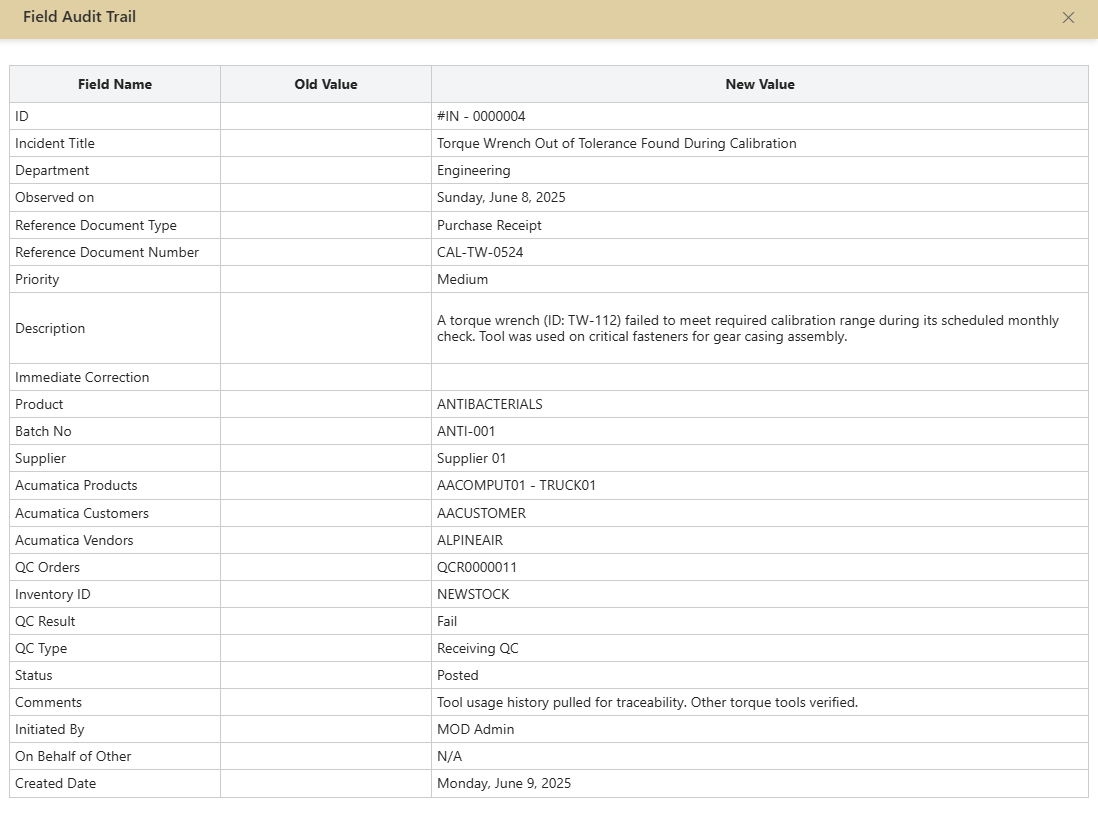
- Clicking the “Activity Log” option will display the detailed field level activity history for the selected item.
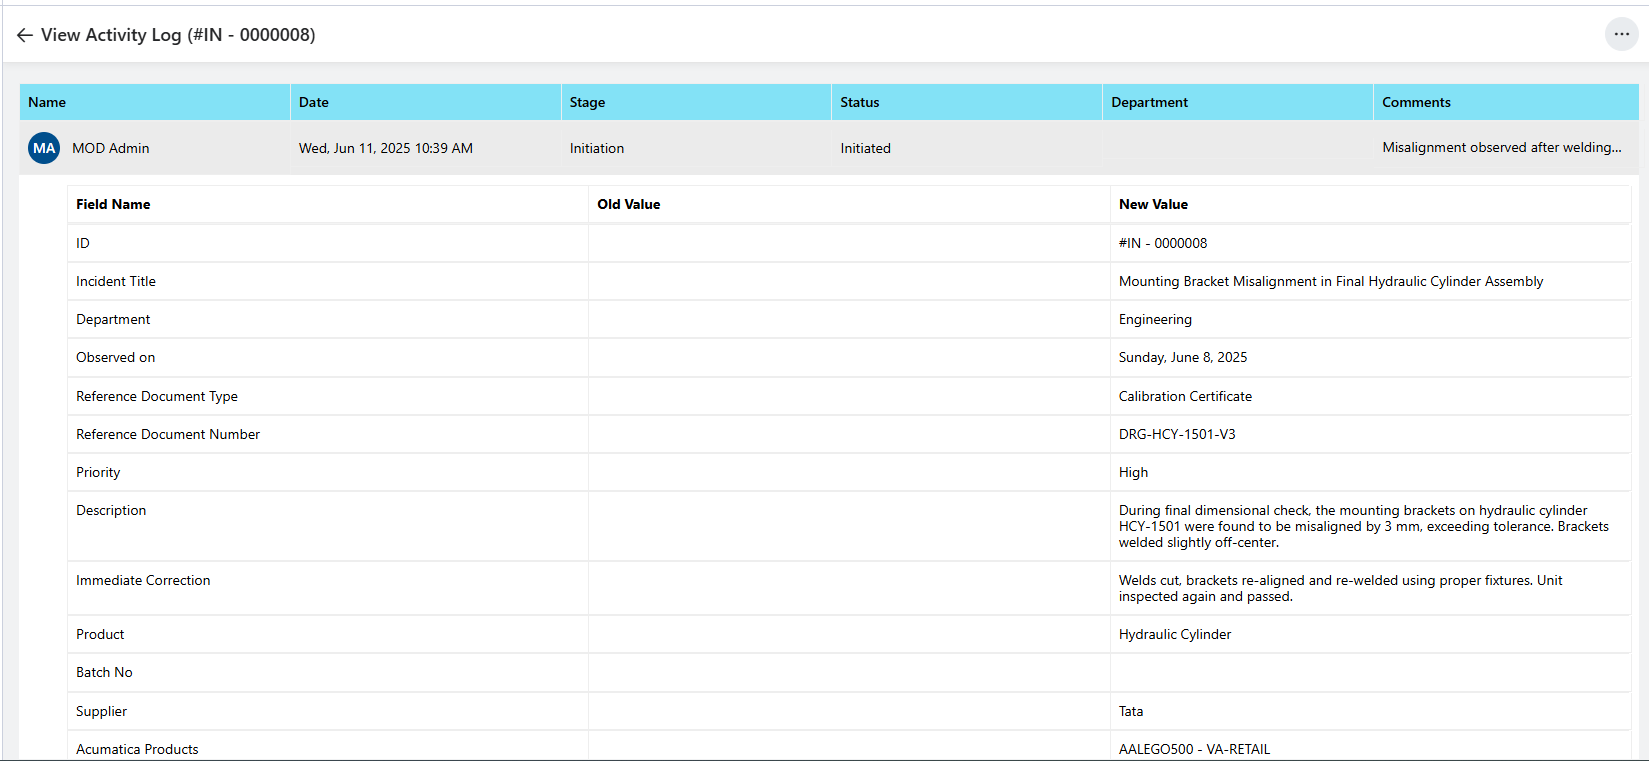
- Users can export the detailed activity log as a PDF using the option highlighted in the screenshot below.
4.5 Module Interlinking
BizPortals QMS application supports seamless module interlinking, allowing users to create meaningful connections between different modules such as Incident, CAPA, and Change Control. This feature enables users to reference related records across modules or within the same module, ensuring traceability, context, and streamlined workflows throughout the quality management process.
- Users need to navigate to the log of the respective module and open the desired item in edit mode > expand Basic Information section and click on Related Records feature as shown below.
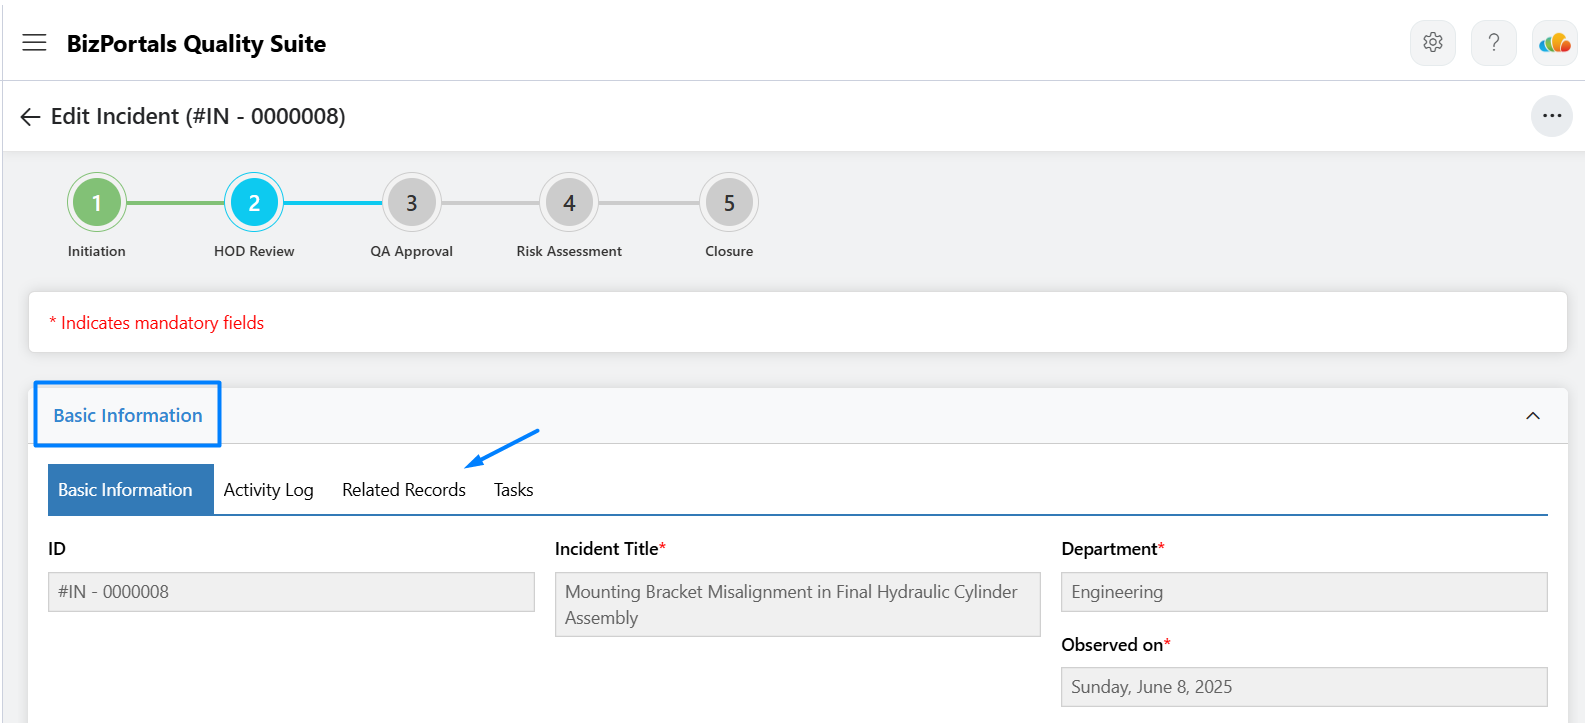
Note: The “Related Records” feature becomes available after the initiation stage (from the second stage onward) and remains accessible until the closure stage.
- Clicking the Related Records feature will display any existing linked records (if available), and users can choose relevant records from same or other modules to link with the current transaction item.
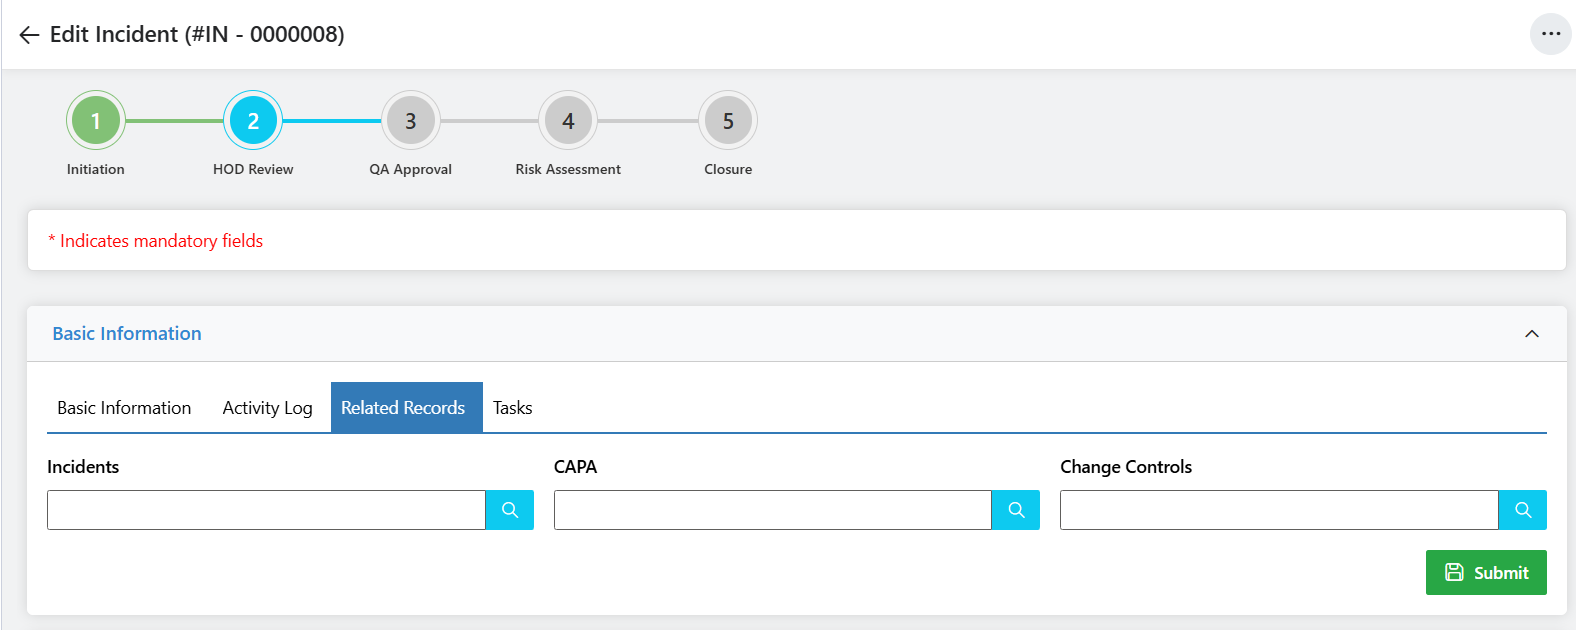
- Users can click on the link control (search icon) next to the respective module field (e.g., Incidents or CAPA) to search for and link related records to the current item.
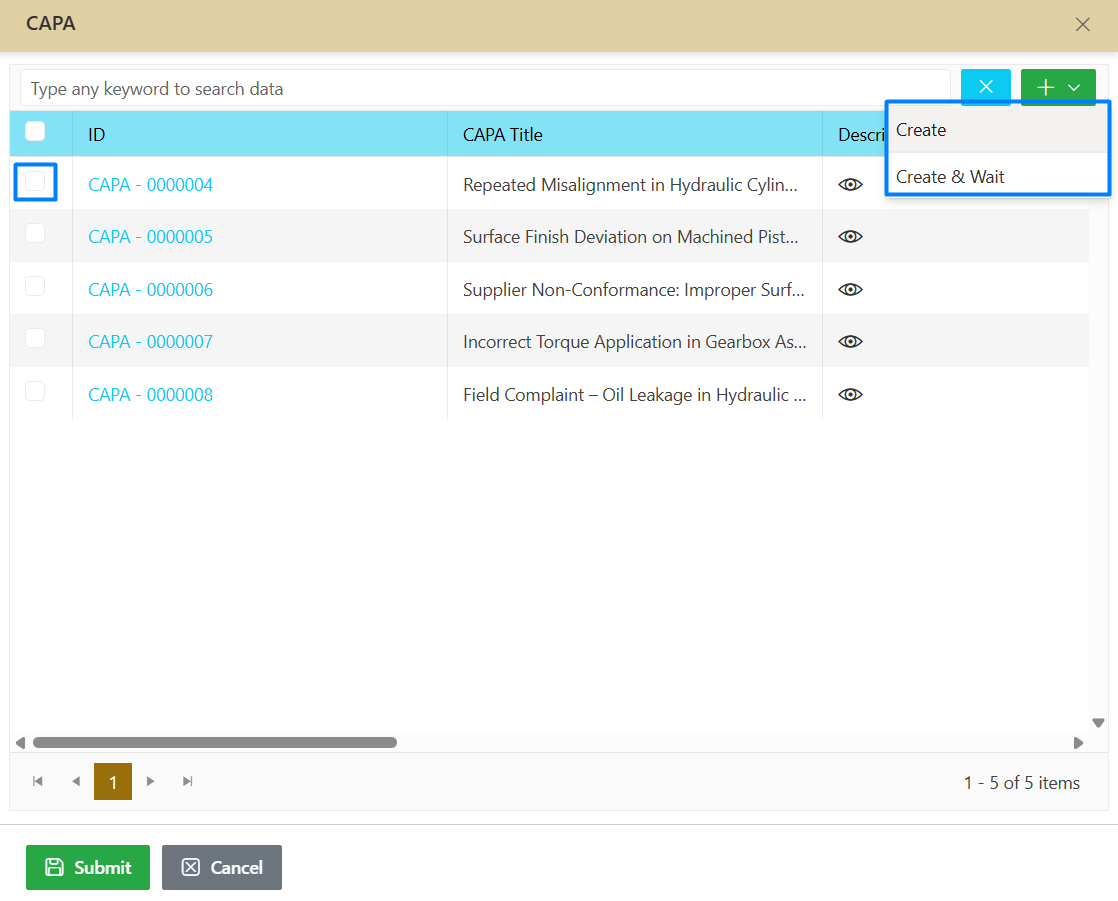
- If a user wishes to link records from the available list, they can do so by selecting the desired items and clicking Submit.
- If a user doesn’t find a suitable record, they have the option to create a new one using the available feature “Create” shown in the screenshot above.
- If a user creates a new record using the “Create” option, the newly created item will be automatically linked to the current transaction, allowing the user to continue and proceed toward closure.
- If a user wants to pause the current transaction until the newly created record is closed, they can use the “Create & Wait” option shown in the screenshot above. In this case, the current transaction cannot be closed until the linked record is successfully completed.
- Users can view related records and referenced transactions directly from the respective module’s log grid for each item.
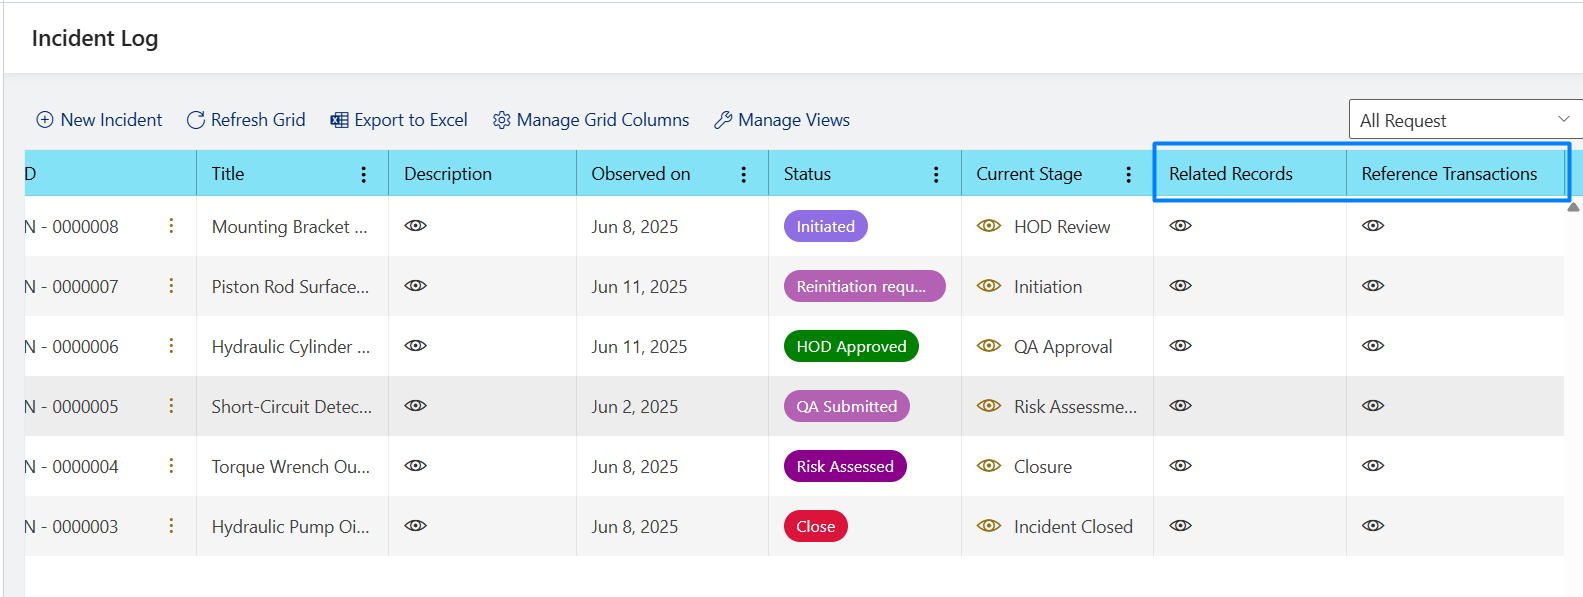
- Related records display the items that are linked to the current transaction.
- Referenced transactions display the records where the current transaction has been linked as a related record.
Note: Modules listed under related records will be displayed based on the user’s assigned permissions.
4.6 Task Management
BizPortals QMS application includes an integrated task management feature that allows users to create tasks directly from any module. These tasks are manually created from the QMS application module, and it is linked with Microsoft Planner. This ensures seamless coordination, enhances visibility, and helps users manage follow-up actions efficiently within the quality process.
- Users should navigate to the log of the respective module, open the desired item in edit mode, expand the Basic Information section, and click on the Tasks feature as shown below.
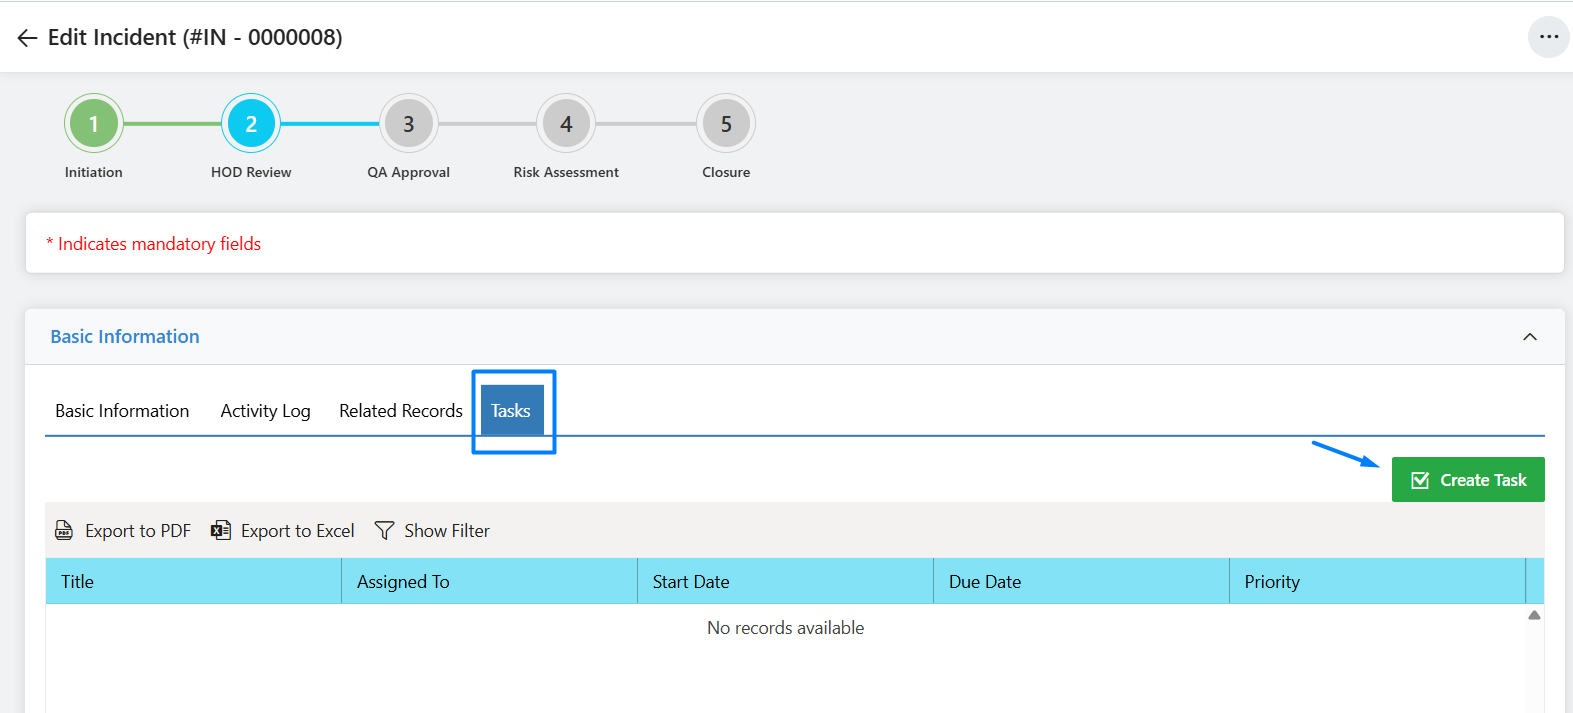
Note: The “Tasks” feature becomes available after the initiation stage (from the second stage onward) and remains accessible until the closure stage.
- Clicking the Tasks feature will display any existing linked task (if available).
- Users can click on “Create Task,” and after confirming the prompt, a task will be generated and automatically linked to the current transaction.
- Users can view the created task here and click on the highlighted option to open the corresponding task in Microsoft Planner in a new tab.
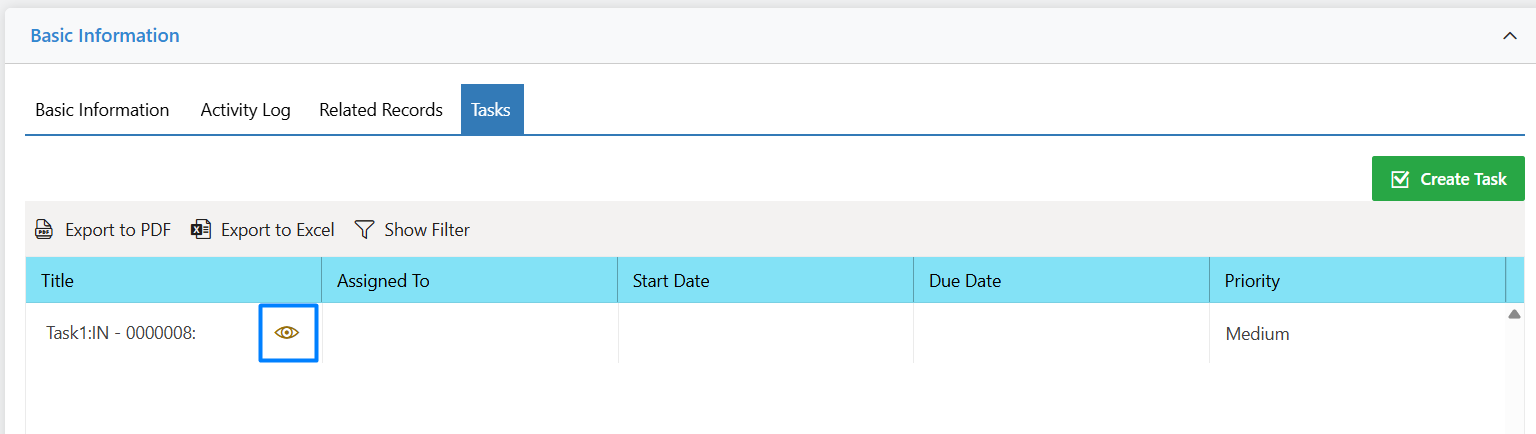
- Users can update the task and its related metadata directly in Microsoft Planner, and the task will remain linked to the current transaction. Key details such as Assigned To, Start Date, and Due Date will be displayed within the QMS interface, while additional metadata can be accessed through Microsoft Planner.
4.7 Stage Log
The BizPortals QMS application provides a comprehensive stage-level transaction assignment summary along with status and comments, allowing users to view detailed information, apply filters, and export the data to Excel or PDF.
- Users should navigate to the log of the respective module, open the desired item in edit mode, expand the Basic Information section, and click on the Activity Log feature as shown below.
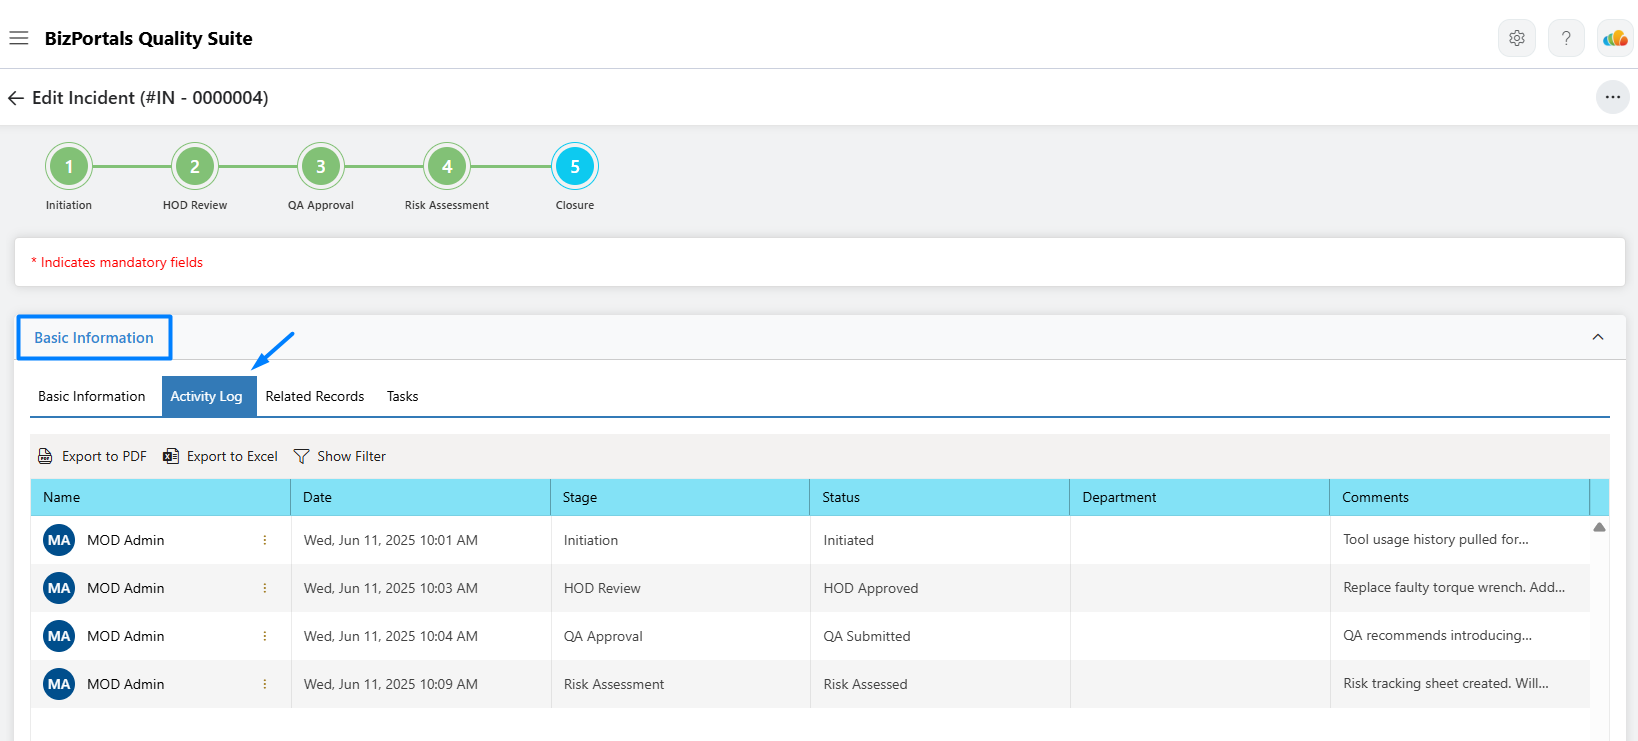
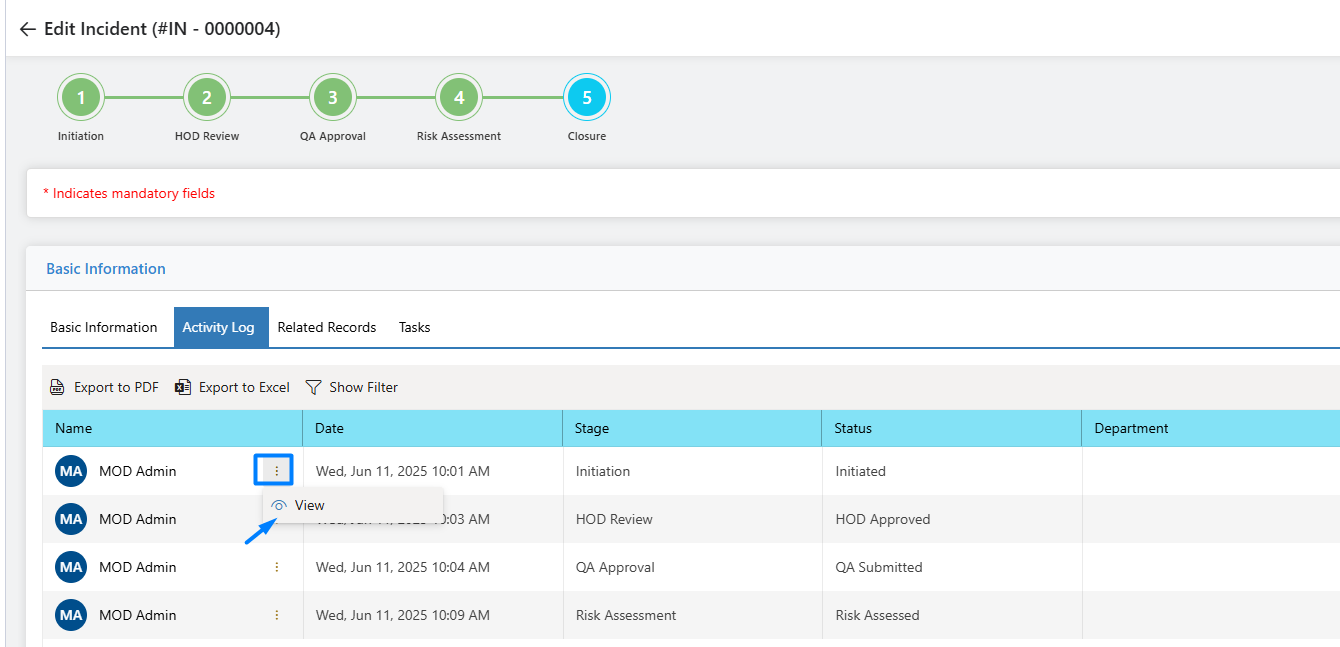
- Users can also access the field-level activity tracker by clicking the “⋮” icon, as illustrated below.
5 Document Control
BizPortals Quality suite offers the Document Control module which includes a set of features designed to manage the complete lifecycle of quality documents efficiently. Users can initiate document approvals, track changes through a detailed activity log, and perform secure digital signatures to ensure authenticity. The module supports exporting documents to PDF, distributing them to various locations, and auto-generating filenames for consistency. Additionally, users can merge multiple PDFs, compress files into ZIP format, and maintain full traceability within a centralized and document management environment.
To install the BizPortals DMS extension on SharePoint, please follow the detailed steps provided at below page.
BizPortals DMS Installation
For complete functionality of the BizPortals DMS extension on SharePoint, please refer to the information provided on the page below.
How BizPortals DMS Works
6 FAQs & Troubleshooting
Whom to contact for support:
- Please contact at support@bizportals.com for further details related to any functionality or feature.